Accessing the CRU Billing Portal
How the billing portal works
Now CRU has transitioned to a new billing system, it is easy for clients to log into their own billing portal and view and download invoices.
This billing portal is separate from the support portal with each client having their own access.
If you or any of your team members do not have access, please let us know and we will send a billing portal invitation.
To log in, simply head to:
https://plans.cru.io/portal/cruplans/login#/
If you do not know your password for your username (your email address), click on the Forgot Password link or click here - https://plans.cru.io/portal/cruplans/forgetpassword
Manage Subscriptions
The Customer Portal offers comprehensive subscription management for you
View Subscriptions
The Subscriptions module from the left sidebar displays a list of all the subscriptions that exist on your account in Zoho Subscriptions.
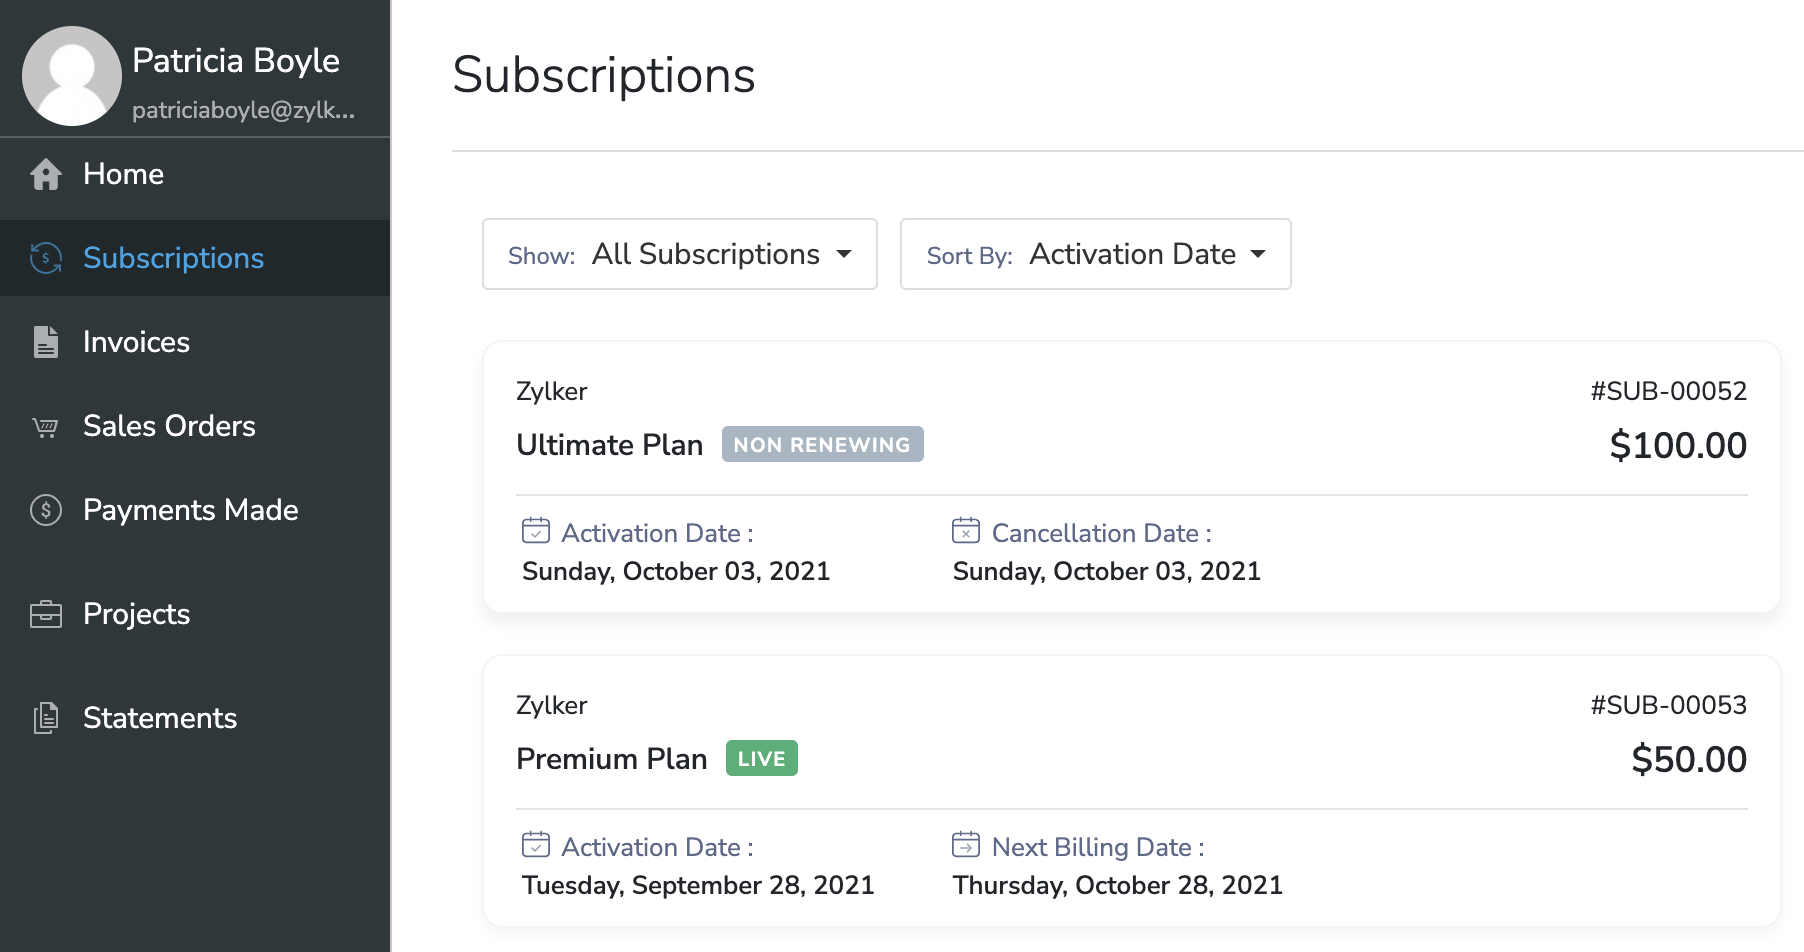
You can use the filters at the top of the list to sort through your subscriptions quickly and find the one you're looking for.
Clicking on any subscription from the list will open an overview screen with additional details of the subscription.
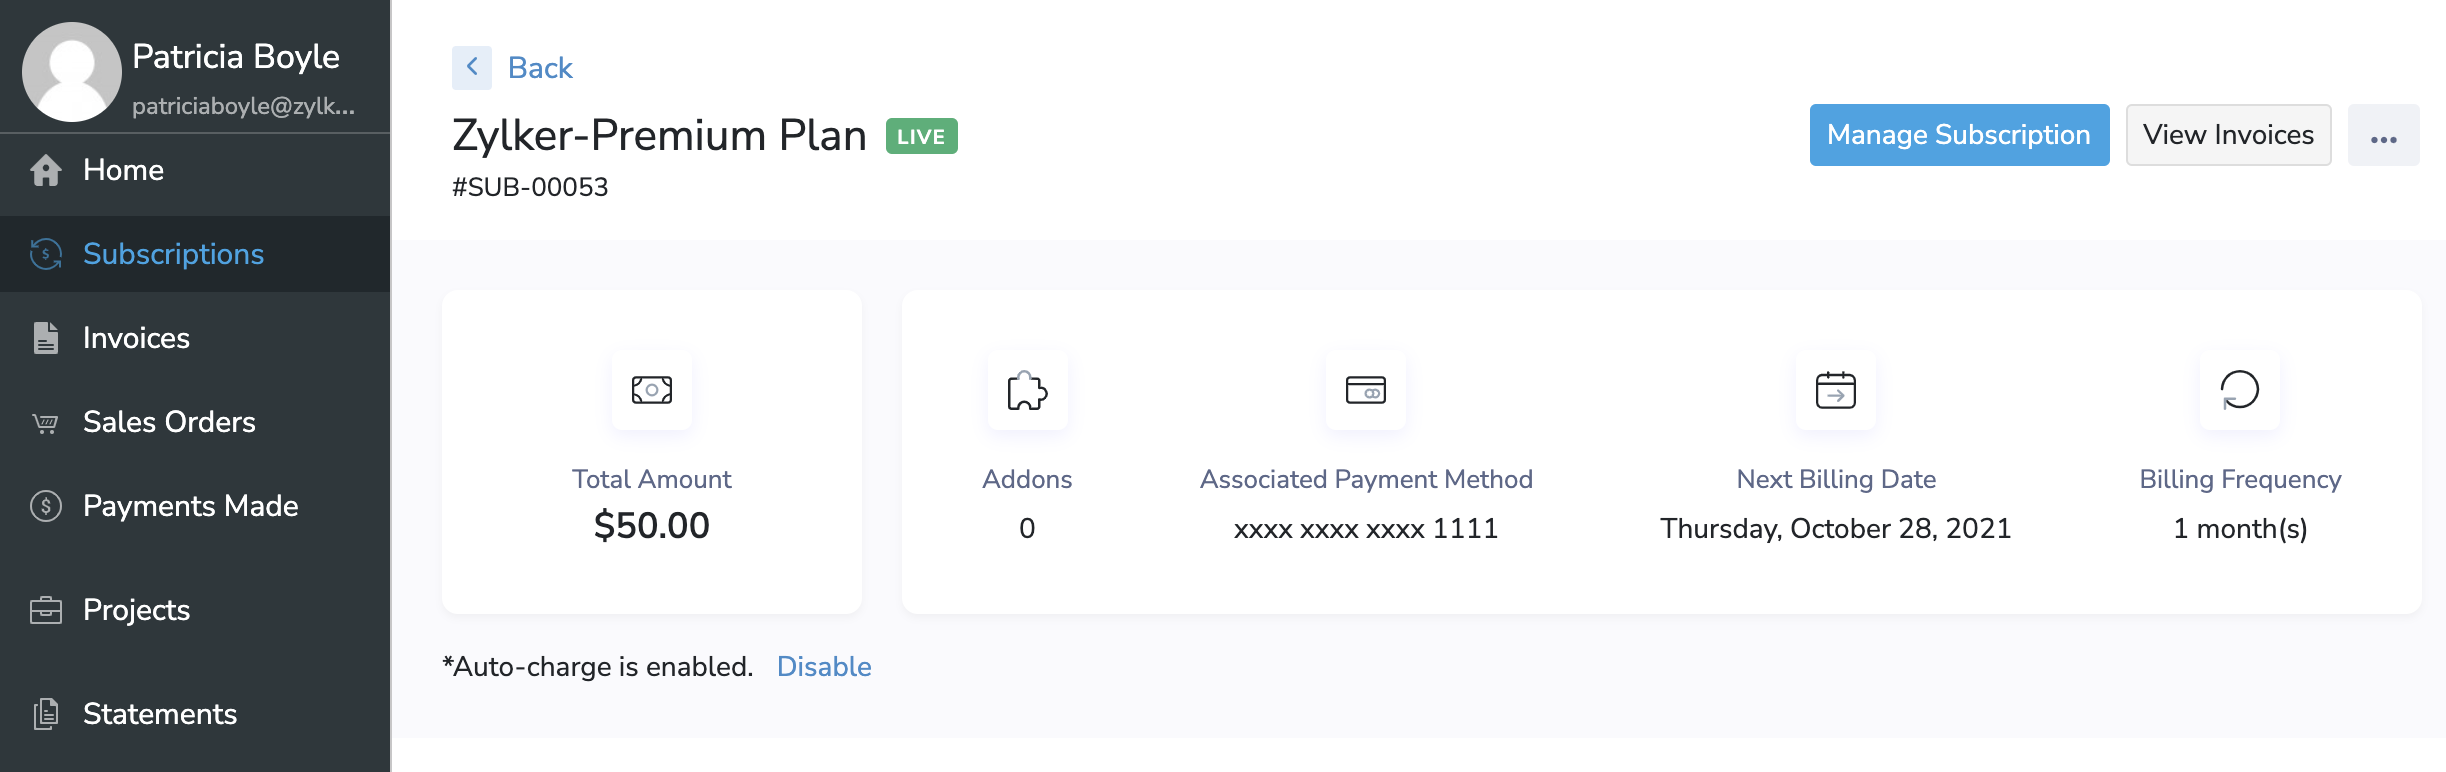
Edit Subscriptions
You can perform subscription updates, such as changing plans, addons, and coupons right from the Customer Portal.
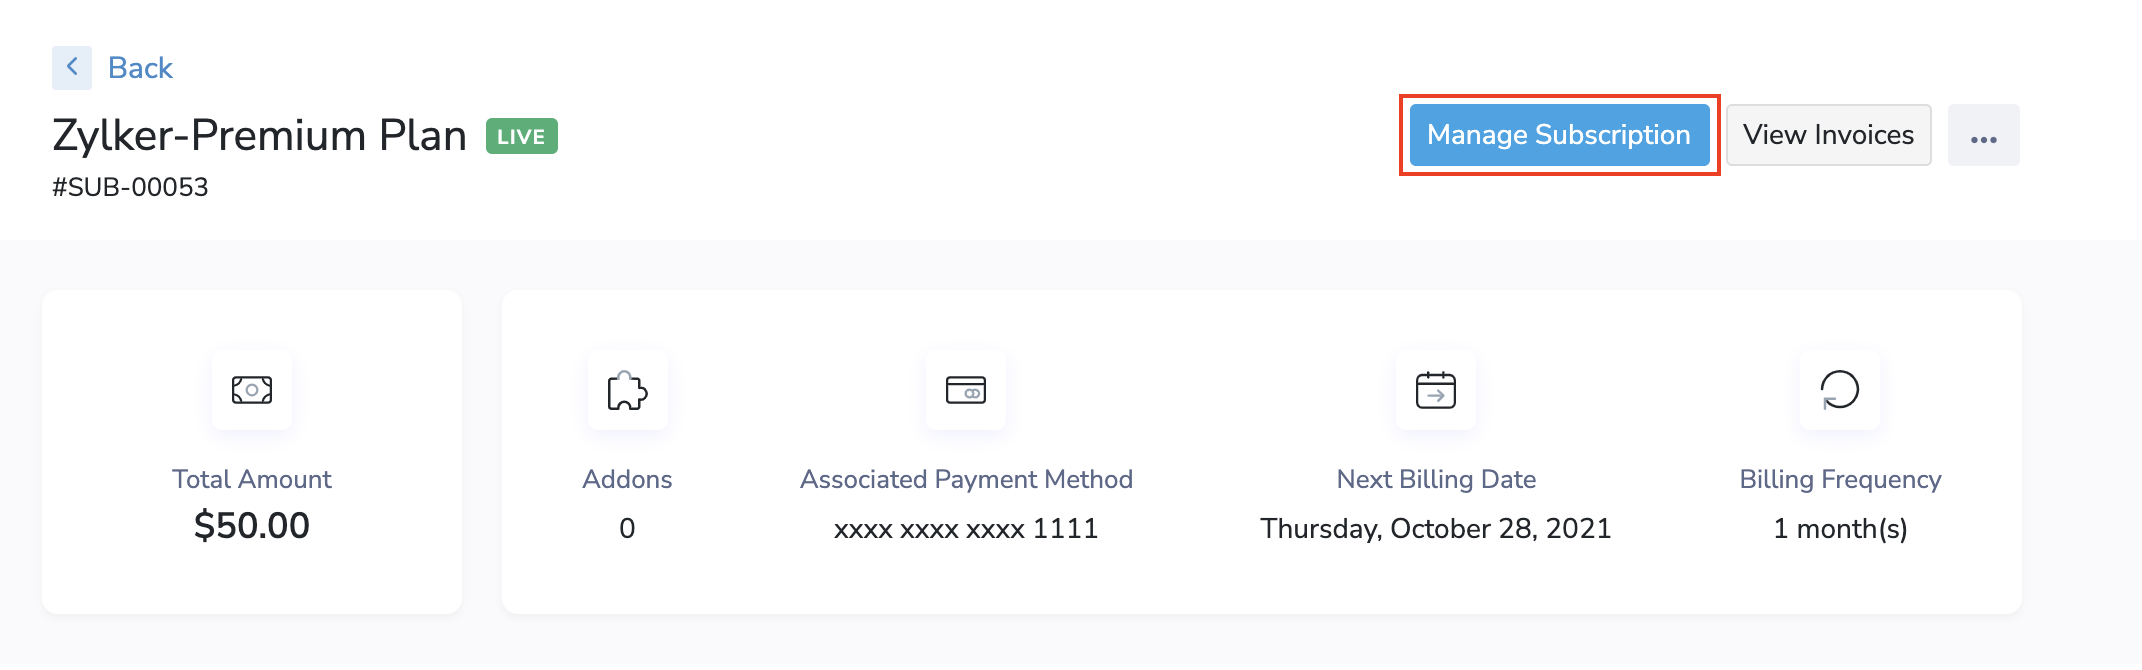
Now, you will be able to edit your subscription and apply changes to reflect immediately, or at the end of the current term.
Change Auto-charge Status
Auto-charge can be enabled or disabled from the Customer Portal for subscriptions that have a payment method associated with it.
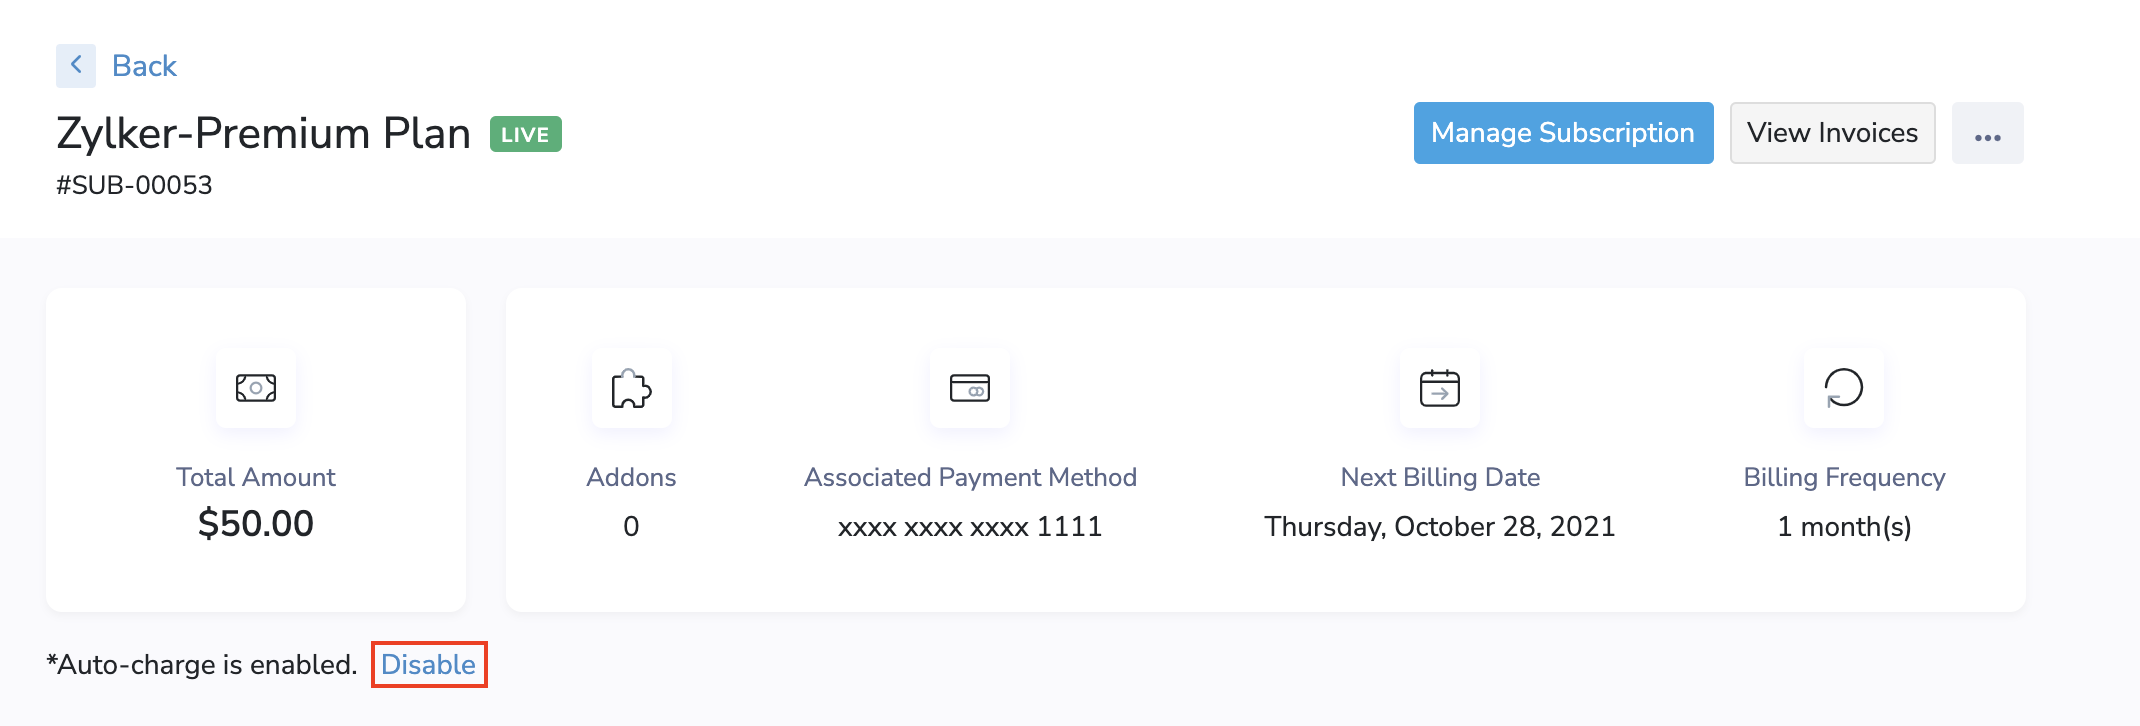
A few points to note about toggling Auto-charge:
- When you disable Auto-charge for a Dunning subscription, the subscription’s status will change from Dunning to Live, since automatic payment retries will not be possible.
- Enabling auto-charge from the Customer Portal will not collect the pending amount (if any) for invoices that have been generated already. For these invoices, you must make the payment manually.
Pause & Resume Subscriptions
To configure a Pause and Resume schedule, you should:
- Go to the Subscriptions module.
- Select a subscription.
- Click the ellipsis (3-dot) menu in the top right corner.
- Select Pause Subscription.
Insight: If a subscription is already paused, then you will have to select Resume Subscription here instead.
- Configure your Pause and Resume (optional) schedule as required.
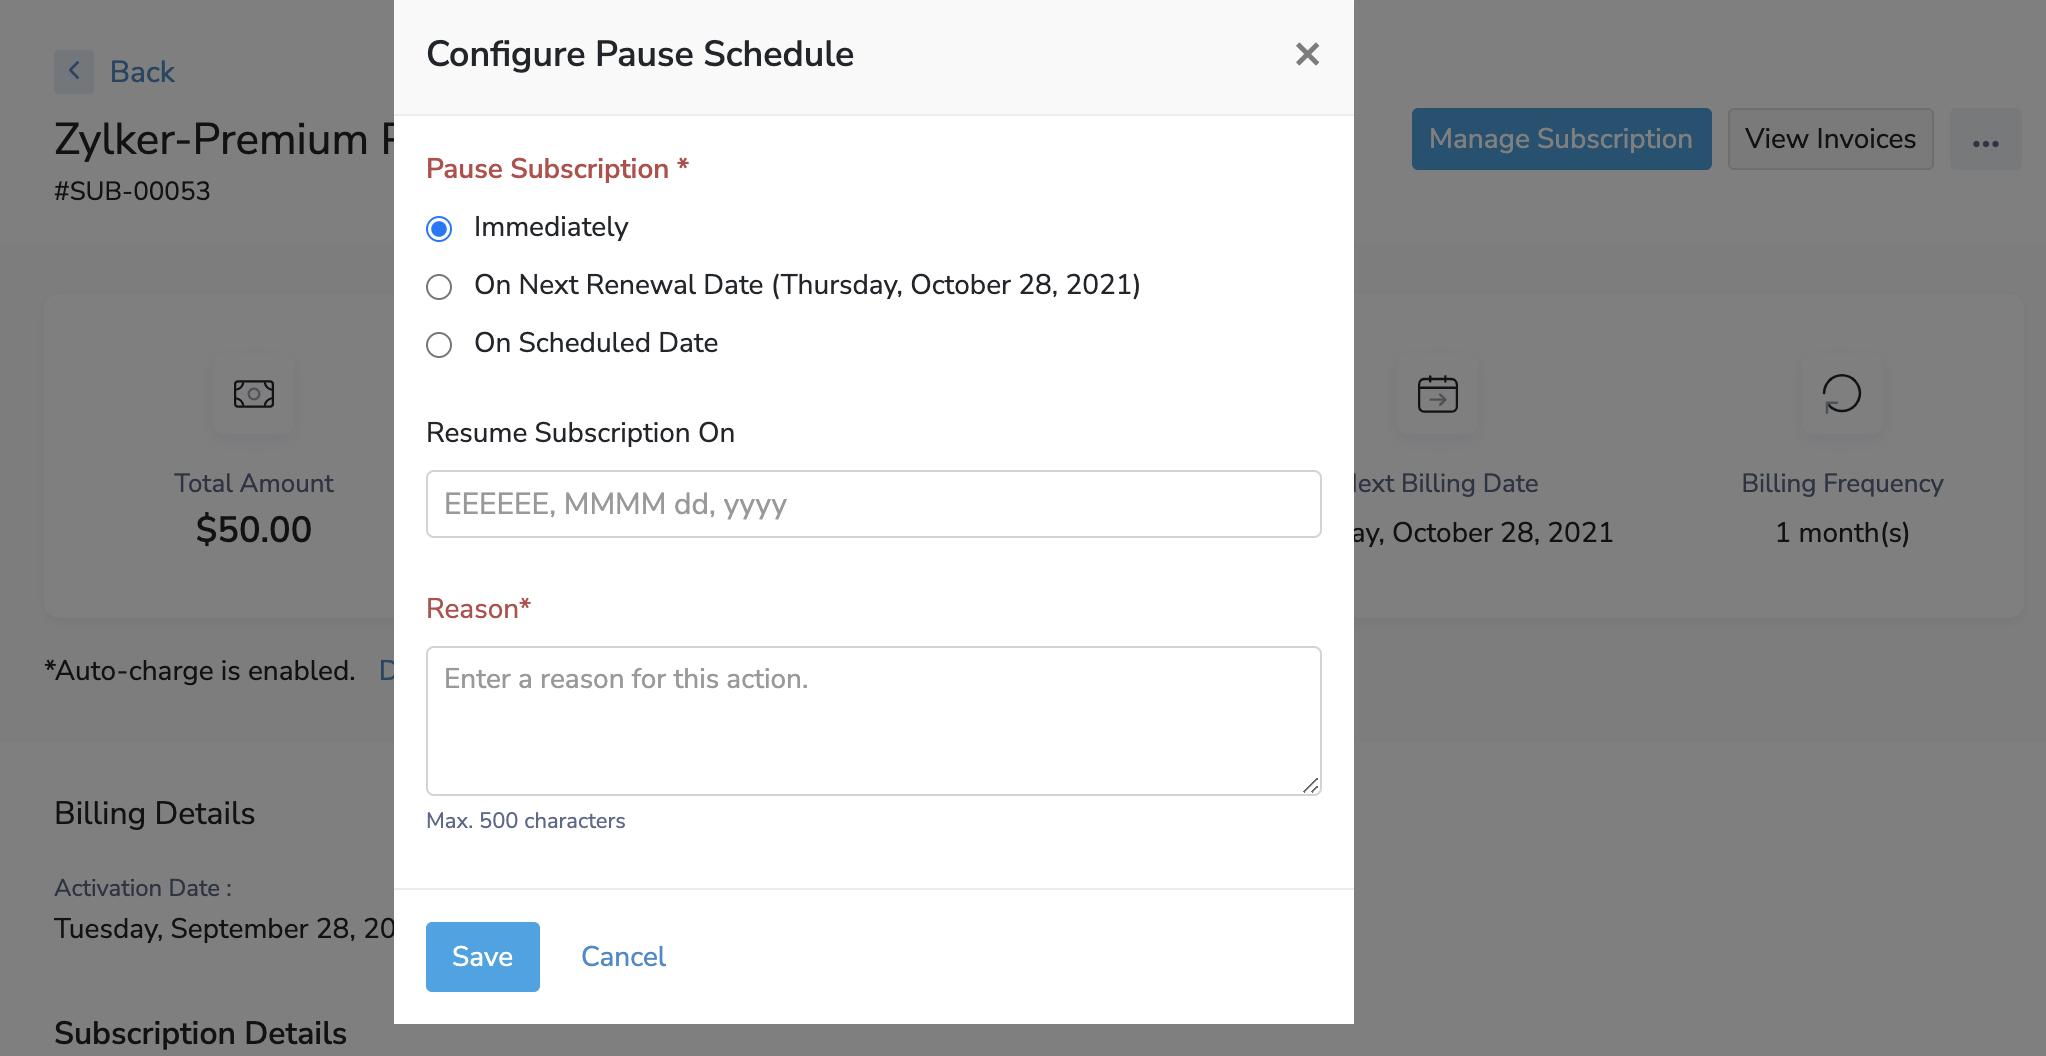
Insight: You will not be able to configure a Resume schedule in this popup if you haven’t provided them with permission to resume subscriptions in Preferences.
- Click Save.
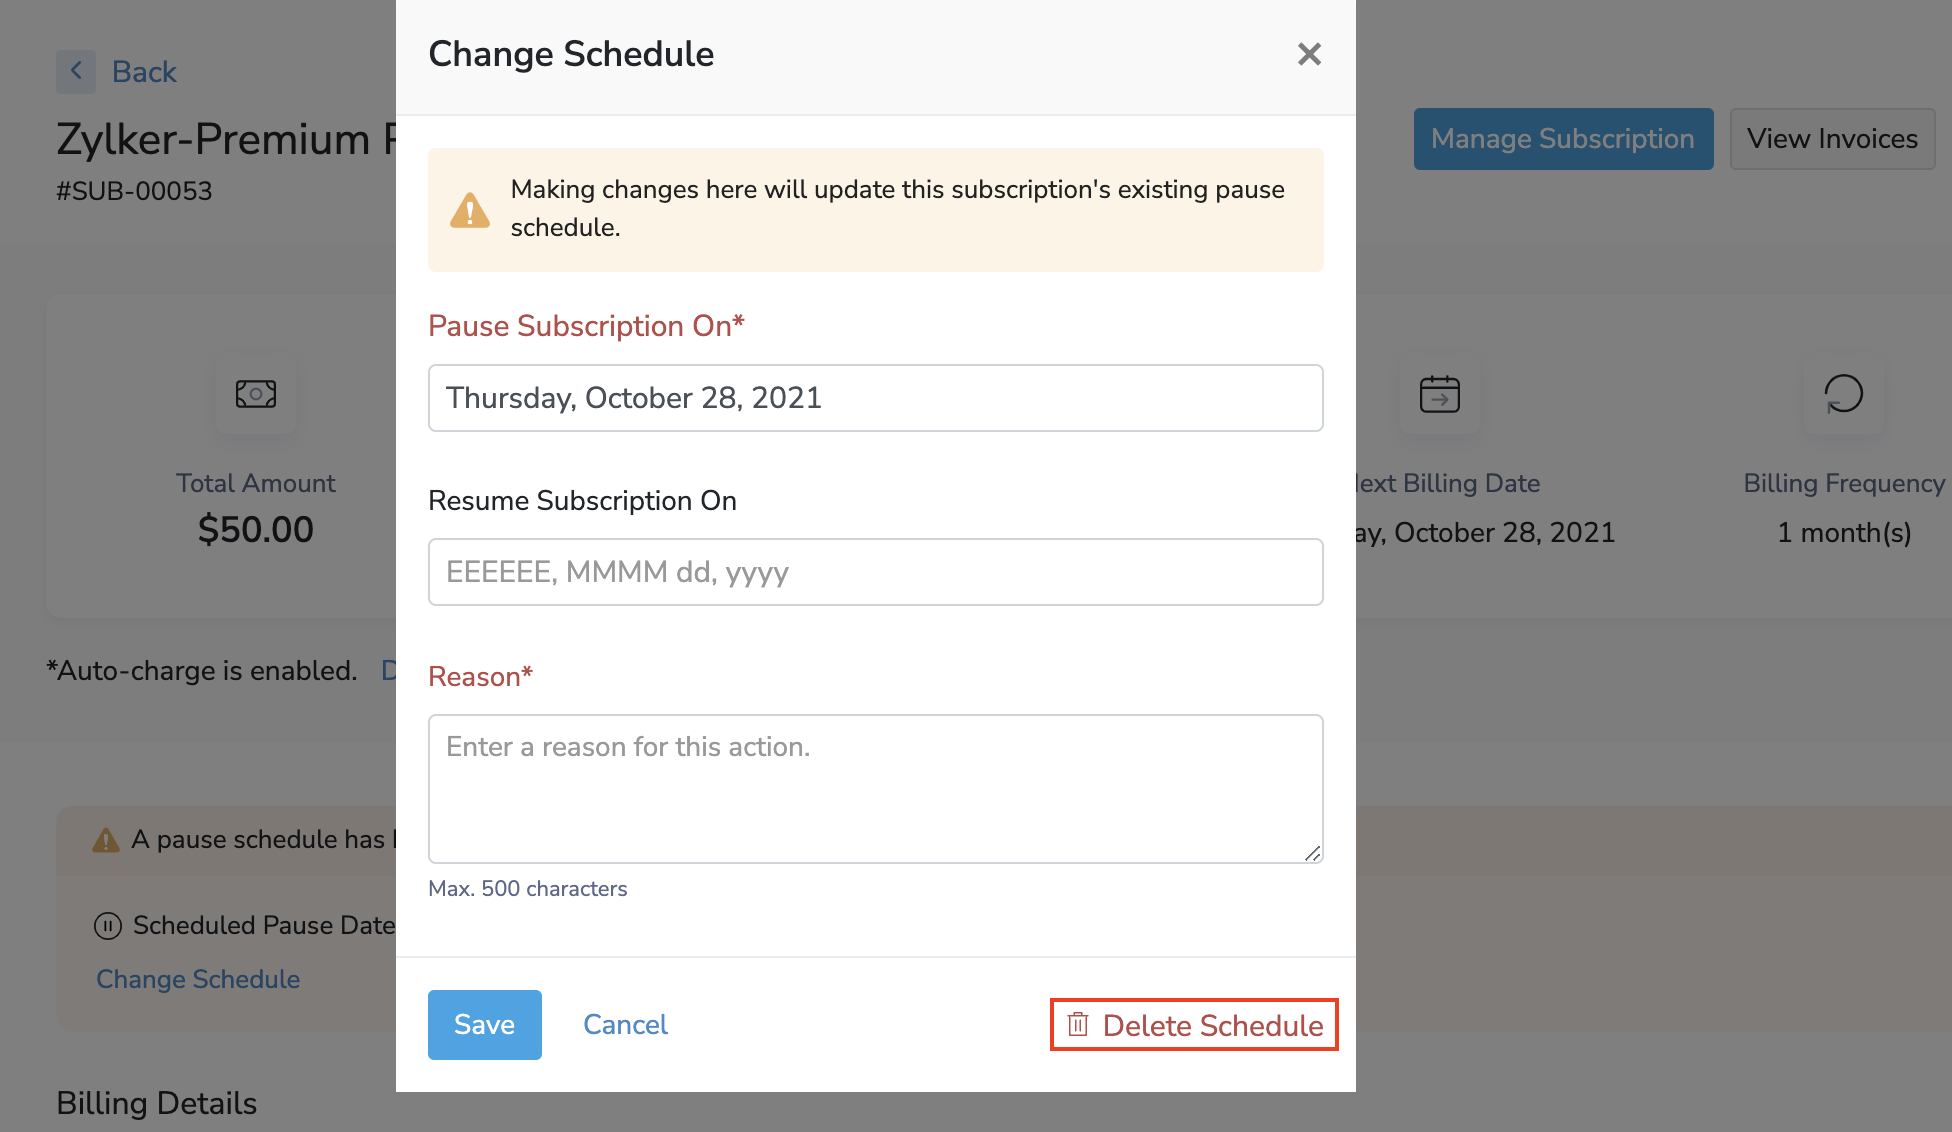
Now the Pause and Resume schedule, which you have configured, will be in effect. You can delete or change the configured pause and resume schedules at any time by repeating the steps above or by clicking Change Schedule from a subscription’s details screen.
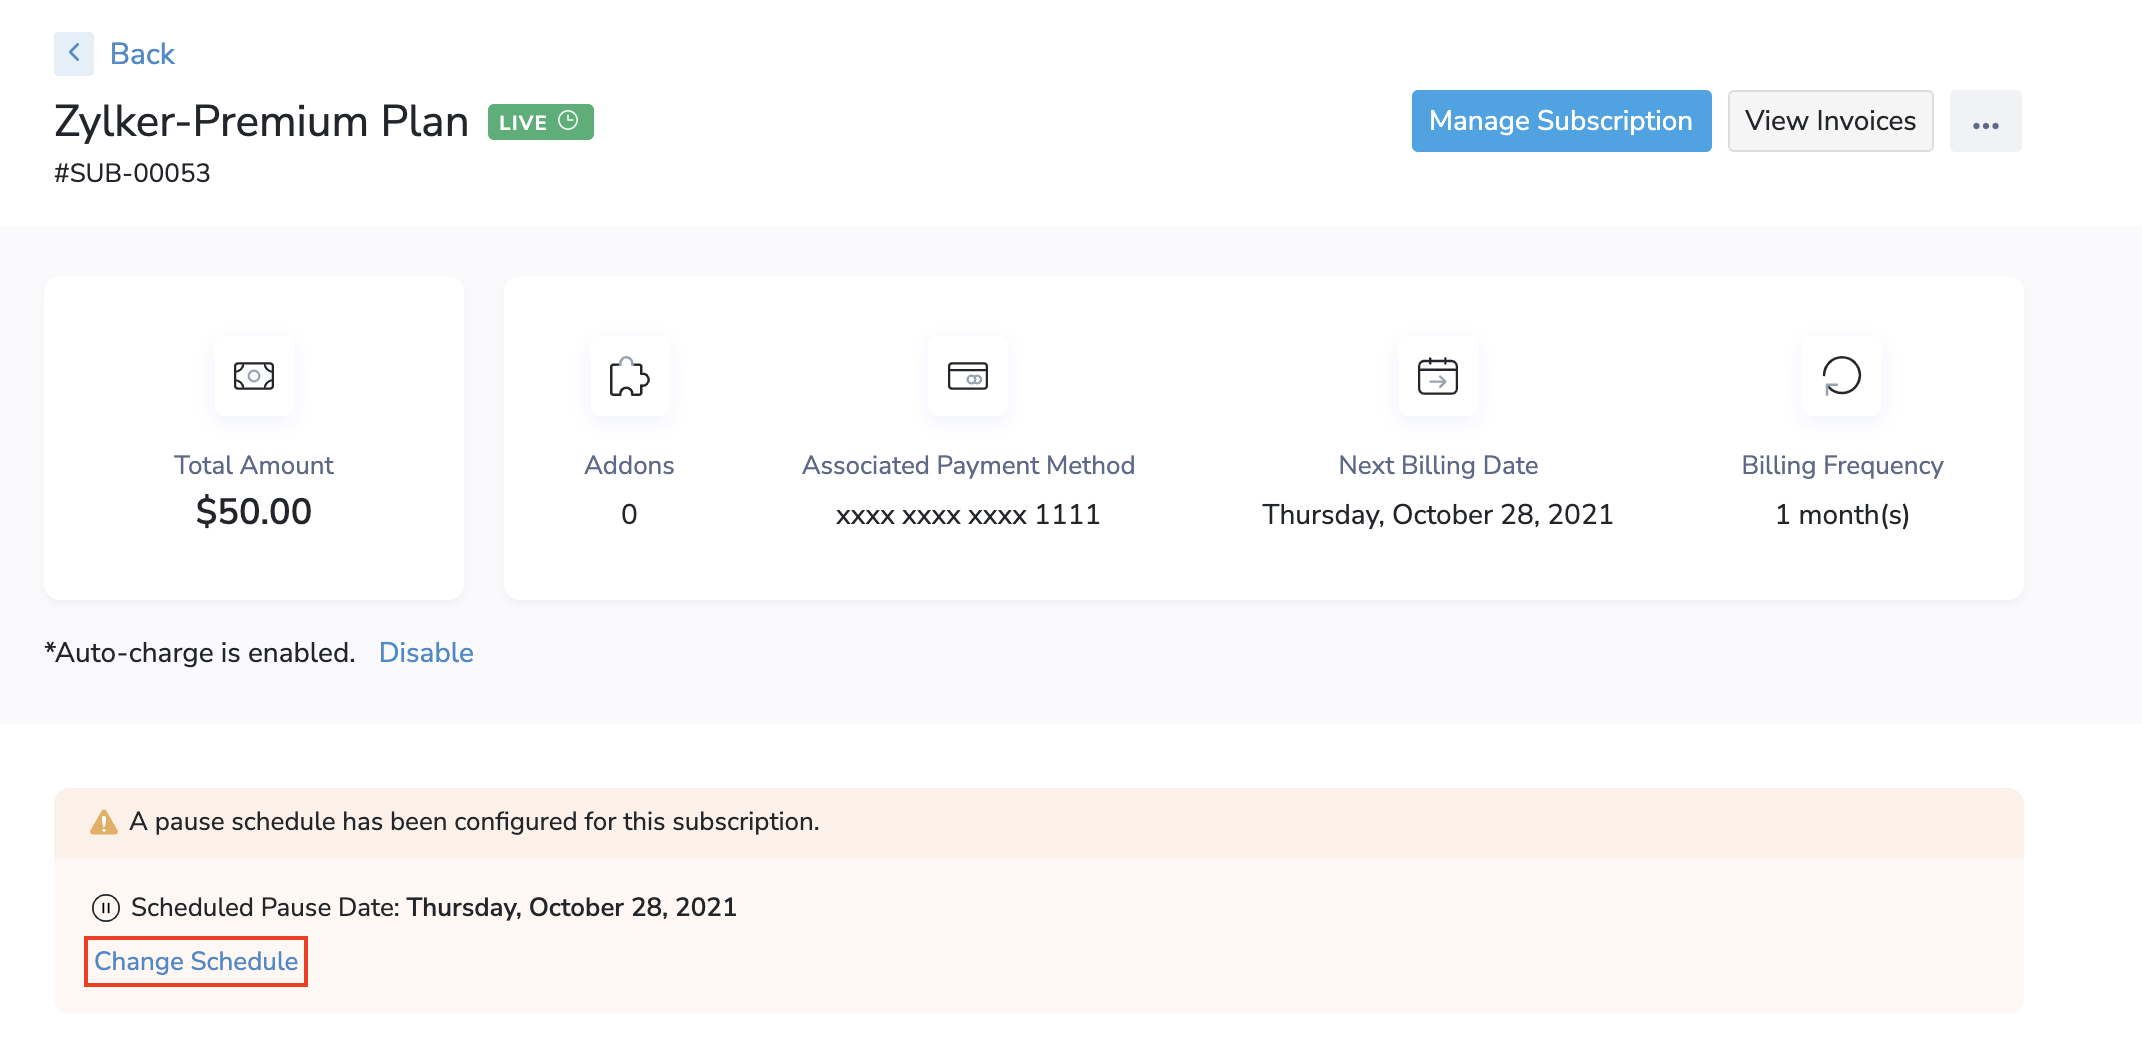
Clicking Delete Schedule will remove the currently applied Pause and Resume schedules.
Cancel Subscriptions
Subscriptions can be cancelled either immediately, or scheduled to be cancelled at the end of the current term, from the Customer Portal.
- Go to the Subscriptions module.
- Select a subscription.
- Click the ellipsis (3-dot) menu in the top right corner.
Select Cancel Subscription.
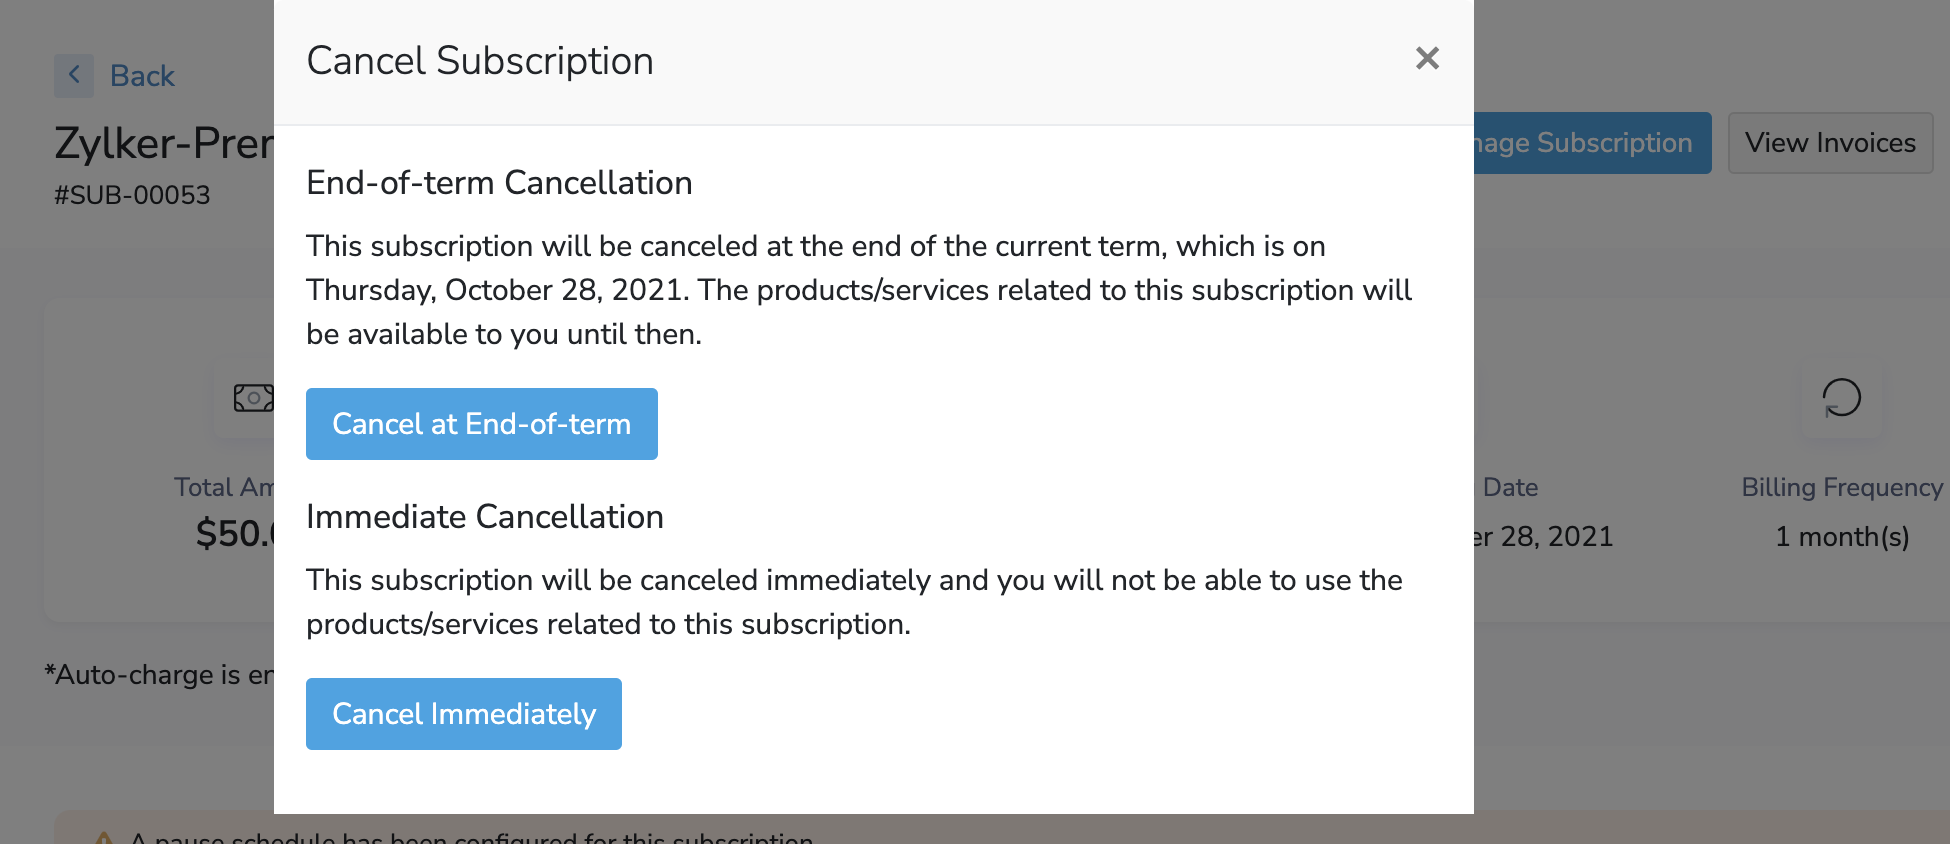
Choose when the subscription has to be cancelled.
Insight: If a subscription has been scheduled to be cancelled at the end of the current term, you can prevent this from happening by going to the Subscriptions module, selecting a subscription, and then clicking Remove Scheduled Cancellation.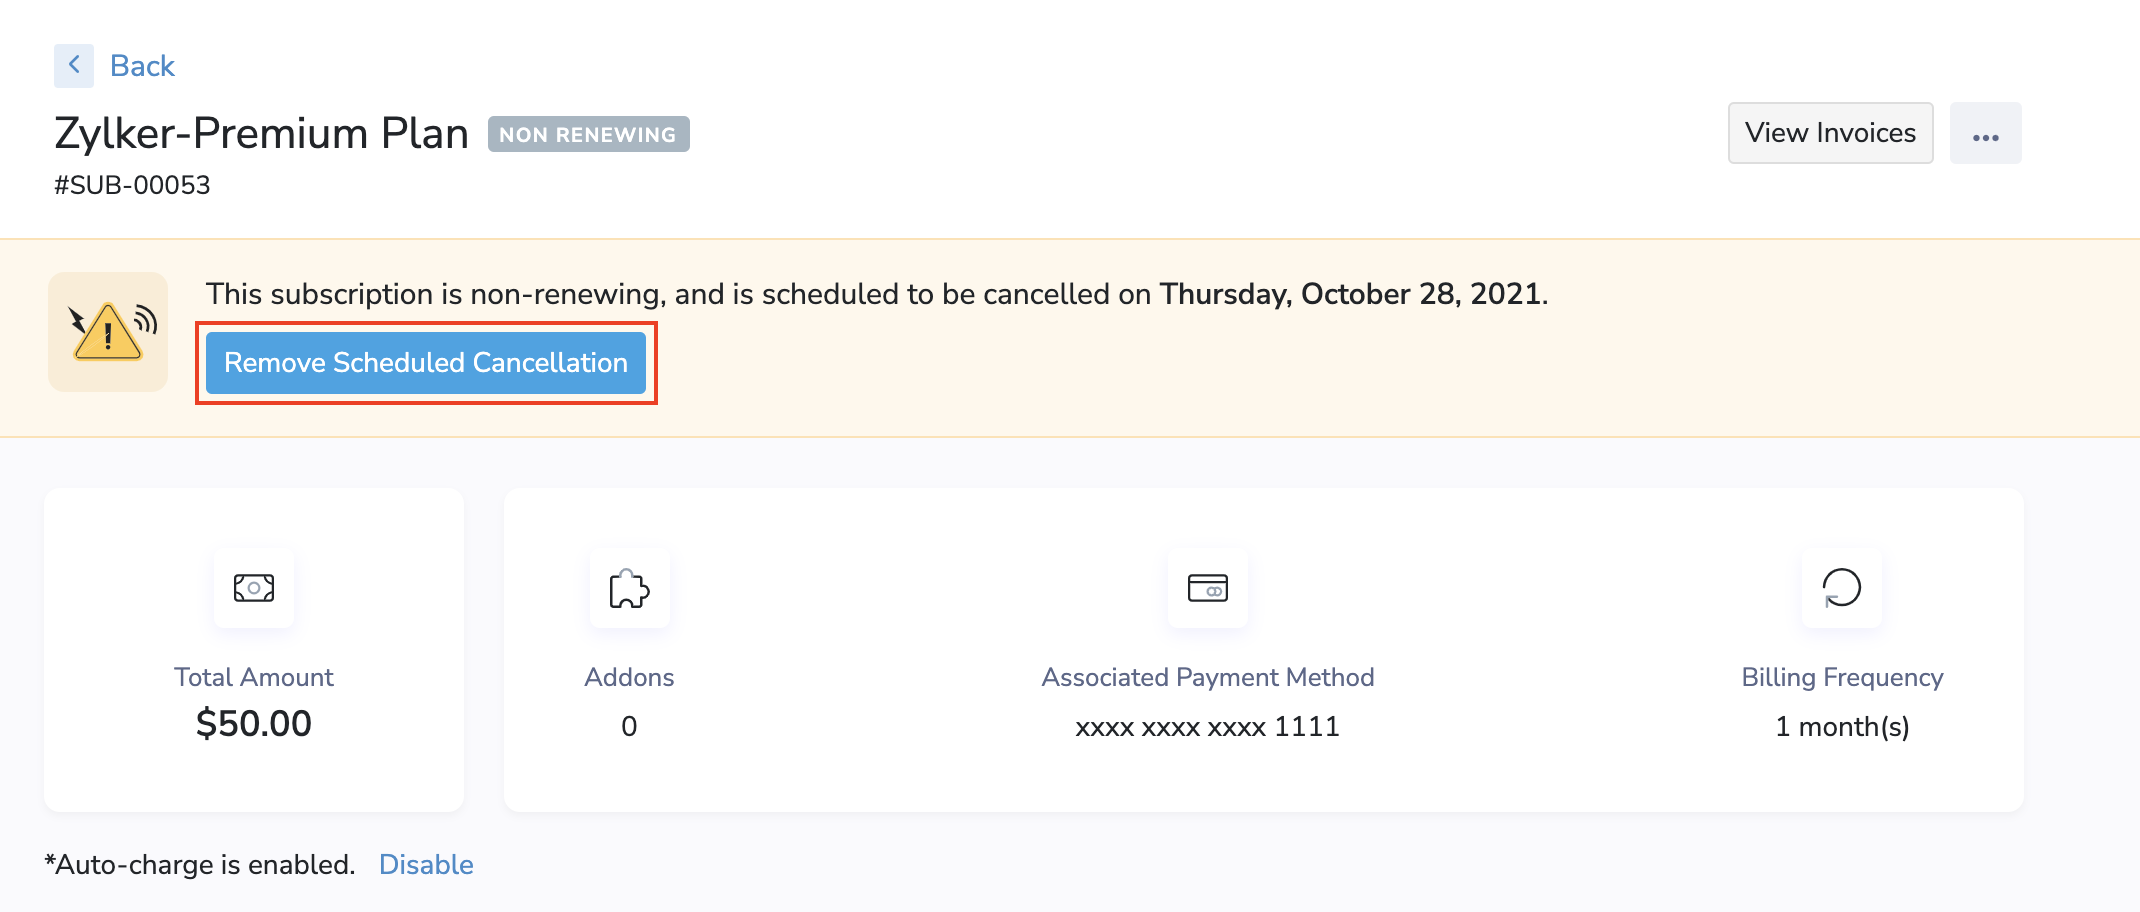
Reactivate Subscriptions
You can reactivate subscriptions that are in the Cancelled or Expired status, from the Customer Portal. You can do this by going to the Subscriptions module, and then selecting an expired or cancelled subscription.
Now, a banner message will be visible at the top, stating that the subscription has either expired or has been cancelled.
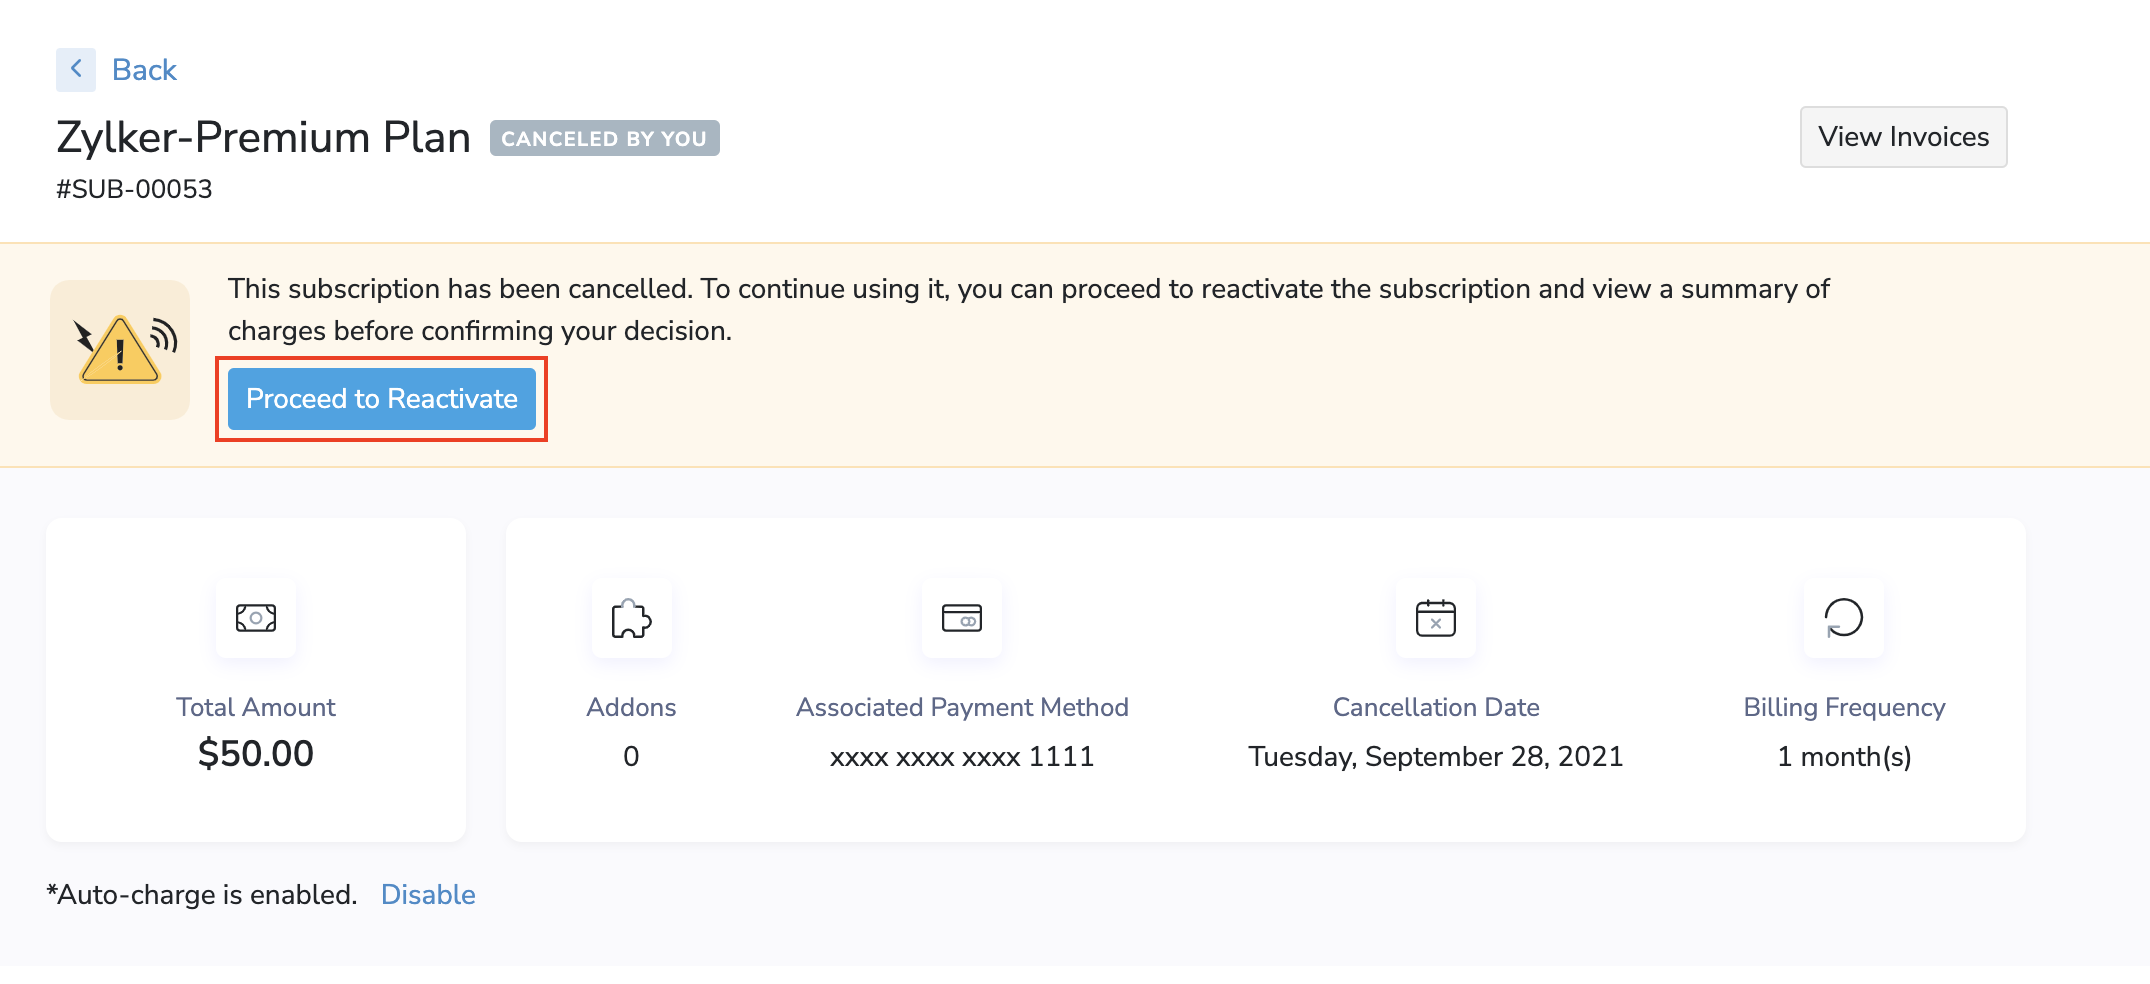
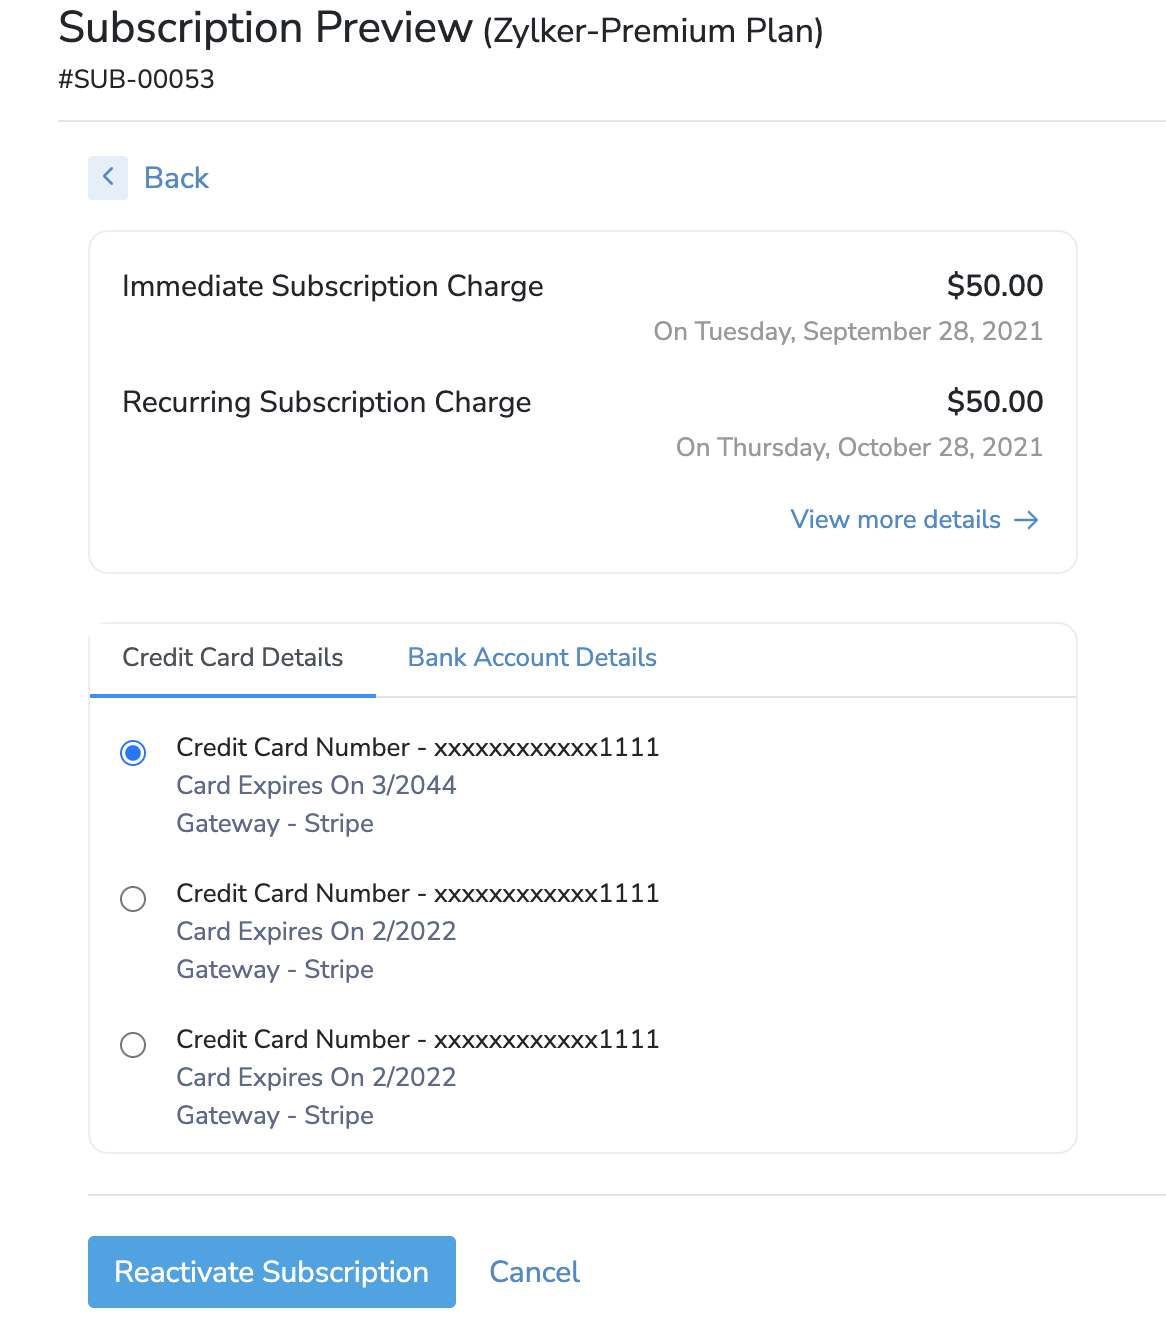
In this banner, you can click Proceed to Reactivate to start reactivating your subscription. A summary of the reactivation charges will be shown to you, along with a Reactivate Subscription button, which you can click to confirm the reactivation.
View & Pay Invoices
You can view invoices and make payments for them from the Customer Portal.
Viewing Invoices
The Invoices module from the left sidebar displays a list of all the invoices that exist for you in Zoho Subscriptions.
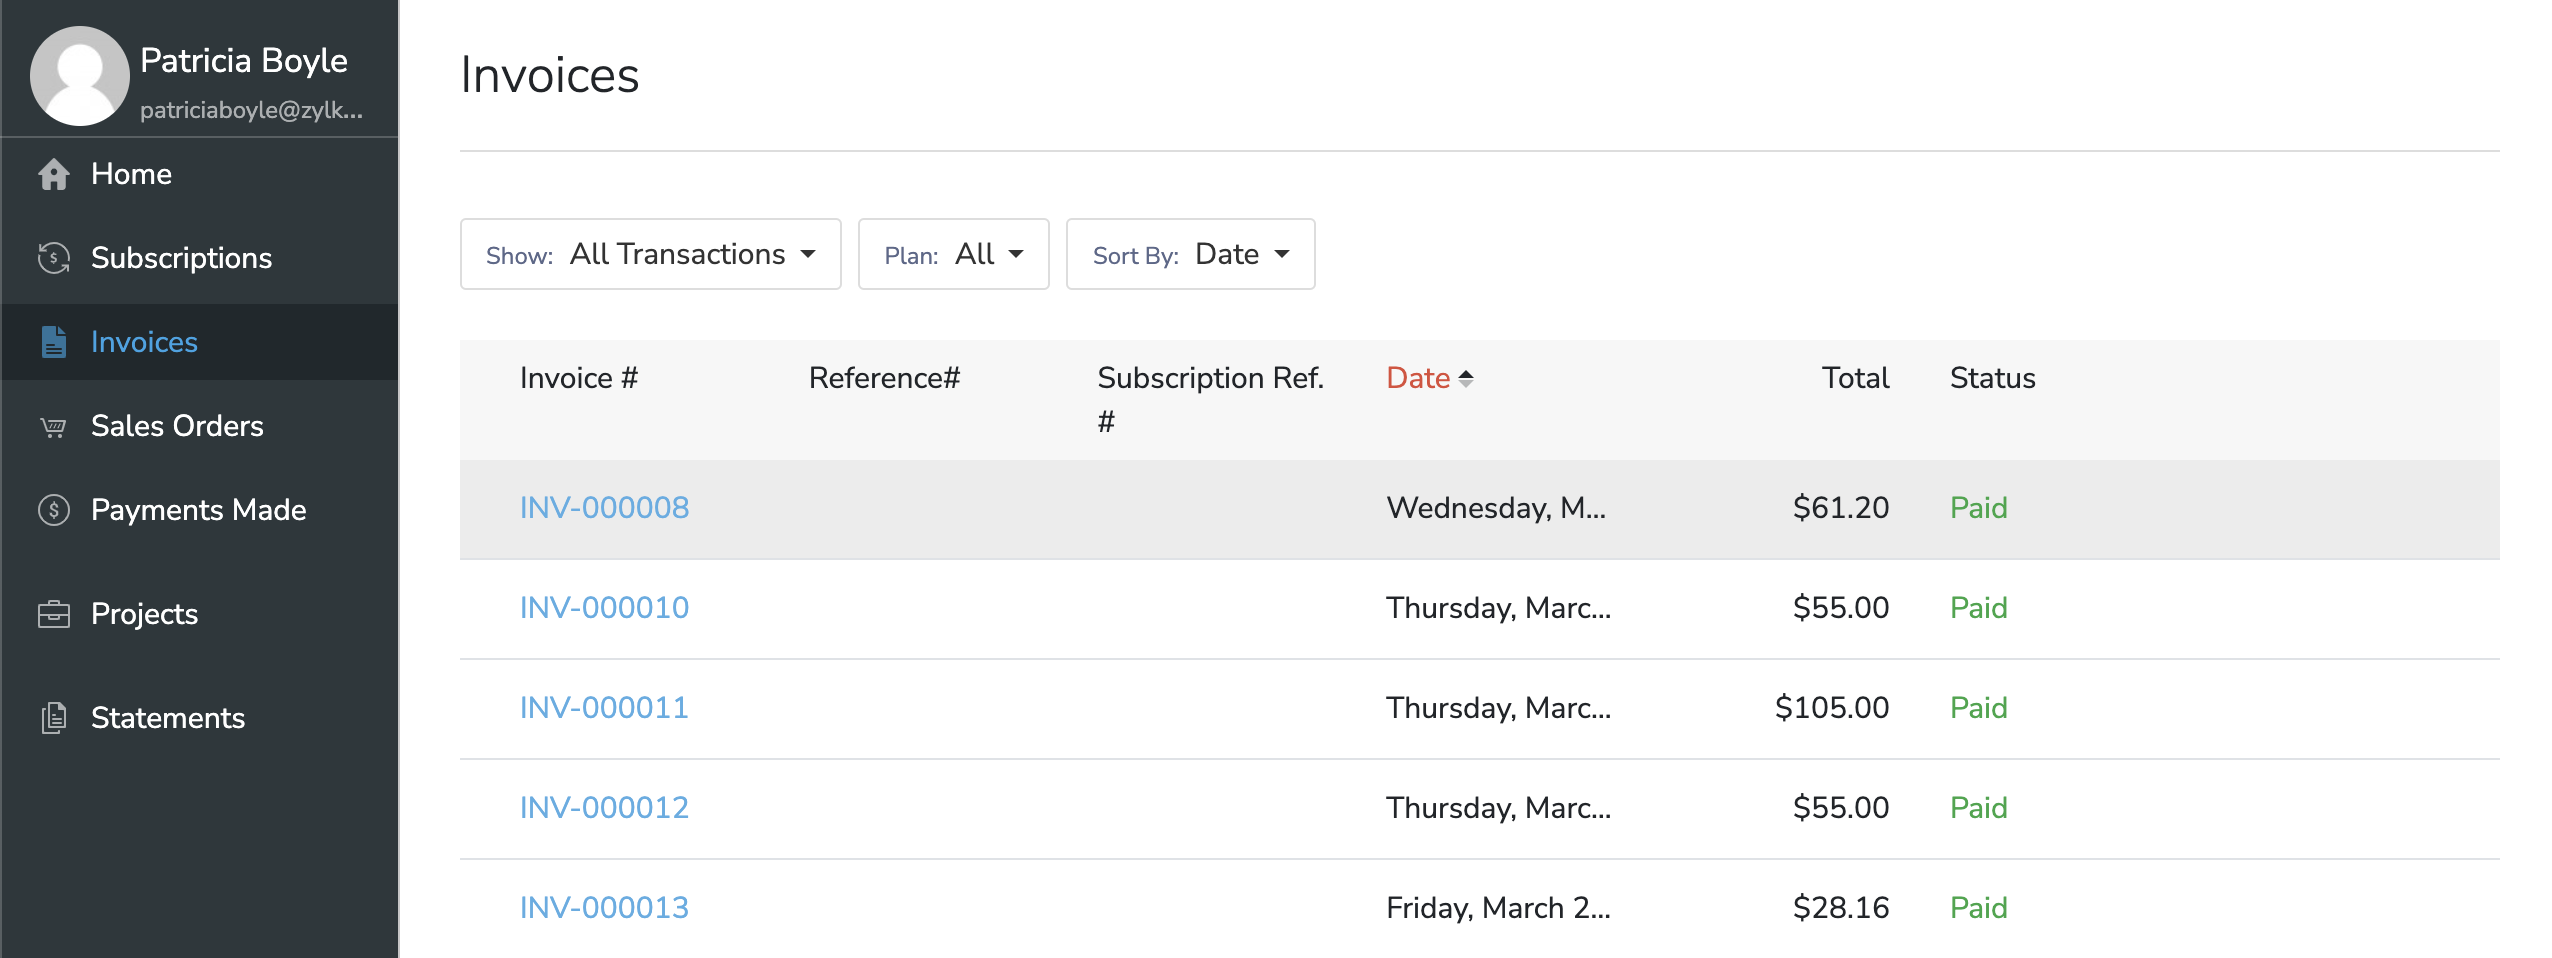
You can use the filters at the top of the list to sort through your invoices quickly and find the one you’re looking for.
Clicking on any invoice from the list will show additional details of the invoice.
Pro Tip: For faster access to a particular subscription’s invoices, you can go to the Subscriptions module, select a subscription, and click View Invoices. This will display a list of all the invoices that have been created for that subscription.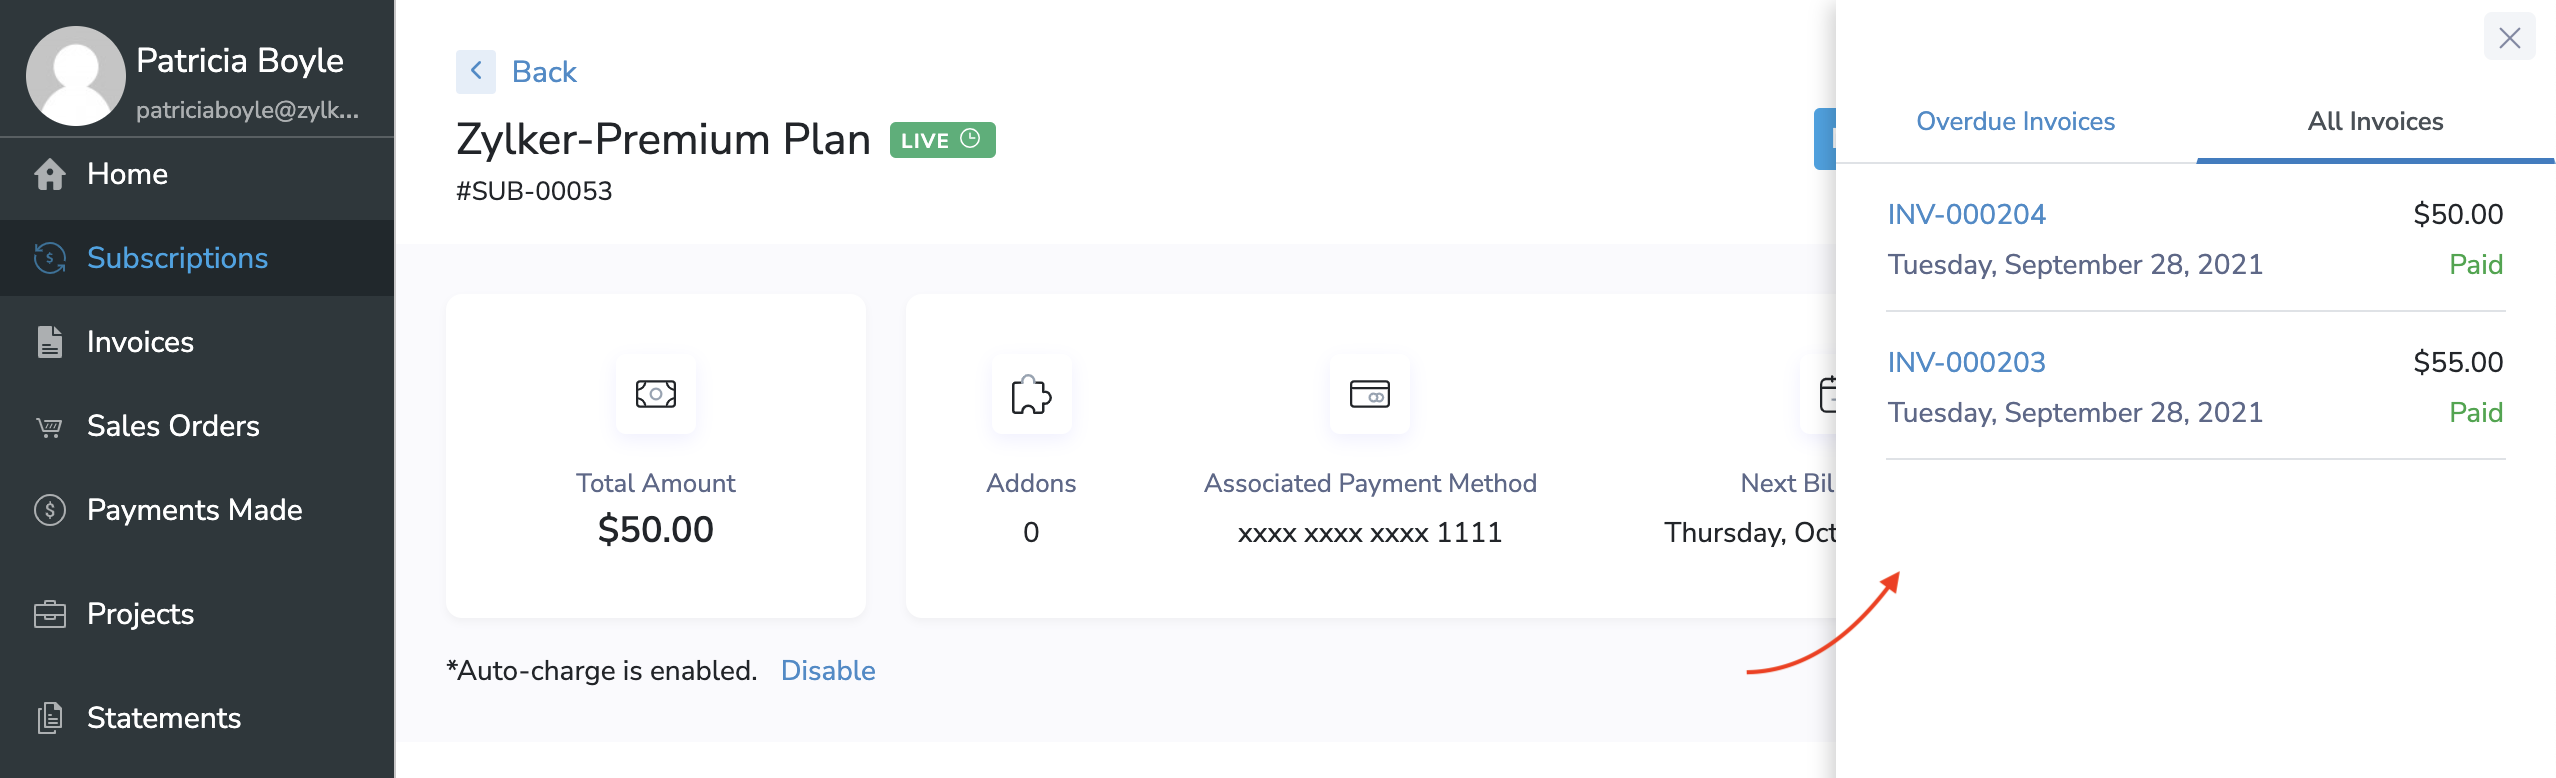
Making Invoice Payments
You can proceed to make invoice payments from 3 places in the Customer Portal:
1. Subscriptions Module
Making payments from the Subscriptions module is an easy way for you to quickly find a particular subscription’s invoices.
- Go to the Subscriptions module.
- Select a subscription and click View Invoices.
Click the Pay Now link present near unpaid invoices.

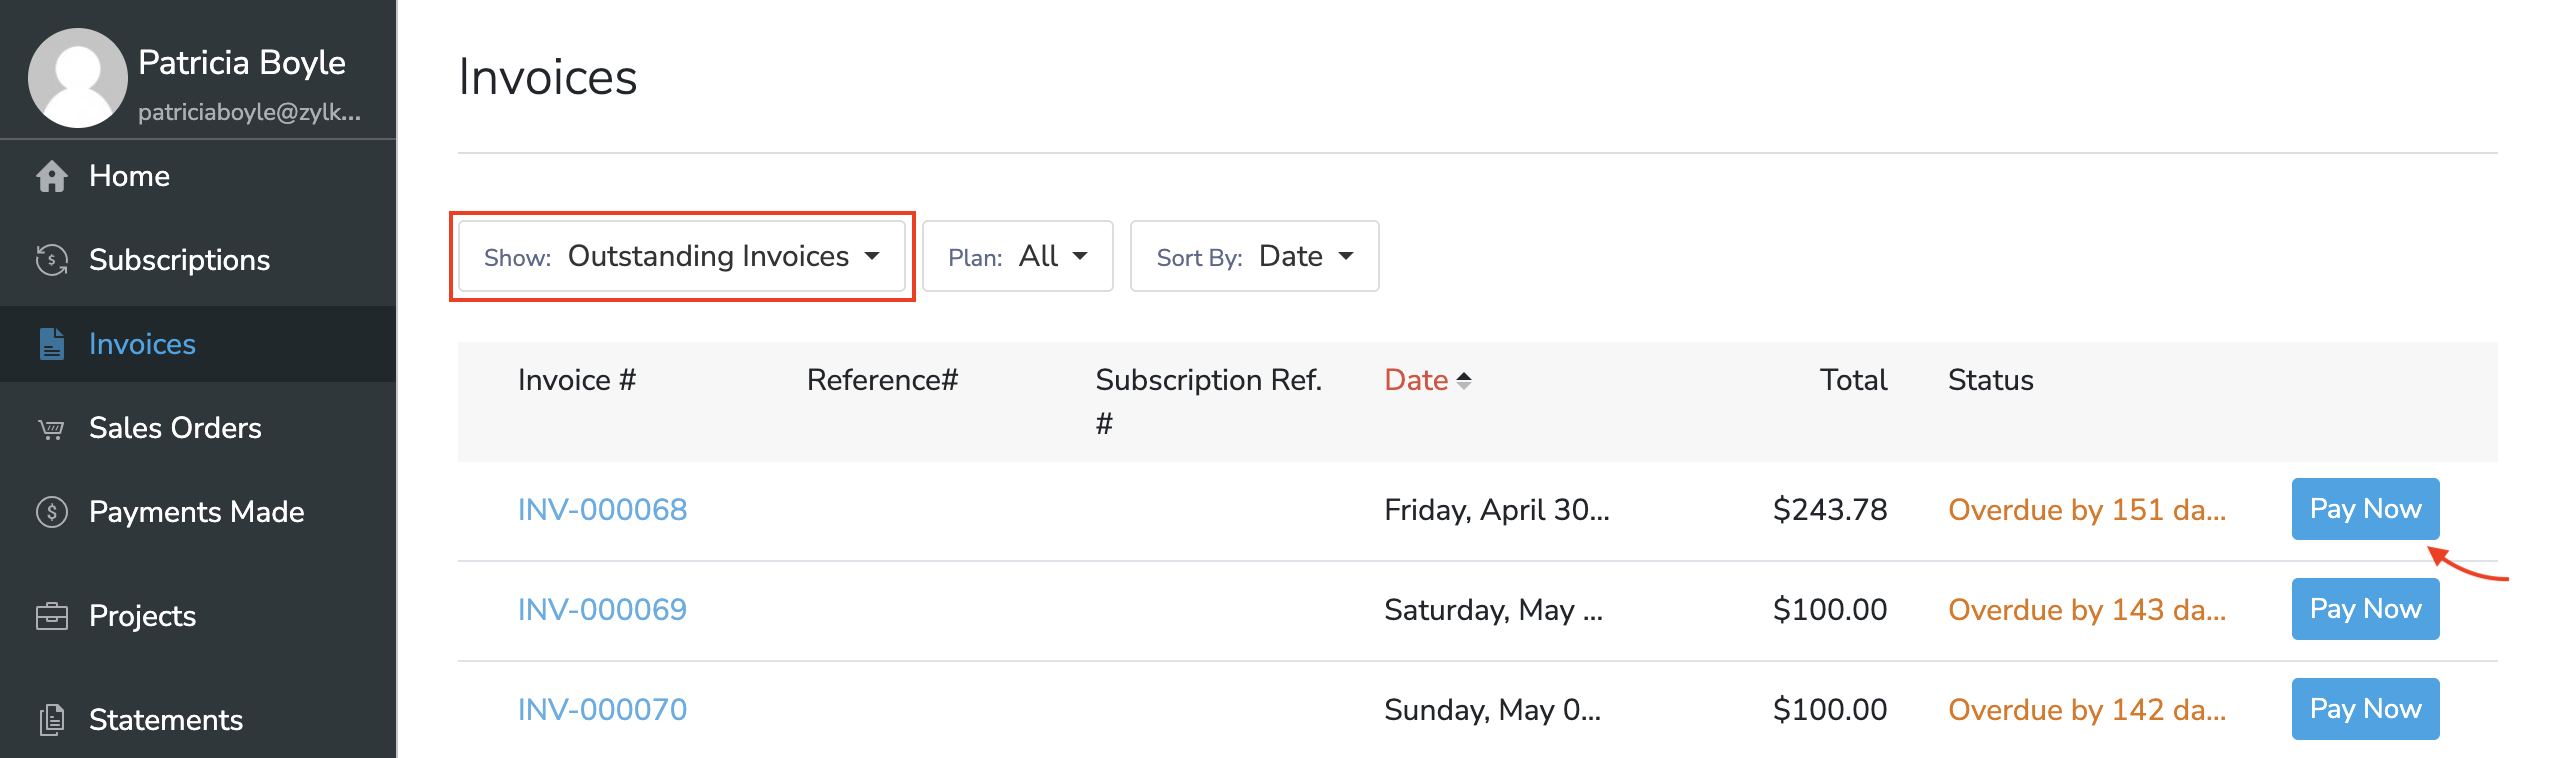
2. Invoices Module
The Invoices module lets you initiate invoice payments either from the list view or from an invoice’s details screen.
- Go to the Invoices module from the left sidebar.
Click Pay Now next to an unpaid invoice. You can also click on a particular invoice from the list to open its details screen. Here, you can click Make Payment.
3. Home Dashboard
If you have multiple unpaid invoices, you can pay the total outstanding amount for all of these invoices in one go.
- Go to the Home dashboard.
Click Pay Now in the Outstanding Invoices section.

No matter which of these 3 ways you choose to make payments, the process will be the same. After clicking the Pay Now button, you will be able to select your payment method of choice. If you already have a payment method associated with it, you can select it and click Make Payment to complete the payment with a single click.
You can also add new payment information, such as card details to complete the payment. When adding new payment information, you will have the option to allow that payment method to be used for future transactions. If enabled, this payment method will be the associated payment method for that subscription, and will be used for Auto-charge in the future.
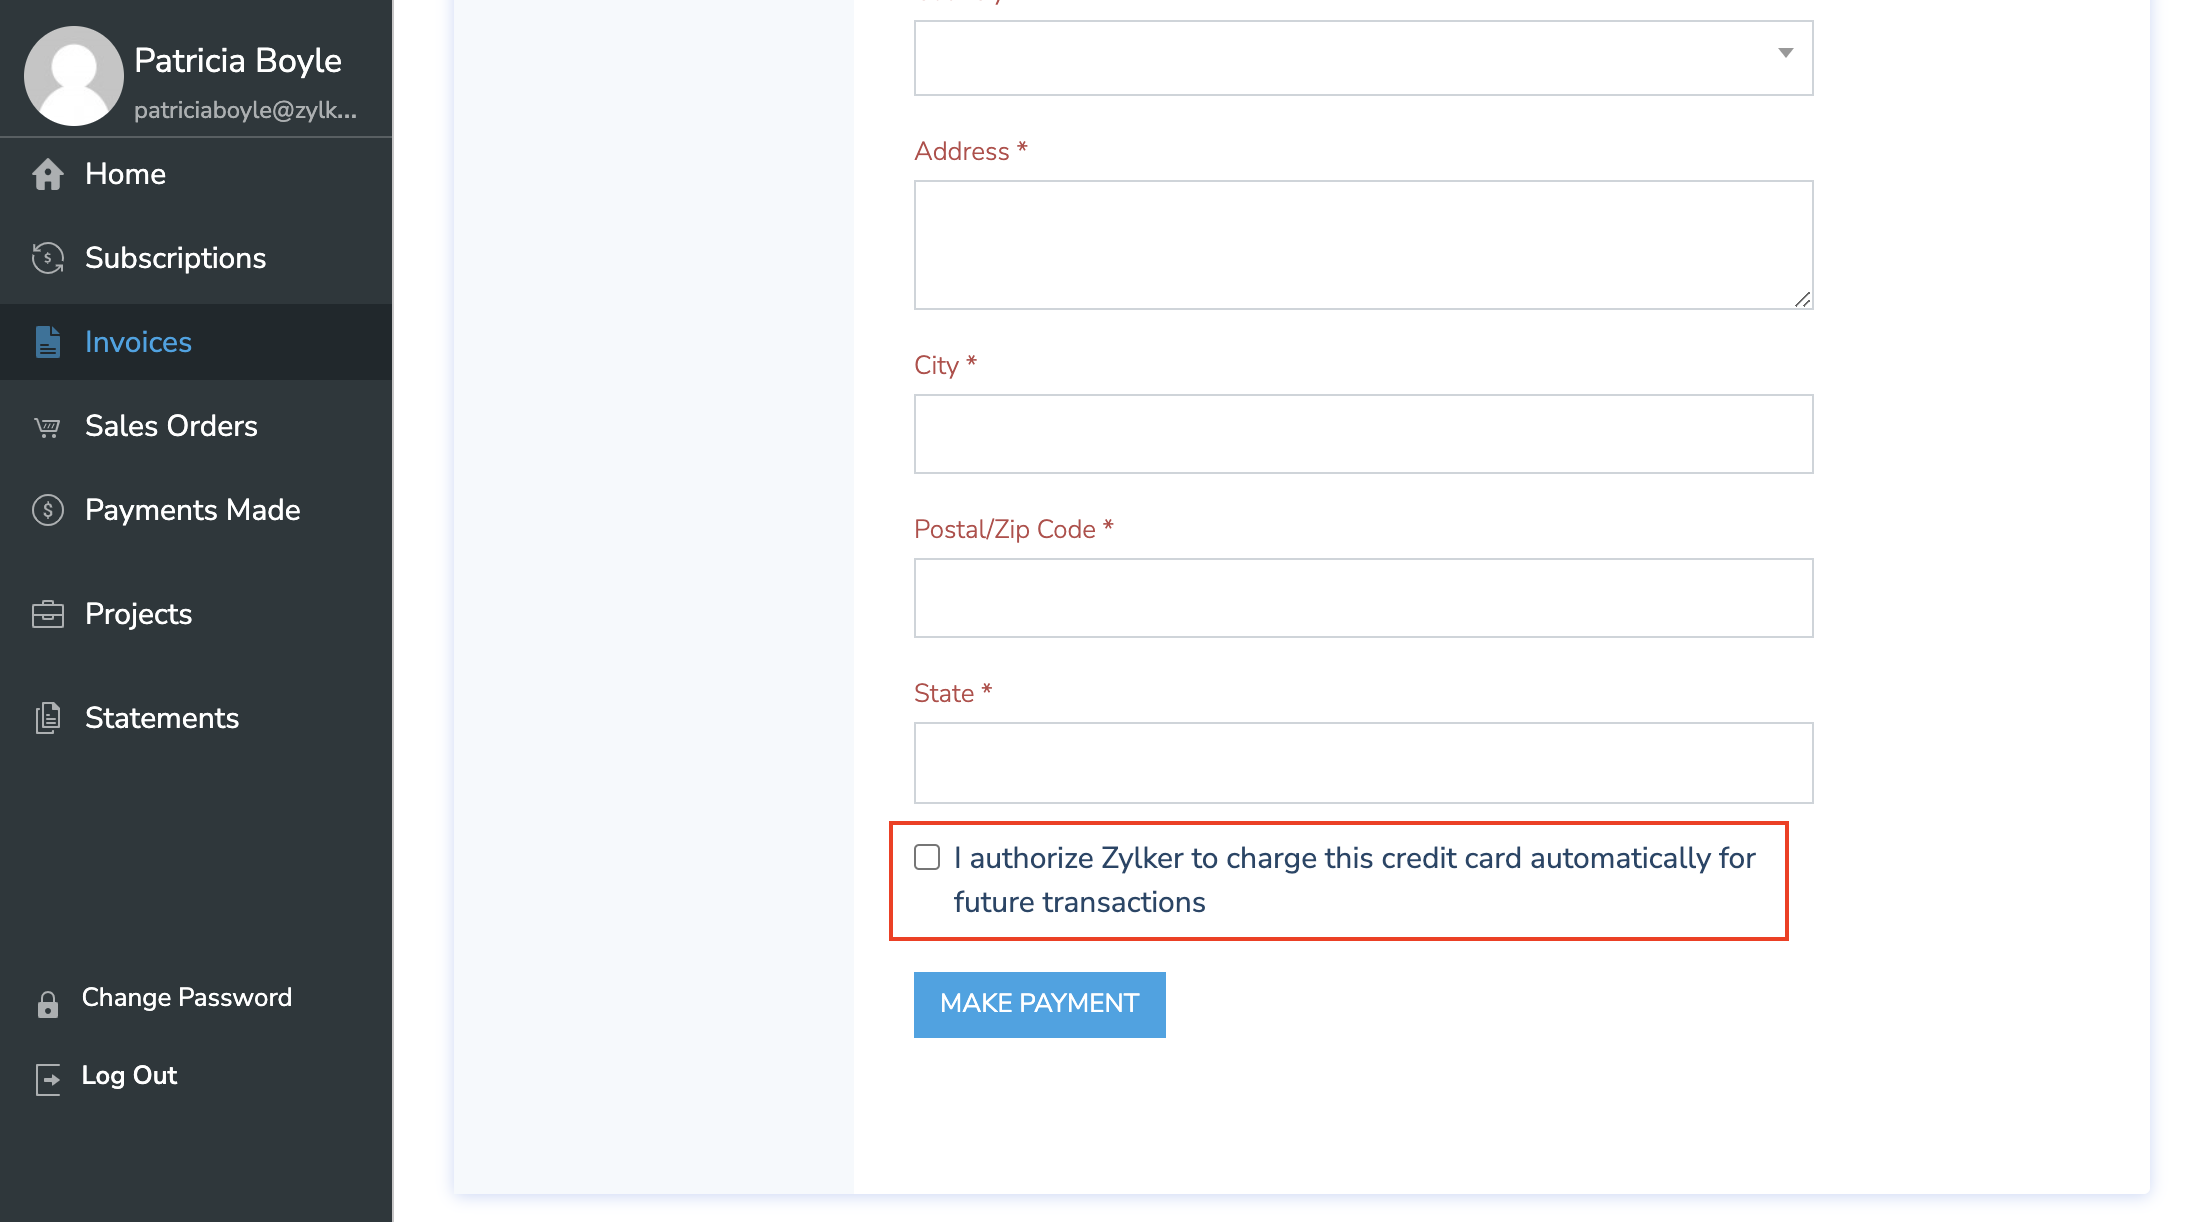
Once you have completed your payment, the status of the invoice will turn to Paid.
Track Payments Made
The Payments Made module from the left side bar displays a list of all the invoice payments that you have made. You can use the view filters at the top of the list to sort through invoices.
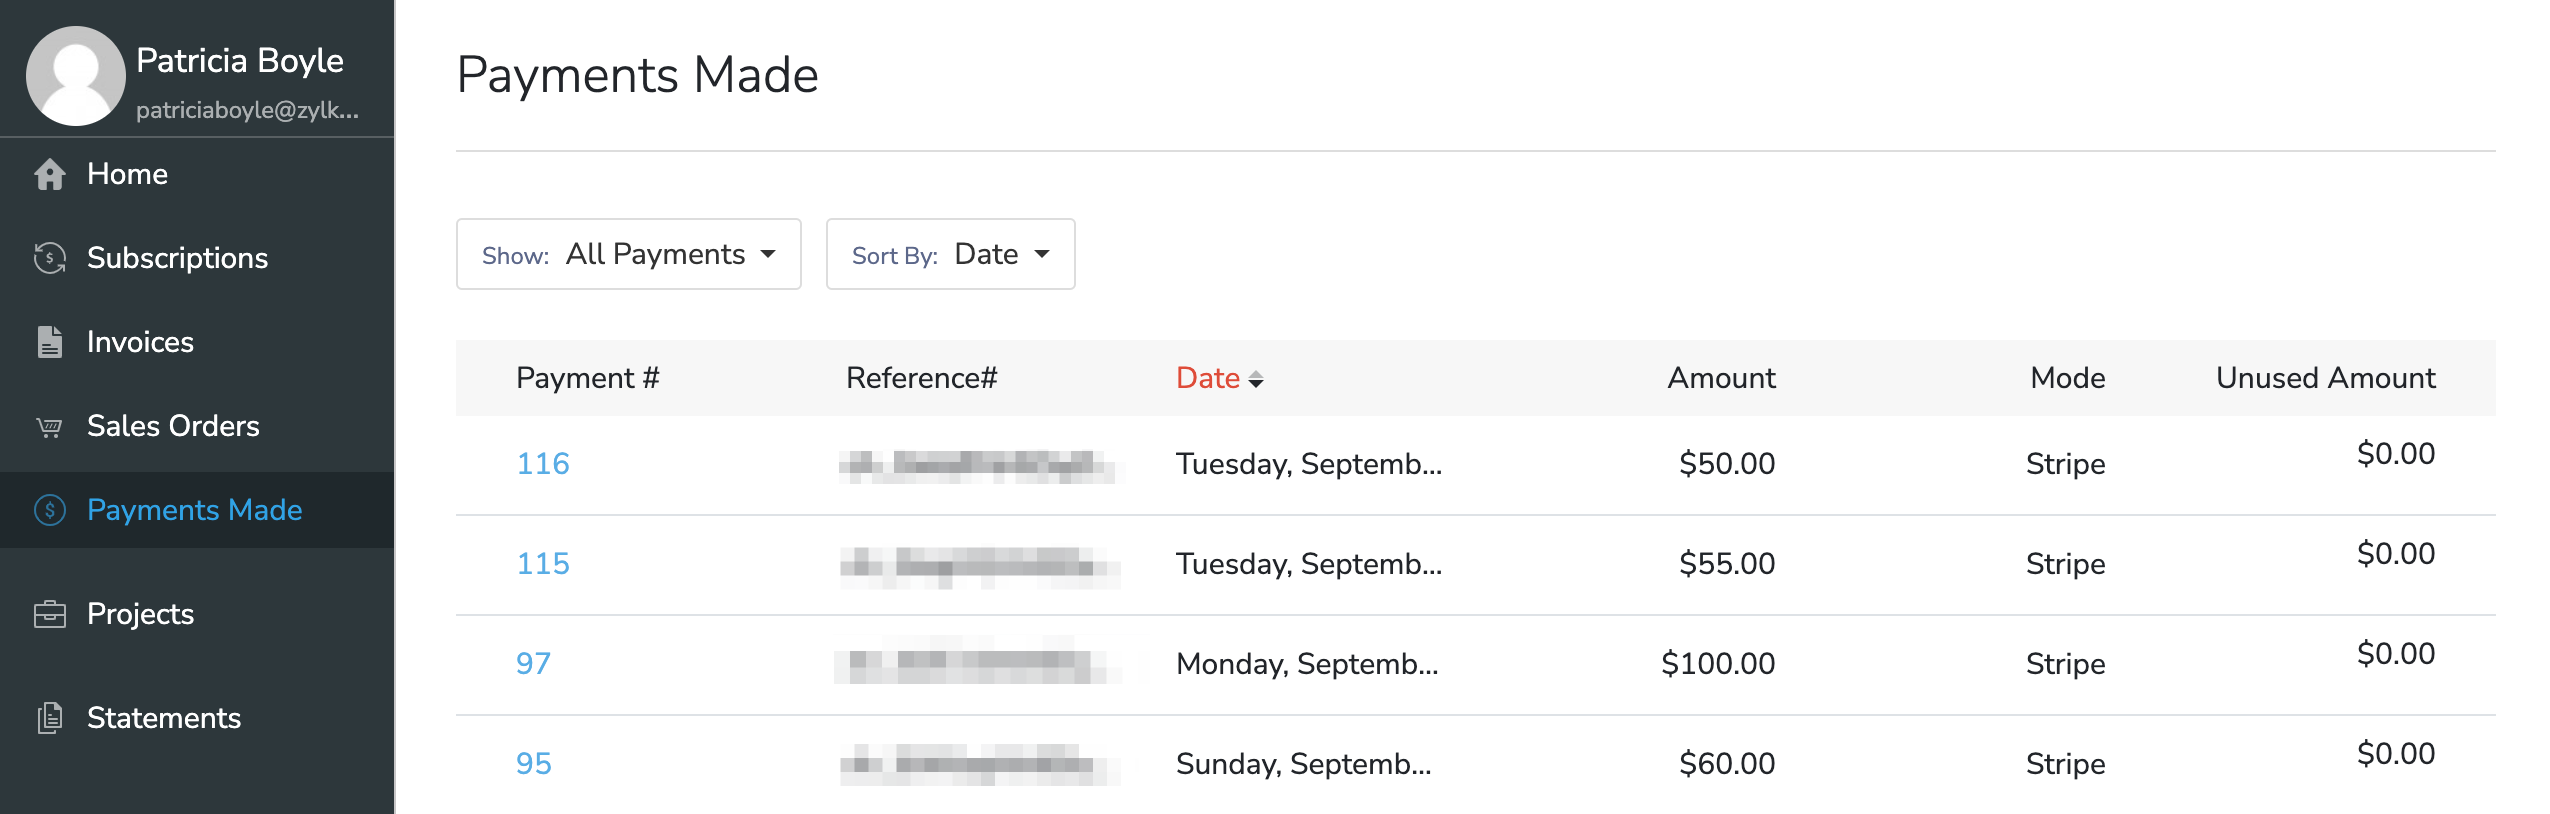
Clicking any payment in the list will display the payment’s receipt. You can download or print this receipt for your reference.
Generate Statement of Accounts
The statement of accounts is a document that lists out all the transactions that have taken place over a particular period. It lets you know the total amount that you owe CRU for the sales that took place during that period.
To generate a statement of accounts from the Customer Portal, you should:
- Go to the Statements module from the left sidebar.
- Select the Date Range in the top-left corner.
- Click Go to generate the statement.
Now, the statement will be generated based on the date range that was selected.
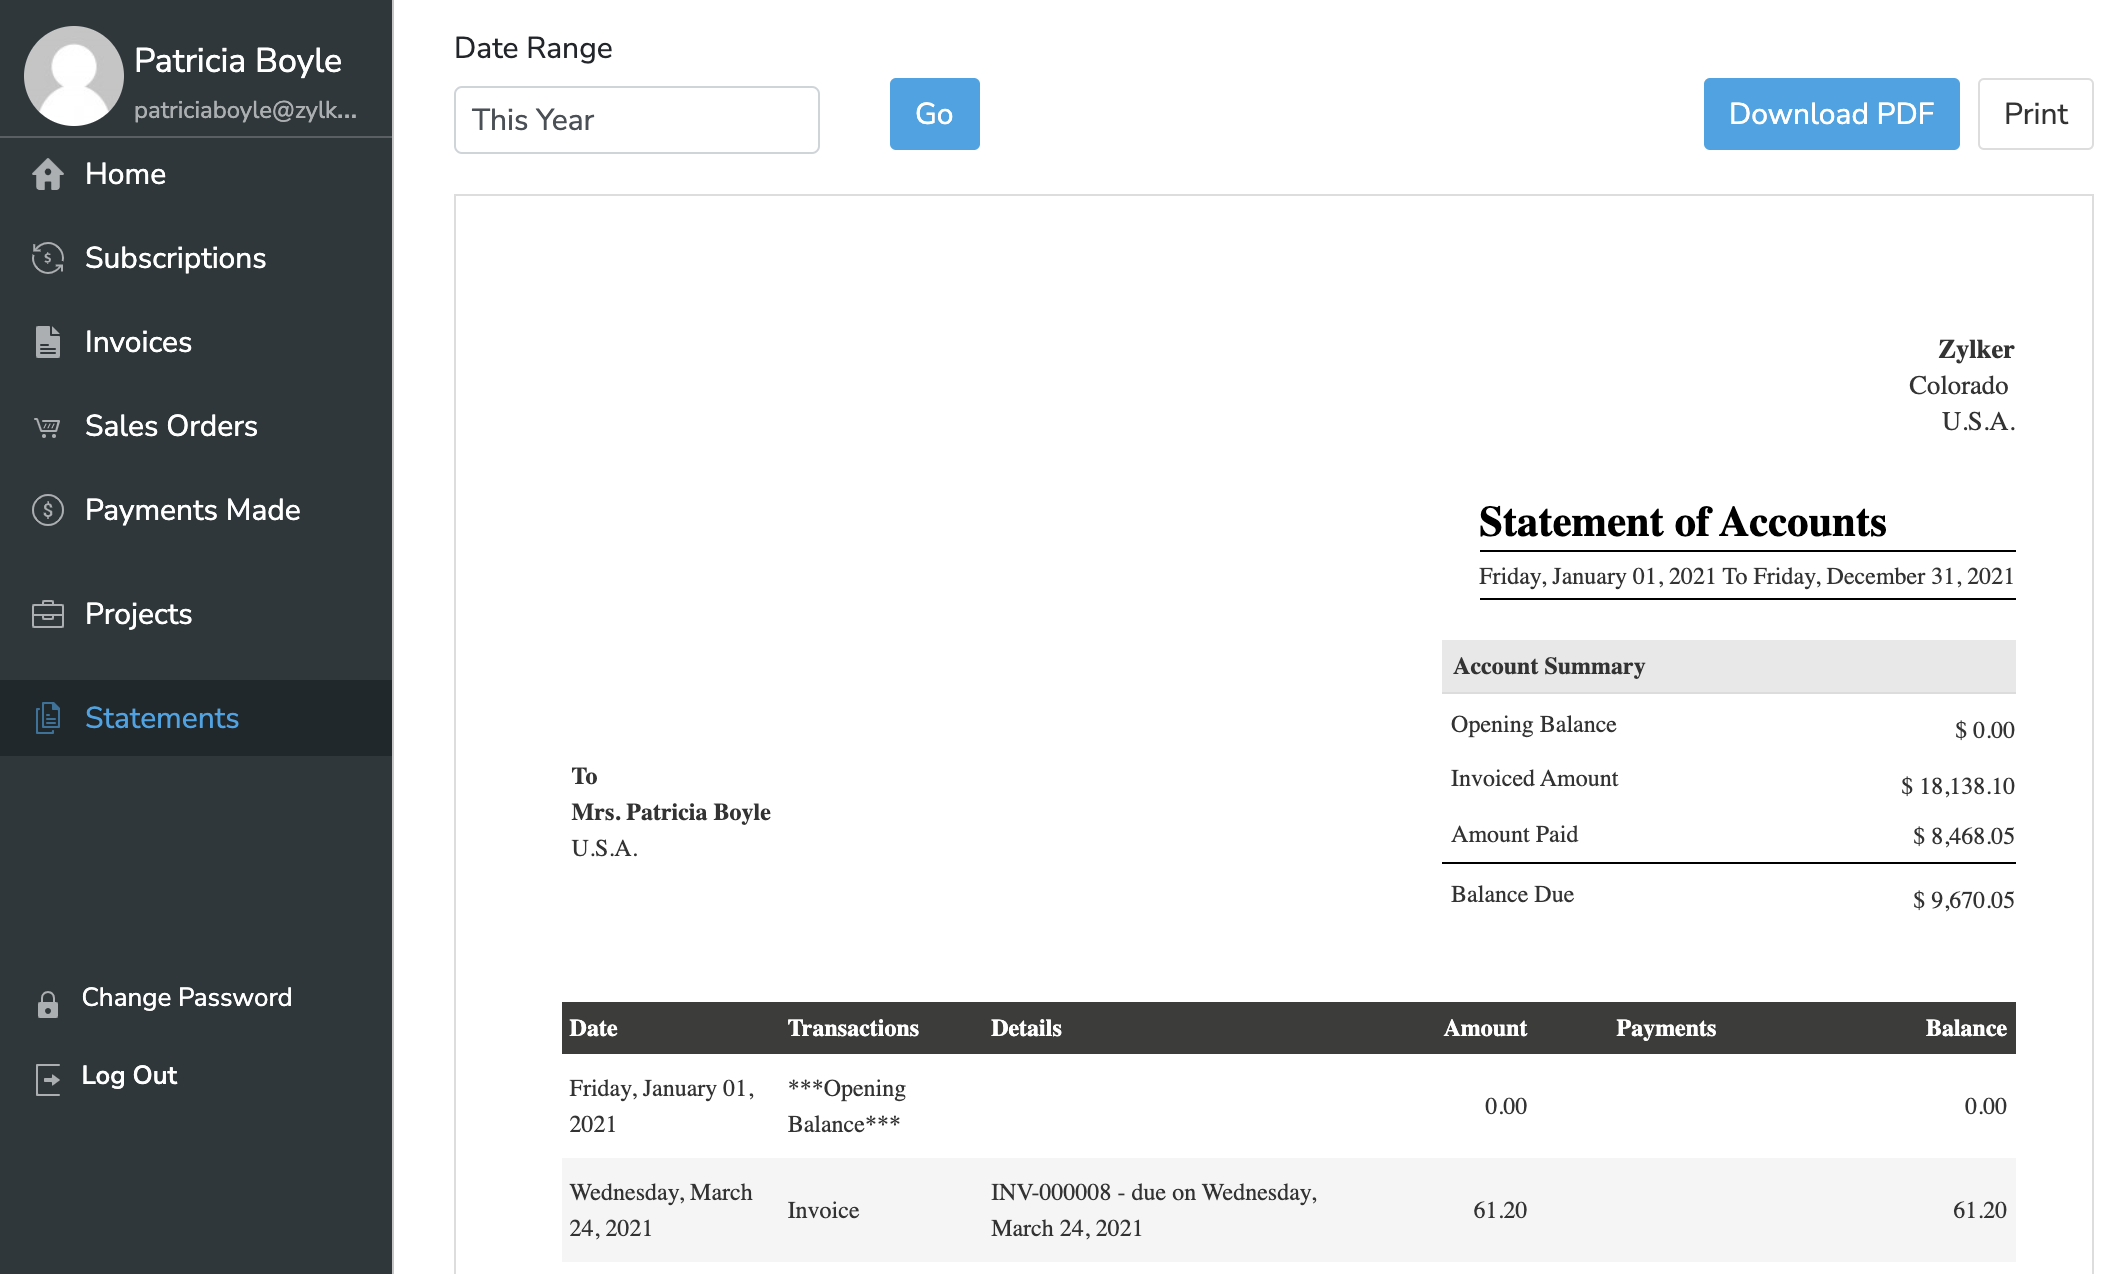
You can also download or print the statement for your reference.
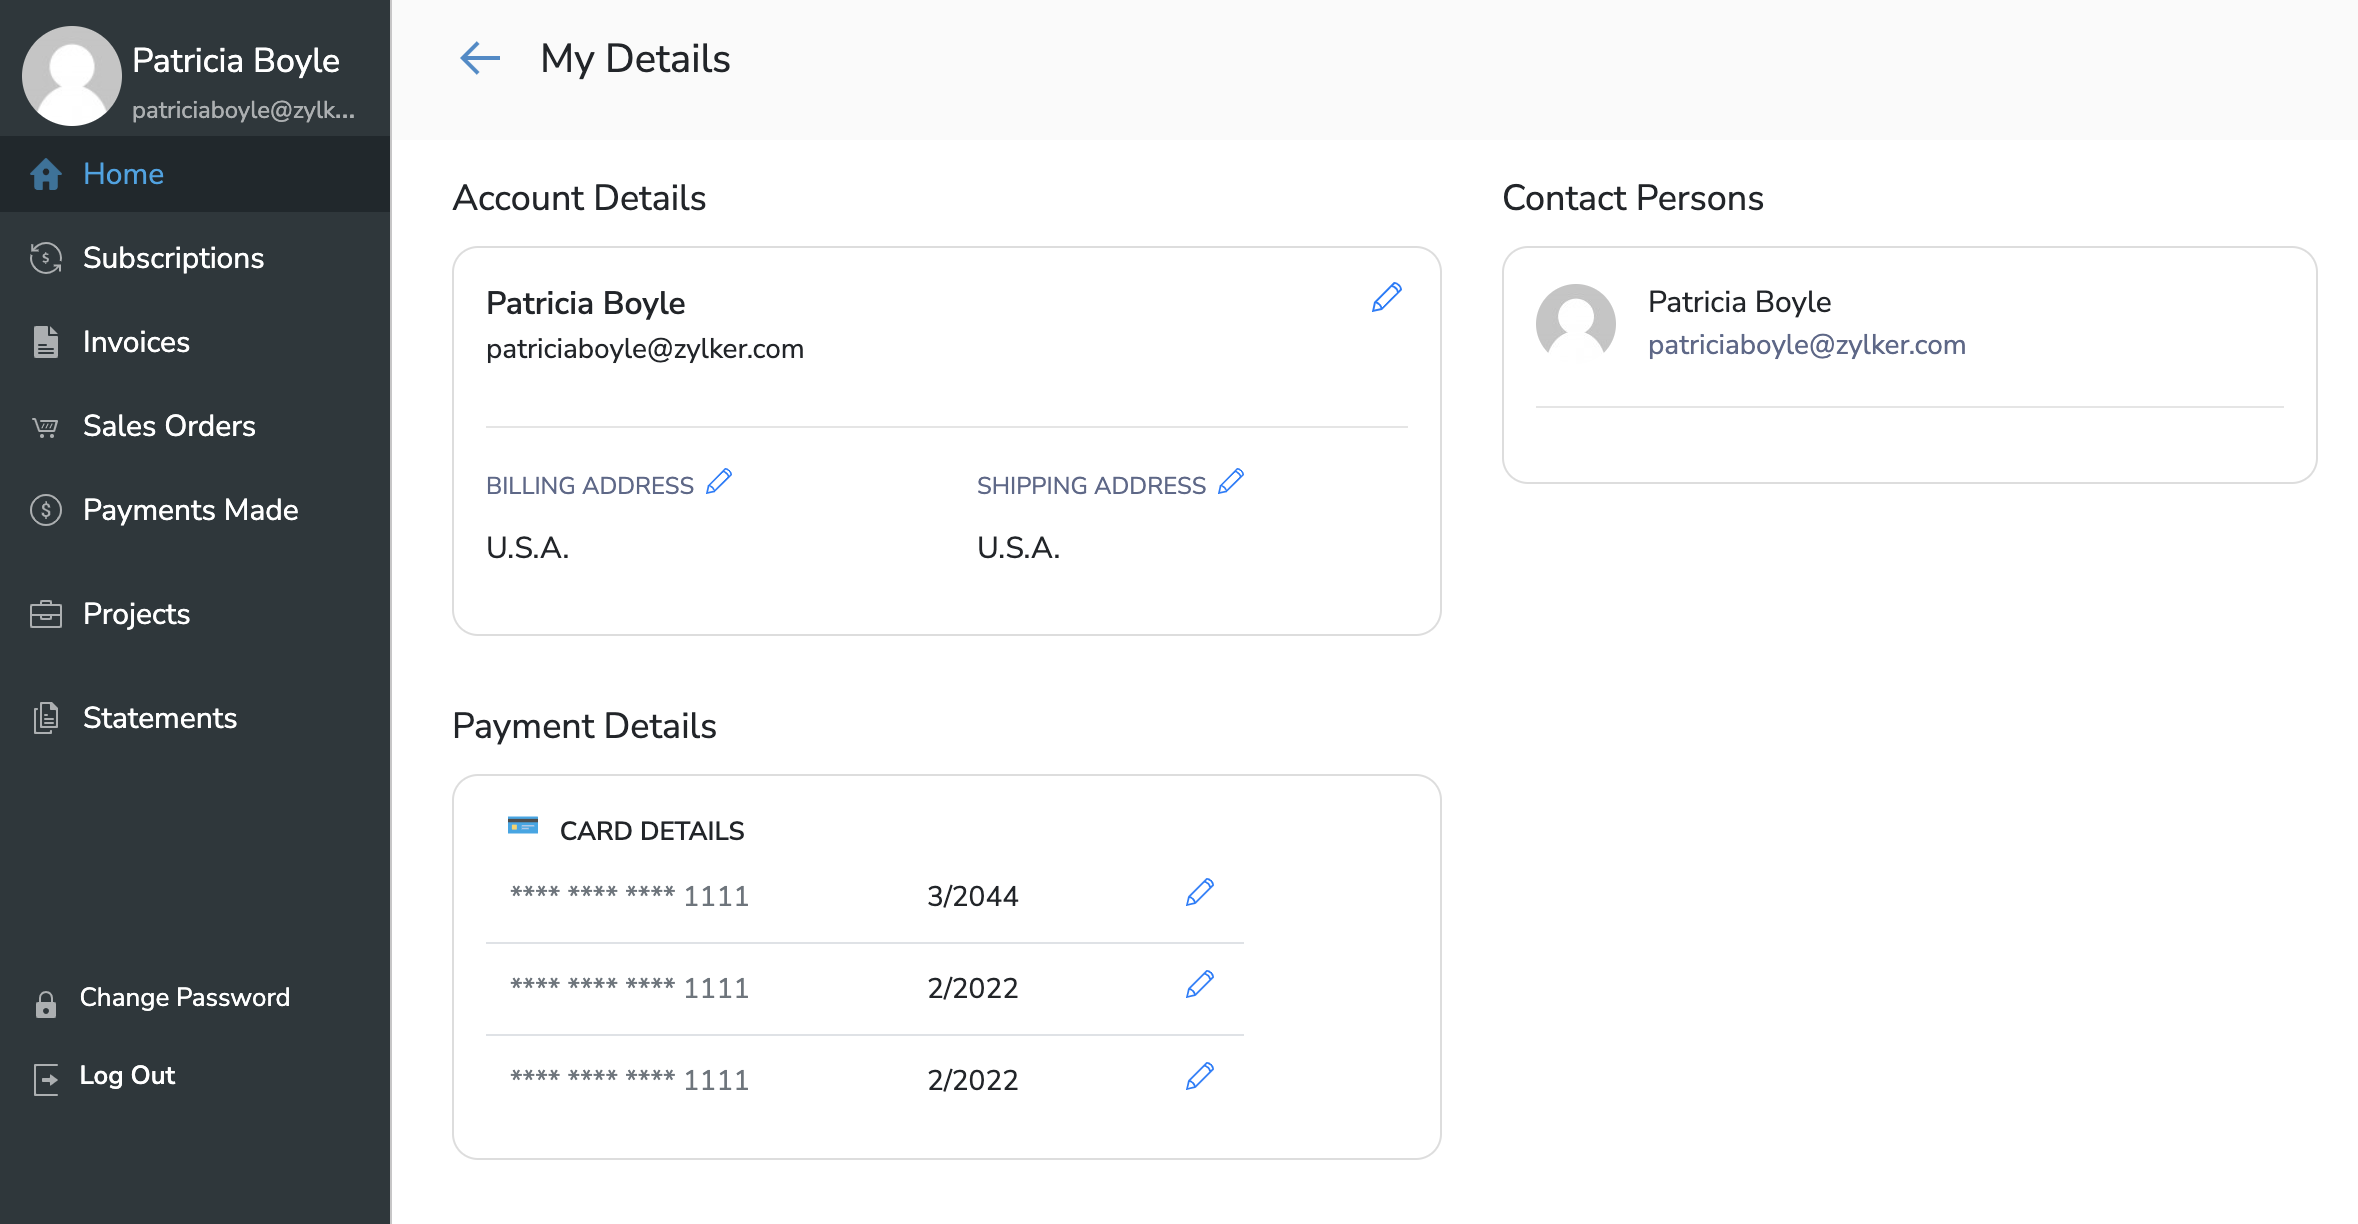
View & Update Payment Information
You can view and update your existing payment information from the Customer Portal.
- Go to the Home dashboard.
- Click View More near the My Details section.
- Click the edit (Pencil) icon next to the payment information that you want to update.
- Enter the details of the new payment method.
- Click Save.
If the old payment method was associated with any subscriptions for Auto-charge, now the updated payment method will be used instead.
View & Update Customer Details
You can update some of you basic contact information that’s stored in Zoho Subscriptions.
To do this, you should:
- Go to the Home dashboard.
- Click View More near the My Details section.
Click the edit (Pencil) icon that’s next to either the Customer Details, Billing Address or Shipping Address section.
Update the necessary details.
Click Save
Related Articles
Print Invoices and Packing Lists - Features
View Guide Links at the bottom of the page Installation 1 CRU CREDIT Setup (optional) 1 CRU CREDIT Ease Of Use Easy Want this feature? Request Here Purchase CREDITS Here Print Invoices, Packing Lists, and Pick Lists The WooCommerce Print Invoices & ...CRU TASKS & CRU CREDITS
A big challenge we have faced when it comes to tasks and issues is how to define and manage tasks, how long tasks should take, what tasks you can and can’t do yourself and how to charge for tasks. To address and attempt to solve these problems while ...CRU Plans - Terms & Conditions
CRU Digital is committed to supporting your online sites and stores to maximise their performance and availability. This document sets out the technical / support services provided by CRU Digital to support and maintain your store when on one of the ...CRU Club - Troubleshoot Guide
Updating Subscriptions How to process a renewal payment Make sure the order’s status is Failed. If it is not, please change it first to Failed by selecting Failed on the status selection and clicking the Update button. After making sure that the ...CRU Club - User Guide
For pricing and how to add to your website see at the bottom of the page. Get Started Manually Creating Subscription via Admin (Choose your own) Add the user to the site first by going to Users > Add New. Fill out the users details: User Role is ...