Setting up the Free Custom Facebook Feed WordPress Plugin
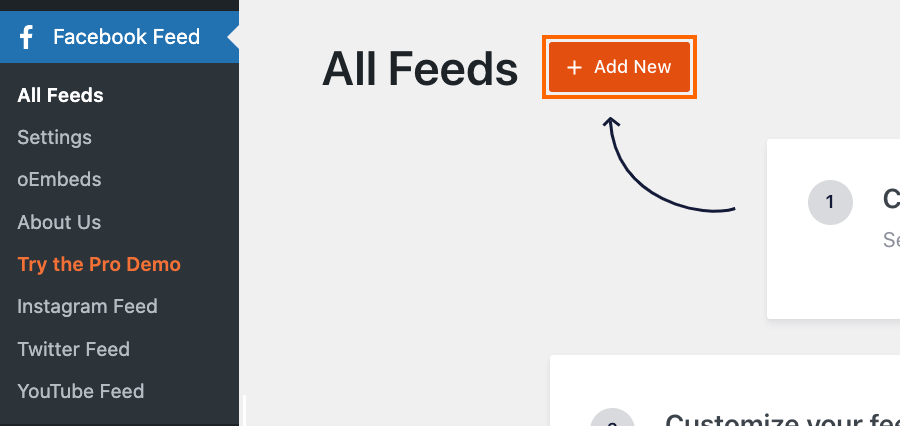
1) You’ll see the Facebook Feed menu on your WordPress menu.
2) Click on All Feeds and then click on the button labeled Add new.

Note: If you are connecting an account on behalf of someone else.
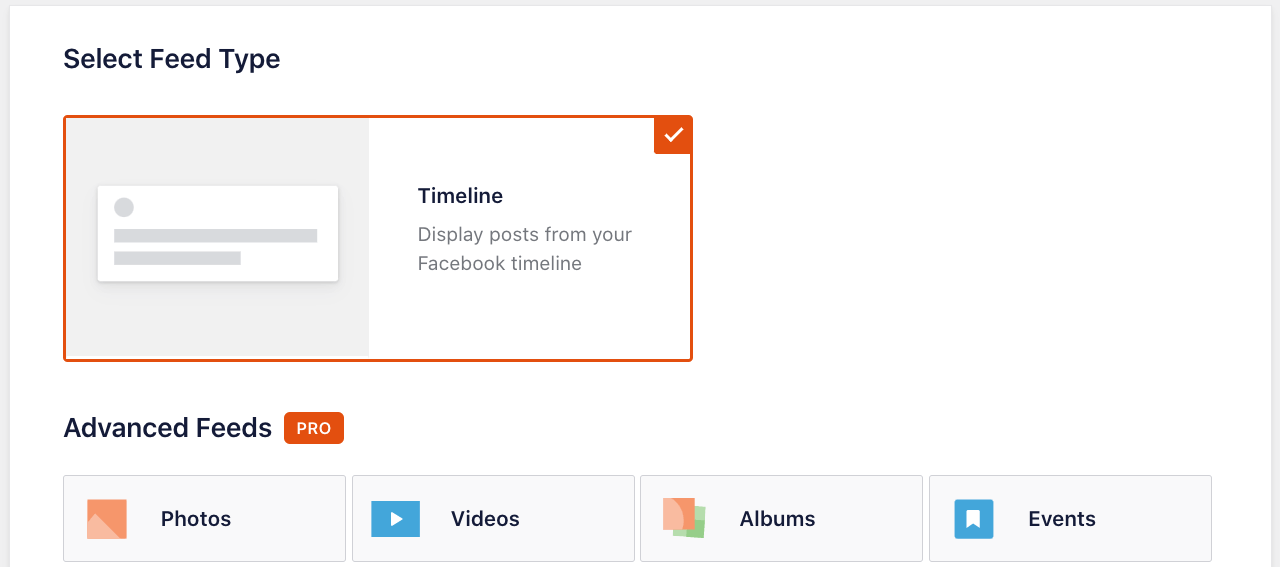
3) Click on the User Timeline option, then click Next
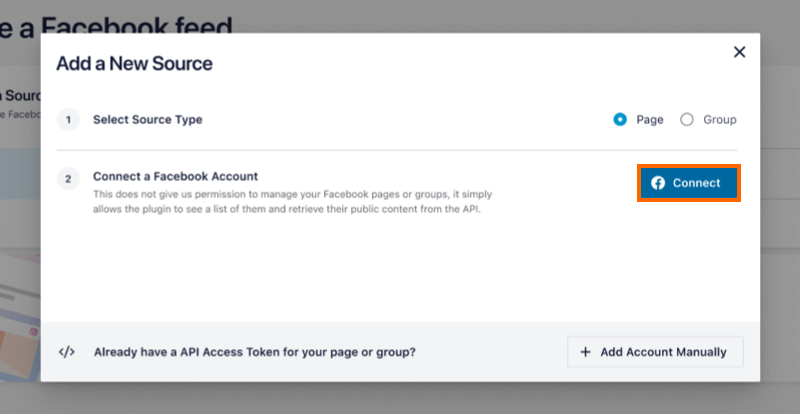
4) Click on the button labeled Add New
5) Select the Type of source, then click the Connect button
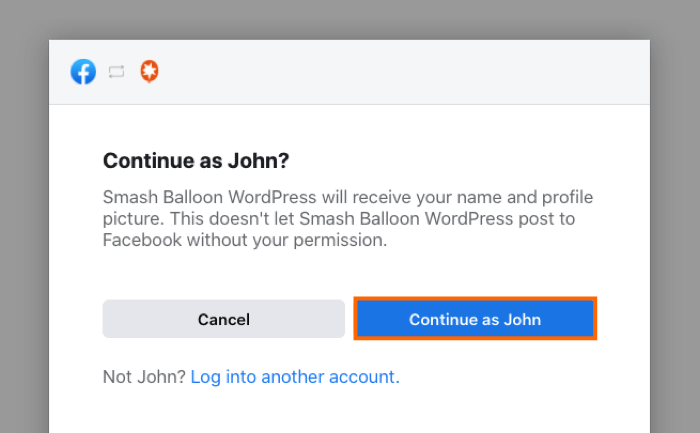
6) You will be redirected to Facebook and if you are not logged in then will be prompted to do so. Once logged in, follow the prompts by clicking the Continue button.
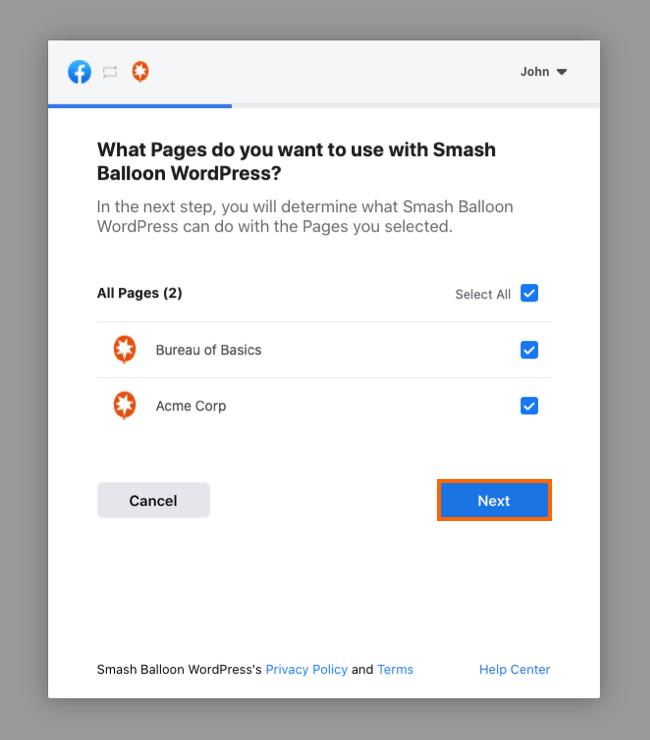
7) Facebook will then ask you what Pages you want to use. Select the pages you want to display then click Next.
 Note: Select all pages on this screen to authorise the Access Token; then, connect only the pages you want to display.
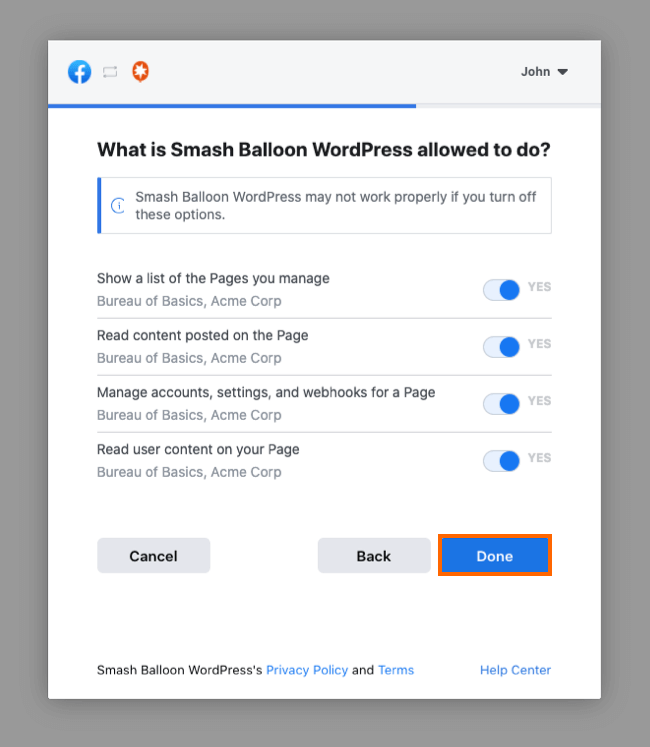
 8) Review what permission our app is requesting, click Done, then click OK on the next page to return to your WordPress dashboard.
 Important: Your feed may not work properly if you turn off one or more of these options.
 Note: This does not allow our plugin to manage your page settings, edit, post to, or do anything else to your Facebook page. It simply allows the plugin to retrieve a “read-only” Access Token for your page which allows it to retrieve posts or other content you wish to display.
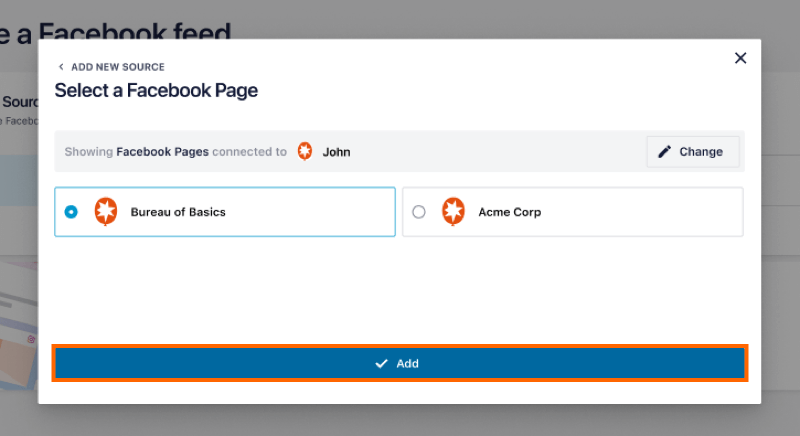
9) The list of Facebook pages will be displayed. Select a page and click the Add button
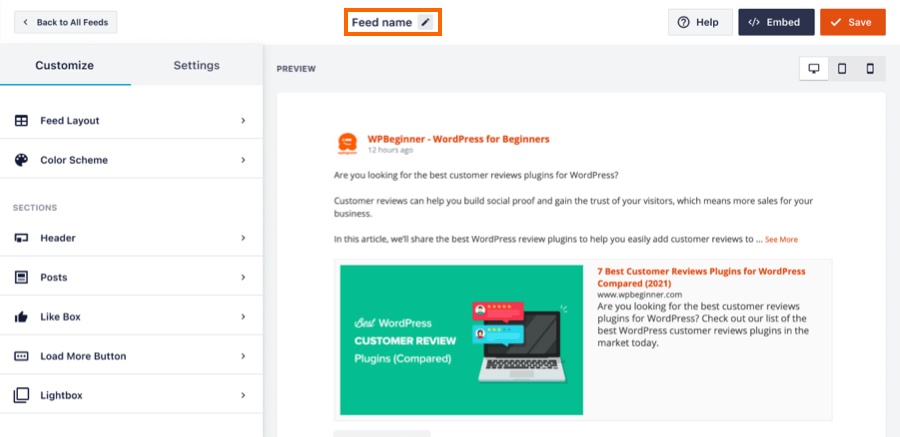
10) Add a name to your feed and customize it using the options on this screen, then click Save
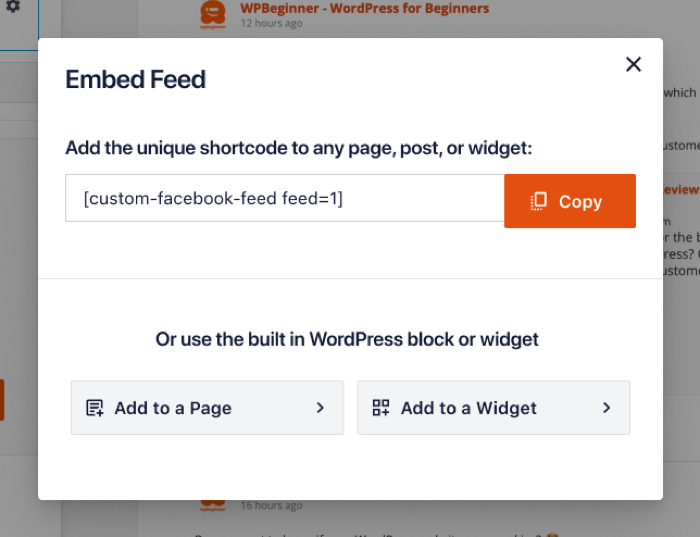
11) Once you’re ready to embed your feed, click the Embed button and copy the shortcode.
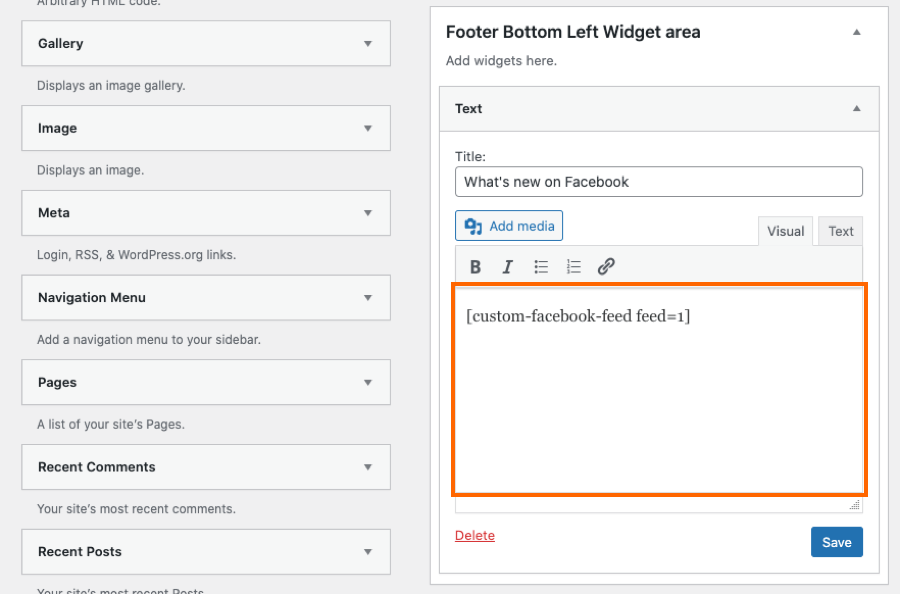
12) To display your feed simply add the shortcode you created to any page, post, or widget, like so:
13) Navigate to the All Feeds page and click the Edit button to customize your feed.
