Gravity Forms Mailchimp Add-on - User Guide
Setting Up the Mailchimp Add-On
Where to Find These Settings
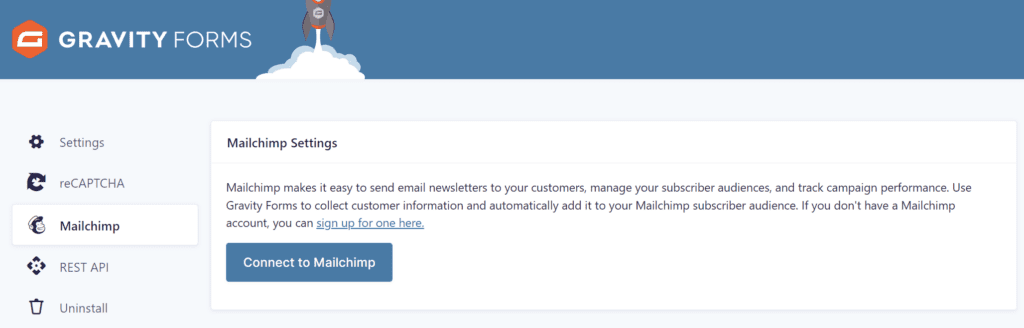
The Mailchimp settings page can be found within your WordPress admin dashboard. From within the left side navigation menu, follow the path: Forms → Settings → Mailchimp.
Connect your Mailchimp Account
To connect your site to your Mailchimp account simply follow the steps below.
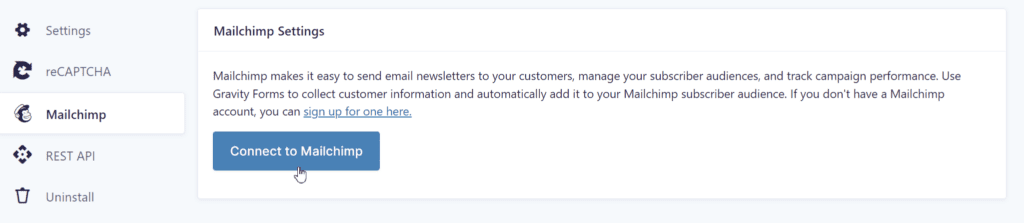
- Click the Connect to Mailchimp button.
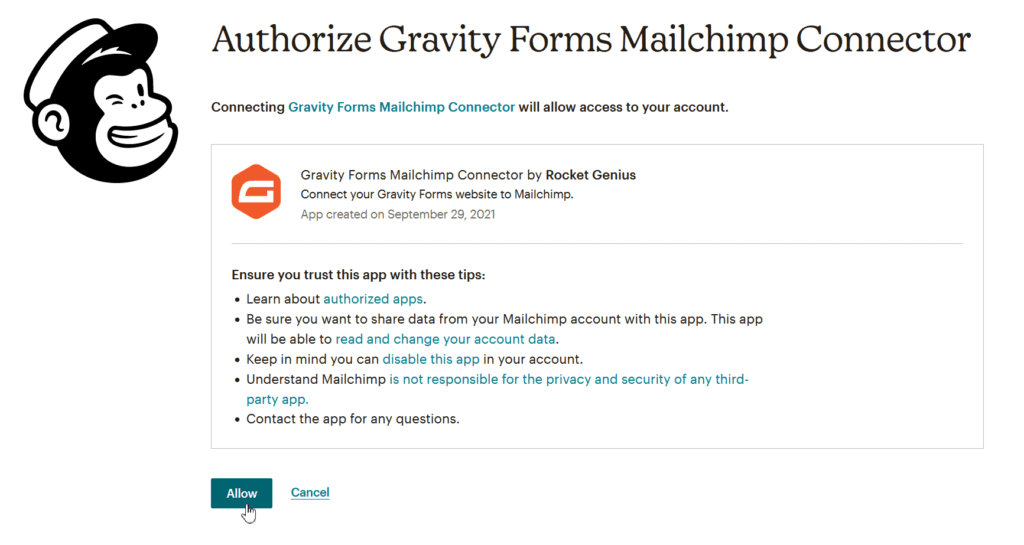
- Log in to your Mailchimp account within the MailChimp window provided.

- Click the Allow button to allow the Gravity Forms app to access your Mailchimp account.
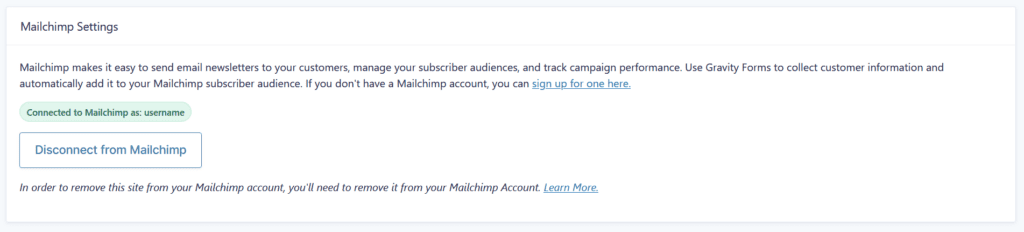
- You should now be redirected back to your Settings page showing Connected to Mailchimp as: username. You will also see a Disconnect from Mailchimp button now, in case you need to undo this process.
Obtaining Your Mailchimp API Key
To use the Mailchimp Add-On for Gravity Forms, you will first need to obtain a Mailchimp API key. In this article, we will show you how to get your Mailchimp API key.
- Log into your Mailchimp account.
- Click on your name (or profile image) at the bottom left of the screen, then click on Account.
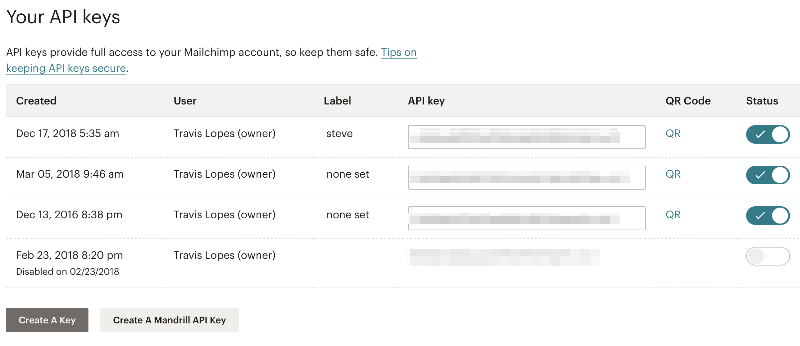
- Click on Extras, then API keys.
- If you have never used Mailchimp’s API before, you will need to generate an API key. To do so, scroll down the page to the section labeled Your API Keys and click on the Create A Key button.
- The page will reload and the Your API keys section will now be populated with your new key.
Mailchimp Feed Setting Reference
Feed Settings
| Setting | Description |
|---|---|
| Name | Enter a feed name to uniquely identify this setup. |
| Mailchimp Audience | Select the Mailchimp audience you would like to add your contacts to. |
| Map Field | Map each of the Mailchimp fields to the desired form field that will contain that information. In Mailchimp these are the fields that display in the user profile information. You can add new fields to the profile under Audience -> Manage Audience -> Settings -> Audience fields and Merge tags. See note 1. |
| Setting | Description |
|---|---|
| Groups | Used to add users to your Mailchimp groups. |
| Marketing Permission | Allows you to set a condition to opt users into different marketing types. If an existing user is found and already opted-in for a Marketing Permission, they will stay opted-in. See note 2. |
| Options | If you select Double Opt-In, then all audience subscribers will be sent a confirmation email via Mailchimp’s service before they are finalised as included in the audience. The Mark subscriber as VIP checkbox sets the VIP flag. |
| Tags | Using text and merge tags, you can assign tags to the entered subscriber. Multiple tags can be set as a comma separated list. This new integration with Mailchimp’s tags was launched with Mailchimp Add-On v4.4. |
| Note | Assign a note to the entered subscriber. This is sent to Mailchimp so the note is added to the member details. This is only visible to the Mailchimp account owner. Supports merge tags. |
| Conditional Logic | If unchecked, every successful form submission will be sent to Mailchimp. If you wish to set specific conditions for sending form data to Mailchimp, then check the “Enable Condition” box and fill out your required criteria. |

Note
- Map each of the Mailchimp fields to the desired form field that will contain that information. In Mailchimp these are the fields that display in the user profile information. You can add new fields to the profile under Audience → Manage Audience → Settings → Audience fields and Merge tags.
- Requires GDPR fields to be enabled for the Mailchimp audience. This is done under Audience → Manage Audience → Settings → Audience name and campaign defaults. Also the audience is required to have at least one member; if the audience does not have any members, add a temporary user (you can delete it after).
Limitations
Once a user has unsubscribed from Mailchimp, they cannot be resubscribed to an Audience through the Mailchimp Add-On and the Mailchimp API. They would only be able to resubscribe using Mailchimp’s subscribe forms. This is a limitation of the Mailchimp API.
Creating a Feed for the Mailchimp Add-On
A feed is the way you define how data is passed from your form submission to an external service. This article will step you through the process of setting up a simple feed. This article assumes that you have already setup the Mailchimp Add-on.
For details on all of the Mailchimp feed settings, refer to the Mailchimp feed settings reference guide.
Scenario
Our example here will focus capturing sign-ups for our team sports newsletter, and registering them automatically to an existing Mailchimp Audience.
Step 1: Create a Form
Firstly, let’s create the form we will be using as the basis for our Mailchimp Feed.
- From your WordPress Dashboard, hover over the Gravity Forms icon, and select New Form in the dropdown that appears.
- Let’s call this form “Mailchimp Form (Team Sports)”.
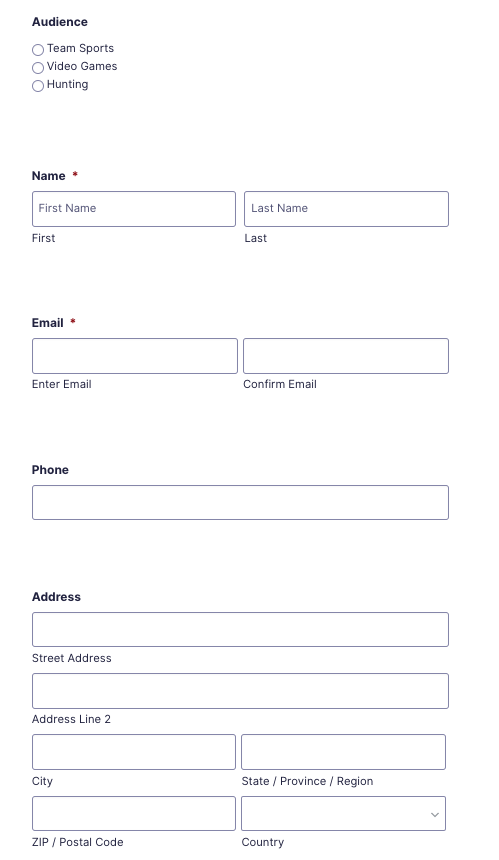
- Add the following fields to the form: Email, Address, Name, and Phone. Later, we will map these fields in our feed so they can be imported into Mailchimp.
- Click Update to save your form.
If you are following along, your form should look basically something like this.
Step 2: Create a Feed
To create a feed, hover over Settings at the top of the form and click Mailchimp in the drop-down menu. On the Mailchimp Feeds page that appears, click Add New to create a feed. The steps below show how to configure your feed.
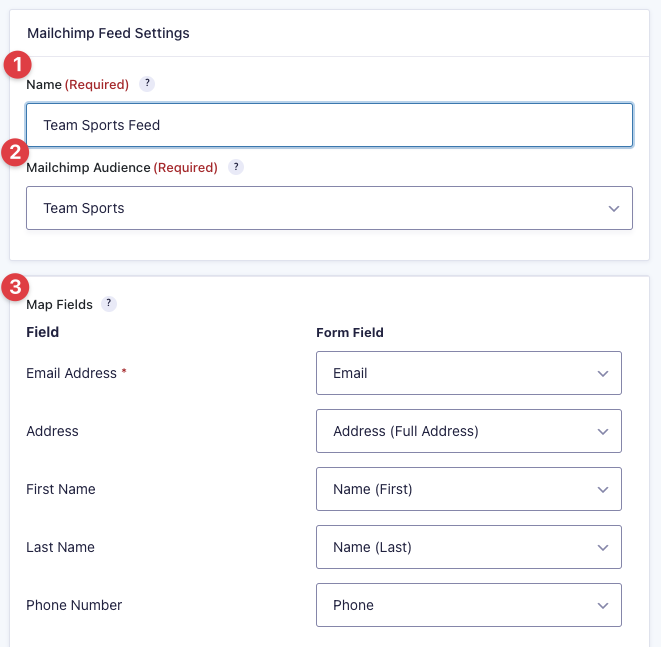
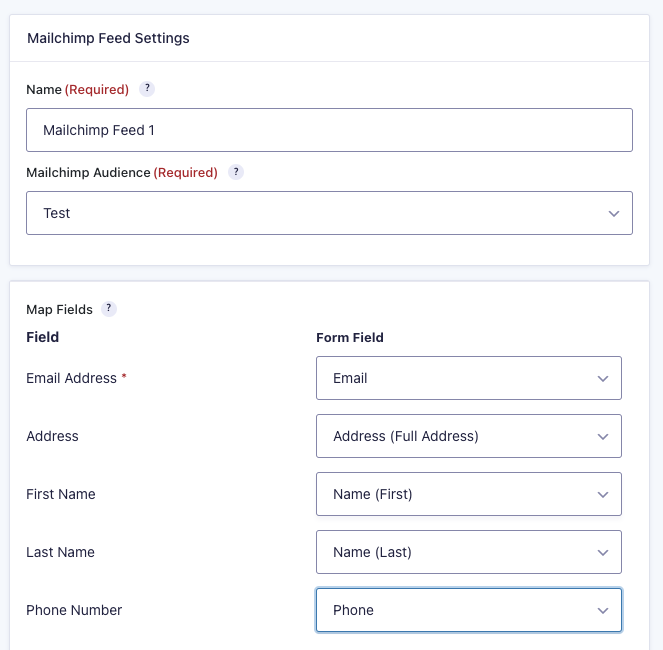
- Since we are creating a feed about team sports let’s Name our feed Team Sports Feed.
- In the Mailchimp Audience we’ll choose Team Sports. The Audience must be created in your Mailchimp account first for it to show up here.
- Next, we’ll map each MailChimp field to the corresponding form field you want to use to populate that data. For example, we will match Email Address field to the Email field we created on our form earlier.

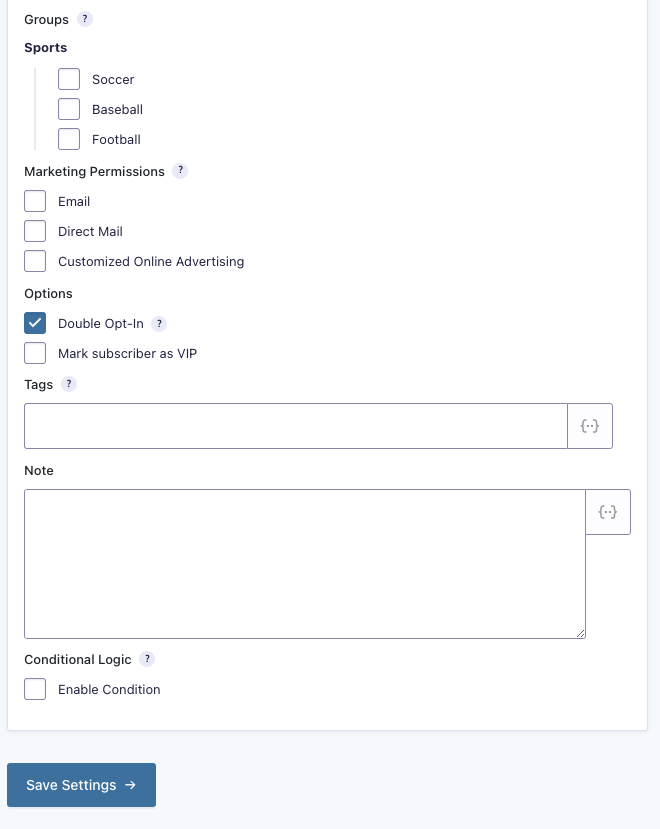
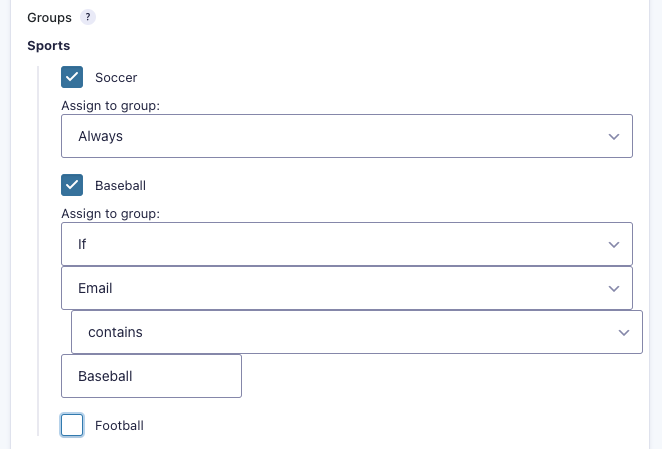
- You can then select a Group for the user to be added to. We’ll select Soccer and Football and Assign to group: Always. The Group must be created in your Mailchimp account first for it to show up here.
- We’ll leave the Marketing Permissions blank.
- We won’t enable Double Opt-In or Mark subscriber as VIP on this form.
- For Tags we will be adding Sports, Team Sports, and newsletter.
- For the Note, we will add “This user was added through our Team Sports feed.” Notes can only be seen by the Mailchimp account owner.
- We don’t need Conditional Logic on this form. Conditional Logic allows you to add more stringent conditions as to when the feed runs.
- Click the Save Settings button to save your options.
That’s it! Whenever a user submits this form a new contact will be created in the Audience you specified on the feed. Of course, test it first!
Adding Mailchimp Subscriptions to Groups
- Ensure that the group exists within Mailchimp. If not, you’ll need to log into your Mailchimp account and create the group.
- When creating a feed for the Mailchimp Add-On, select the audience that contains your group.
- If groups exist within the audience, they will automatically appear with checkboxes next to each of them. Upon enabling a group, you will be able to select if all subscribers on the form will be added to the audience or just ones that fall under a specific condition.
- Save your feed.
Conditional Audience Subscriptions in Mailchimp
In some scenarios, you may want different users subscribed to different Mailchimp Audiences based on their form selections. In this article, we will show you how to configure different subscriptions based on the form options chosen.
Note: This article assumes that you have already set up your audiences and have a basic familiarity with the Mailchimp Add-On.- Create a Radio Button field and add your audiences as choices.

- For each of your audiences, you will need to create a new feed. Within the form editor, hover over Settings and click on Mailchimp.
- Click Add New and begin setting up your feed, selecting one of your audiences.
- Within your feed settings, click the checkbox labelled Enable Condition to enable Conditional Logic. Using conditional logic will allow you to only use this feed when a particular parameter exists. In this case, it is the setting you want to use for this audience.
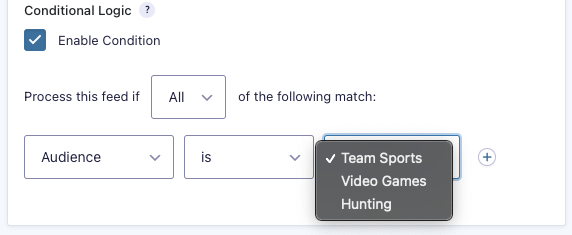
- Inside the conditional logic settings, select the field that you want to use for the audience selection, as well as the selection that a user will need to select for the audience to be used. In the example below, if the user selects Team Sports from the Audience field, that user will be added to Team Sports Audience in Mailchimp.
- Click Save Settings to save your feed configuration.
- Now this feed will only process if the conditional logic settings are met. You can create additional feeds for your other audiences like Video Games and Hunting using these same instructions.
Troubleshooting Mailchimp error “Unable to add/update subscriber”
Any issue that occurs while attempting to add or update a Mailchimp subscriber will often generate the same generic message
Unable to add/update subscriber: Invalid Resource
The error message is also saved as a note on the entry.
How To Capture More Info
Recreate the error with Gravity Forms logging enabled. The error will be saved to the Mailchimp error log, as well as a hopefully more detailed error message from the Mailchimp service.
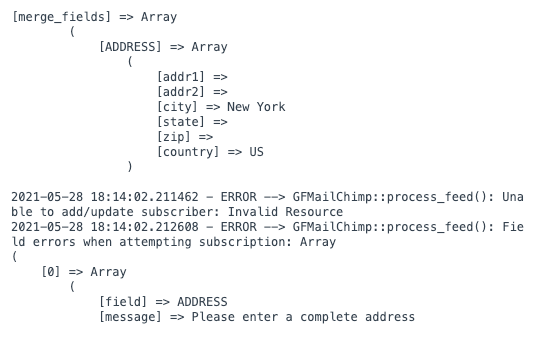
For some Mailchimp errors, additional information is sent if a specific field has thrown an error. These errors are also saved to the Mailchimp Add-On log.
Checking Error Codes
You can cross-check any error code captured against Mailchimp’s Error Glossary
If the logged information does not help figure out why the error occurred, a developer could add specific debug statements into the site code to try and track the error.
Example
This screenshot shows an example snippet from the error log.
Remove an Application from your Mailchimp Account
Our Mailchimp Add-On now uses an upgraded OAuth authentication method, which upon connection and validation, creates an authorised app within your Mailchimp account.
This article shows how to revoke that access, by describing how to remove the app from your authorised list.
Steps
To remove an application from your list of authorised applications, follow these steps.
- Log in to mailchimp.com with a web browser.
- Click your profile icon and choose Account.
- Click the Extras drop-down menu and choose API keys.
- In the Authorised applications section, click the “X” next to the application you need to remove.
 Overview and pricing of this feature. Click here
 Troubleshooting this feature? Click here
Related Articles
Gravity Forms Mailchimp Add-on - Features
View Guide Links at the bottom of the page Installation 1 CRU CREDIT Setup (optional) 1 CRU CREDIT Ease Of Use Easy Want this feature? Request Here Purchase CREDITS Here The Gravity Forms Mailchimp Add-On gives you an easy way to integrate all of ...Gravity Forms Mailchimp Add-on - Troubleshoot Guide
Can't see any Troubleshooting Guides on this page? This means we don't have any, please raise a ticket here if you have an issue and help us build out our guides! Overview and pricing of this feature. Click here Looking for the user guide for this ...Gravity Forms - Troubleshoot Guide
Form submissions not syncing to Mailchimp This troubleshooting guide is for standard forms such as Contact Us or any other form that captures data that syncs to Mailchimp. Requires Mailchimp/Form Add-On Integration If you are finding that new form ...Gravity Forms User Registration - User Guide
For pricing and how to add to your website see at the bottom of the page. Create Your Form The first step in integrating the User Registration Add-On is going to be creating the form you would like to use. This can include existing forms. The only ...Gravity Forms User Registration - Feature
View Guide Links at the bottom of the page Installation 1 CRU CREDIT Setup (optional) 1 CRU CREDIT Ease Of Use Easy Want this feature? Request Here Purchase CREDITS Here Seamless Integration With the Gravity Forms User Registration Add-On you can ...