Switching from Mailchimp to Klaviyo can enhance your email marketing capabilities, especially for eCommerce-focused businesses. Follow these steps for a smooth transition:
Before You Begin
Before you create your form, having your objective front of mind is crucial to making a signup form that’s both aesthetically pleasing and functional. Here are some goals that you may have for your form:
- Email opt-in
- SMS opt-in
- Highlighting a page on your site
- Advertising a sale
- Gathering birthday or preference information
- Giving physical location-specific information or deals
- Encouraging participation in a rewards program
You have two options when creating a form, either creating it from scratch or browsing the Form Library for inspiration. Here, though, we will only look at how to create a form from scratch.
- Navigate to Signup Forms
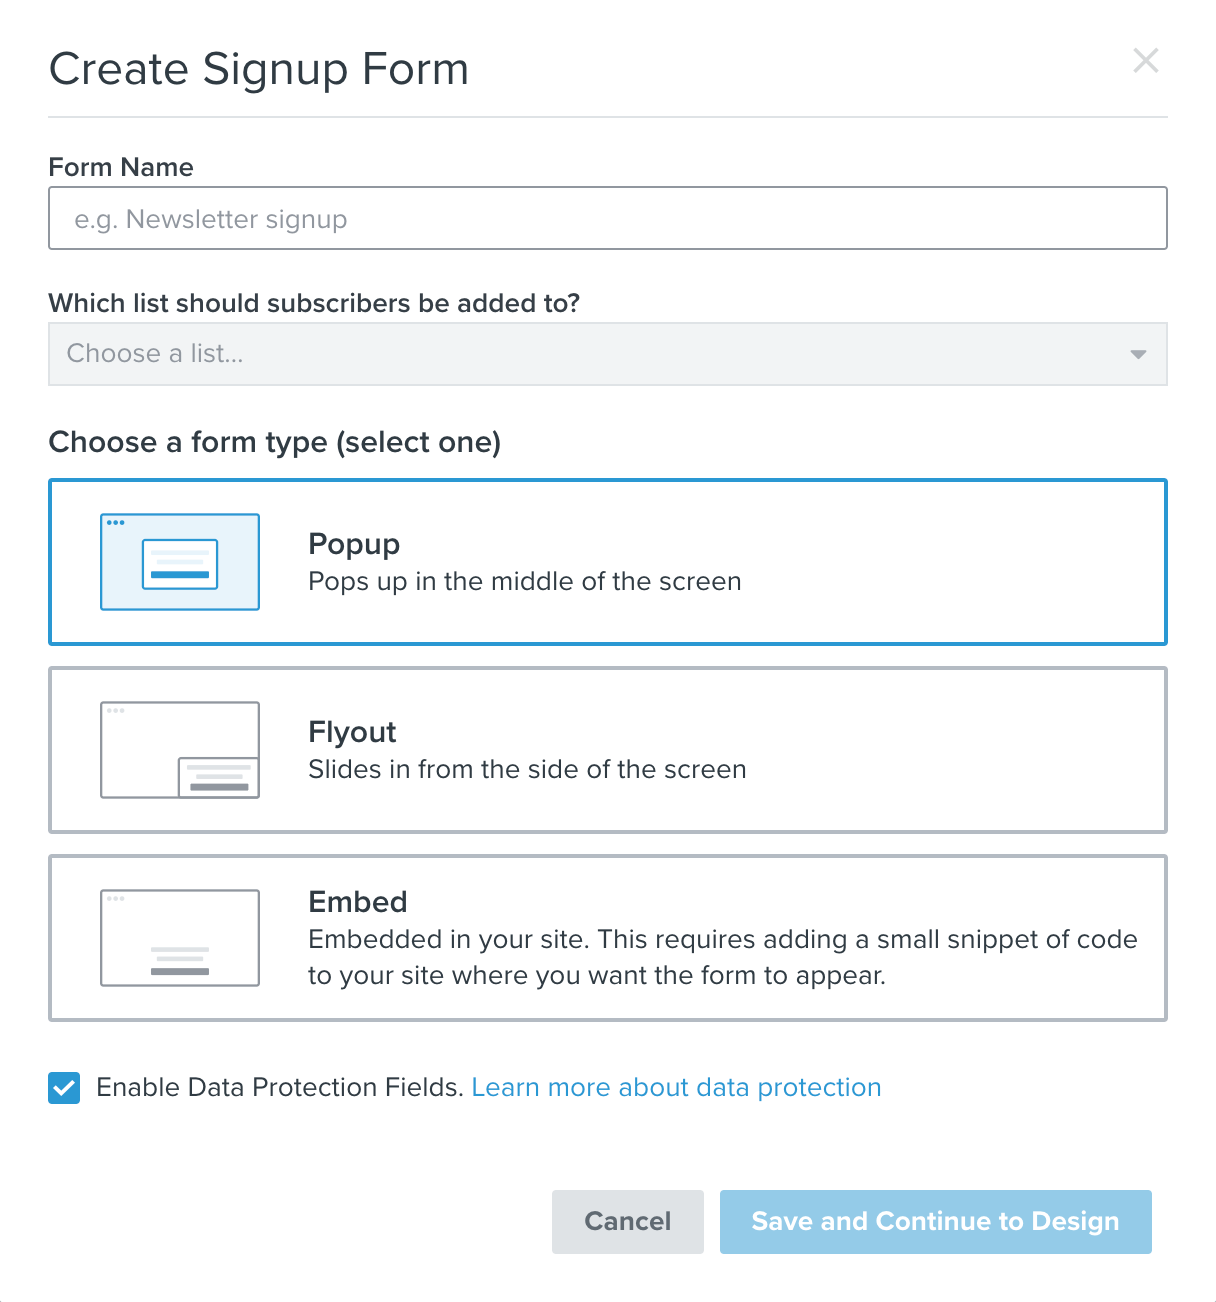
- Click the Create Signup Form button in the upper right
- Click Create from Scratch
- Name the form
- Select the list you would like new signups to feed into (you can change this later by editing the form's submit button, if you would like)
- Choose the format that you would like to use
- Choose if you would like the default template to include data protection language
Navigate to Blocks
- Text Block
- Button Block
- Image Block
Input Fields
- Text Input Block
- Email Input Block
- Phone Number Block
- Radio Button
- Multi Checkbox
- Date Block
- Dropdown Block
- Click Success Message if you want to change what is displayed when someone submits the form
- Navigate to Styles to change the look and feel of both your form and success message, including the font, font color, font size, type of form, etc.
- Go to the Targeting & Behaviors tab to edit when and to whom the form will display
- Click Publish once you finish designing your form
- Navigate to the Signup Forms tab in your account
- Select the Edit Form from the settings dropdown
- Edit the form or success message as you see fit
- Click the button block in your form
- Select a new list under List to Submit in the Button Click Action section
- Navigate to the Signup Forms tab
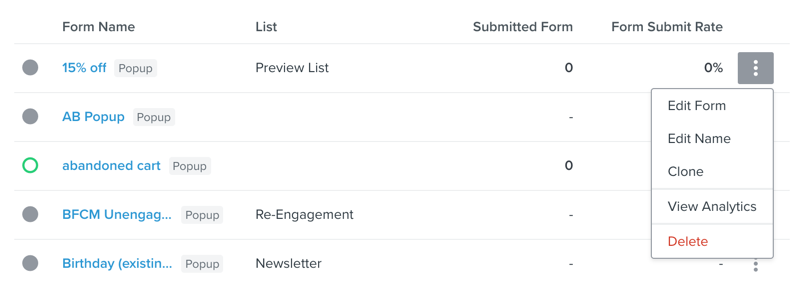
- Click the dropdown menu beside the name of the form
- Select Edit Name
- Update the name of the form in the Edit Form Name modal
- Click Save Form
- Navigate to the Signup Forms tab
- Click the dropdown menu beside the name of the form
- Select Clone
- Name your new, cloned form
- Confirm the list you want the form to add subscribers to; by default the clone form will be connected to the same list as the original, but you can select a new list if you want
- Click Clone Form
- Navigate to the Signup Forms tab
- Click the dropdown menu beside the name of the form
- Select View Analytics
- View the performance of the form on the Form Analytics Overview page
-
Deleting a form removes it from your account permanently. If you would prefer to turn your form off without deleting it, unpublish the form.
- Navigate to the Signup Forms tab
- Click the dropdown menu beside the name of the form
- Select Delete
- Click Delete Form to confirm you want to delete the form from your account
Forms save automatically, but while you are directly editing a signup form you may see it appear in "Editing" mode. If your form is in draft mode, your changes will be incorporated once you publish the form.
If your form is live, changes won't be displayed until you choose to publish the edited version on your site. This allows you to edit your form, come back to it, and review it with your team before publishing it on your site. For this reason, you will see your form in editing mode before you publish the new changes, even though they are saved automatically.
When turning a draft form live, you will automatically be prompted to publish the form.
When making edits to a form that is already live, you will have to publish the edits before they appear on your site. Once you make a change to a live form, it will automatically be saved. However, you will then see the option to publish changes beside the form's live status.
Once you're ready to push the edits to your site, click Publish Changes.
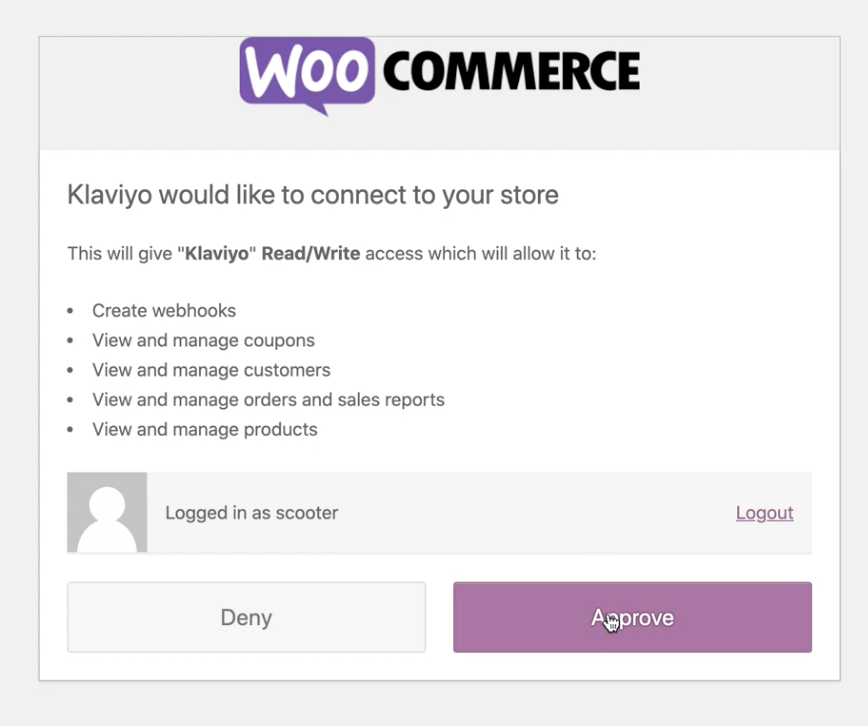
- Confirm that you are logged in to the correct Klaviyo account by checking the account name displayed in the authorization window.
If you need to switch accounts, click Logout and then log in to the correct account before proceeding.
When you are ready, grant Klaviyo read/write permissions by clicking Approve.
- You’re almost done! The Klaviyo installation wizard will walk you through the final steps to connect WooCommerce to your Klaviyo account. On the integration settings page, confirm the account name is correct.
Subscriptions
- Check the box next to Collect email subscribers to easily add this option to your WooCommerce site.
- Select a list from the dropdown under Add email subscribers to this list. If no lists are available in the drop down, head over to the Lists & Segments tab to create a new list.
Anyone who subscribes via the checkbox during checkout will be added to this list. Consent is sent to Klaviyo after the customer clicks the submit order button during checkout. - Under Email marketing consent label, enter the consent language you wish to appear next to the checkbox on your checkout page. The default language is Sign me up to receive Email updates and news
- Check the box next to Collect SMS subscribers if you want to add this option to your WooCommerce site.
- Select a list from the dropdown under Add sms subscribers to this list. Users who consent to SMS marketing via this checkbox will be subscribed to the list you select. Consent is sent to Klaviyo after the customer clicks the submit order button during checkout and the order is created in WooCommerce.
- Under SMS marketing consent label, include the text you wish to appear next to the checkbox on your checkout page.
- Next, add SMS consent disclosure text, which is required for TCPA compliance. Use the default Klaviyo consent language or add your own.
Advanced
- If you wish to convert all future Placed Order and Ordered Product events to a selected currency, check the box for Convert all currencies to one standard currency. This will not apply retroactively to previously placed orders that sync to Klaviyo.
- When you are satisfied with these settings, click Connect to WooCommerce. You can go back and edit these settings at any time by locating the integration from the Integrations tab and choosing View Settings.
Congratulations! Your WooCommerce account is now connected to Klaviyo. Check out the setup wizard for a few recommendations on what to do next. When you’re finished, click Go Back to Klaviyo to return to your dashboard.
Troubleshooting
If you received an error message "Unable to test API by fetching order count. Invalid count" this means that when Klaviyo tries to validate the WooCommerce integration and get a count of orders, their API doesn’t return a value Klaviyo expects or it returns nothing at all. Since the integration hasn't officially connected to Klaviyo yet, this means that it needs to be resolved within WooCommerce.
To get more information about this error, use an application like Postman to make an API call to the order count endpoint which will provide more insight into what is being passed to Klaviyo.
The endpoint you need is: {customers-url}/wc-api/v1/orders/count
Change {customers-url} to your WooCommerce store URL.
Test Your WooCommerce Integration
To test out your integration and plugin, go to your website and follow these instructions:
- Add an item to your cart.
- Proceed to the checkout page.
- Fill in your email address and phone number on the checkout page. If enabled, check the boxes to subscribe to email and SMS marketing.
- Submit your test order.
- Check for the following (these may take a minute or two to update):
- Started Checkout event logged under Recent Data
- Profile created in the lists you selected for email and SMS marketing
- Placed Order event logged under Recent Data
Recent Data
The Recent Data section displays the most recent instance of an event.
Historical Data
The Historical Data Progress bar updates in real-time as your historical sync is processed.
Next Steps
Congratulations on getting set up! With your account setup and integrated, it's time to start using Klaviyo's core features. After you are done with the items in this category you'll be all set to get the most out of Klaviyo's features.
Rebuilding Carts from an Abandoned Cart Flow
You can use WooCommerce Data to Rebuild Carts from an Abandoned Cart Flow.
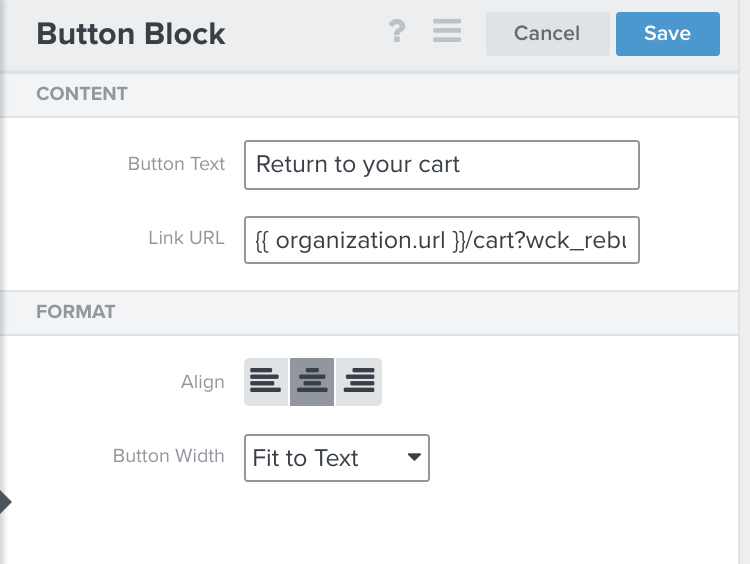
We will generate a key on the Started Checkout event that allows you to create a link that rebuilds the customer's cart in case they return to their cart via an email triggered by this event on another device. You can create this link using the following url parameter in an Abandoned Cart flow email triggered by a Started Checkout:
/cart?wck_rebuild_cart={{ event.extra.CartRebuildKey }}
Assembled, the url should look like the following:
{{ organization.url|trim_slash }}/cart?wck_rebuild_cart={{ event.extra.CartRebuildKey }}
The dynamically-generated product title link pulls directly from the URL you have inserted in your account settings. If needed, this URL can be updated in the email template editor.
If you are using {{ organization.url }} to link to a non-secure HTTP URL, you will need to manually add your URL using HTTPS for the cart to rebuild correctly.
 Raise a ticket and CRU can set up the plugin connection as well as customise the integration to support CRU Club "Groups" (includes Set Up Fee if adding CRU Club Groups support due to the added work to customise the plugin).