Page Builders
Over the years CRU has used different page builders across our sites. With the more recent changes to Wordpress and the way we develop websites, we move into using the newer Gutenberg Blocks as well as our favourite, Advanced Custom Fields. As it is impossible for CRU to provide all of the documentation for each of the page builders we are using, we will highlight the most common features and provide links to the specific page builders knowledge base articles.
How can I tell which page builder I am using?
The best way to figure out which page builder is to check one of the pages on your website and match it to one of the below screenshots:
WP Bakery
Visit this article to know more: WPbakery
Visual Composer
Visit this article to know more: Visual Composer
Advanced Custom Fields

Note: we use this as either the only page builder or, we use it in conjunction with the above page builders as we can insert more styles/features. We suggest checking to see if you are using both a page builder and ACF
Wordpress Gutenberg
WP Bakery
Changing the Background Image using the Page Builder
To change the Background Image of a Row element, edit your page with the FrontEnd Page Builder.
Hover your mouse over the Row element which has the background image that we want to change.

- Click the Edit Row button – it’s the Pencil Icon.
- In the new Pop-up Window -> go to Design Options Tab
- Find the Background Image attached to the row element and click the X sign.
- Next click the + sign and the Media Library will be opened. Upload a new image or navigate the Media Library and choose a new Image to be used for the Background Image.
- Click the Set Image button.
- The new image will appear in the Design Options tab.
- Click the Save Changes button and now the Row element will use our new Background Image.
Just below the Background Image, you will notice a select box, which for a default Row element it will be set to Theme defaults, but in our case it will be set to Cover. The Cover option allows our image to take the entire space of the Row element, in both width and height.
How to check the Dimensions of an Image to be Replaced
- Go to the media library and select the image you want to replace with
See the 'Dimensions' line to check the dimension of the image you want to be replaced
Change Hover color on Text over Image and Buttons
This troubleshooting guide is for clients using WP Bakery Visual Composer as the page builder
Text Over Image
- On the Edit Page page, hover the cursor over the Image with Text Over element and click the pencil icon
- Change the Image Shader Hover Color and click Save changes button. Note that it is on RGBA mode
Buttons
- On the Edit Page page, hover the cursor over the Button element and click the pencil icon
- Change the Hover Background Color and Hover Border Color and click Save changes button.
How to upload PDF files that's accessible on the Frontend
- Click Media > Add New
- Drag the PDF file or click Select Files button, then wait for the file to finished uploading.
- Then back on the Text Block Settings on the edit page, click Add Media button
- Then, under the Add Media, locate the PDF file that you have uploaded and click on it.
- Then click the Insert into Page button at the lower right part


Advanced Custom Fields
Changing Background Image
- On the edit page scroll to the section where the background image is located
- Make sure you are on the Content tab
- Click the X icon to remove the image
- Click Add Image button and select or upload the new image
- Save your changes by clicking the Update button
Visual Composer
Editing text via Visual Composer
You may follow this guide:
- On the admin dashboard, click Pages
- Hover the cursor over the page you want to edit which is, in this case, is the Cellar Door page and click on Edit with Visual Composer
- Click the 3-layer icon to show the elements on the page
- Collapse the rows and columns until you see the text or element you want to edit. Every time you hover to a row, column or element, it will highlight on the preview (see green highlight on the preview side of the image)
- Hover the cursor over the element you want to edit and click on the pencil icon
- Edit the text inside the WYSIWYG editor
- Click the Check icon to save your changes.
WordPress Gutenberg
Gutenberg is the default WordPress editor introduced in WordPress 5.0. As a replacement for the TinyMCE editor, it offers a different way to create interactive posts and pages.
After the WordPress 5.9 update, Gutenberg became more than just a content editor. It includes all aspects of customization to provide a full site editing (FSE) experience, which means you’ll be able to build and design your entire WordPress site using the editor.
Using a block-based approach, Gutenberg includes every element you typically need to create a web page, such as paragraphs, headings, lists, buttons, widgets, embeds, and columns.
It also provides a better visual representation of the page, making it more like a page builder than the previous WordPress editor.
Gutenberg Editor vs Classic Editor
Although the Gutenberg editor and the classic editor serve the same purpose, there are clear differences between the two:
- Editor interface. The classic editor offers a simple text editor resembling Microsoft Word. On the other hand, the WordPress block editor has a responsive and intuitive interface, where all icons are self-explanatory and easy to reach.
- Content creation. The classic editor provides a blank area for writing posts and pages. In comparison, the Gutenberg WordPress block editor has more features for creating content and managing its visual aspects efficiently.
- Ease of use. The classic editor requires basic HTML knowledge to enjoy all its possibilities. The newer tool doesn’t require technical expertise – simply drag and drop blocks to create pages and posts.
- Features. The classic editor offers basic formatting features for site editing and lacks design flexibility. It is not an ideal option to create media-rich pages or complex layouts. On the other hand, the new WordPress editor includes features such as reusable blocks for creating templates.

Pro Tip
While the new block editor comes pre-installed in WordPress 5.0 and higher, users with older versions of WordPress can also use the block editor by installing the Gutenberg plugin. However, we highly recommend updating the core WordPress software to the latest version. If you get WordPress hosting specifically designed for this CMS, you’ll be able to update the versions automatically from the control panel.
How the Gutenberg Editor Works
The Gutenberg WordPress editor uses the concept of individual content blocks to add and edit various elements in posts and pages.
Each of them is a standalone component that you can customize and manipulate, providing in-depth control and flexibility. For example, you can set a different background color or width settings for an entire block without affecting other elements.

To find all blocks, click the Block Inserter + icon. It lists them in a collapsible panel according to their structure. Each of them has a different configuration and design tools.
For example, the paragraph block has options for changing its color and typography. On the other hand, the image block has tools to add alt text and adjust the image dimensions.
With WordPress’ latest updates, the default content editor offers many new features to support full site editing, such as:
- Site editor. Edit and navigate between templates, their elements, and styling options.
- Template editing mode. It enables you to directly edit, change, and create a post or page’s template.
- Block theme. Build WordPress themes using FSE-compatible blocks.
- Styling. It lets you modify styles in three levels – global modifications, local blocks, and theme defaults.
- Theme blocks. Create traditional templates using template tags. The current WordPress editor includes Post Author, Post Comments, Read More, Avatars, and Query Loop blocks.
- Browsing. Navigate between pages, templates, and posts right on the editor.
- Navigation block. Edit the structure and design of a site’s navigation menu.
- Query block. It duplicates WP_Query and allows you to customize it with additional functionalities.
Furthermore, Gutenberg includes block patterns that consist of pre-arranged blocks. They usually contain multiple column layouts, button arrangements, and image compositions.
Developers and experienced WordPress users can build their own WordPress blocks and block patterns and share them with others via plugins.
How to Use the WordPress Gutenberg Block Editor
Building and managing a WordPress website using the Gutenberg editor is quite easy. To help you get started with full site editing, the next sections will provide guides on how to create and edit blocks.
How to Create a New Block
The first step when adding a post is to create a new block, which is relatively easy using the Gutenberg WordPress editor.
Keep in mind that the first block of every page or post is the title. Simply move your cursor below it and follow these steps to create a new block:
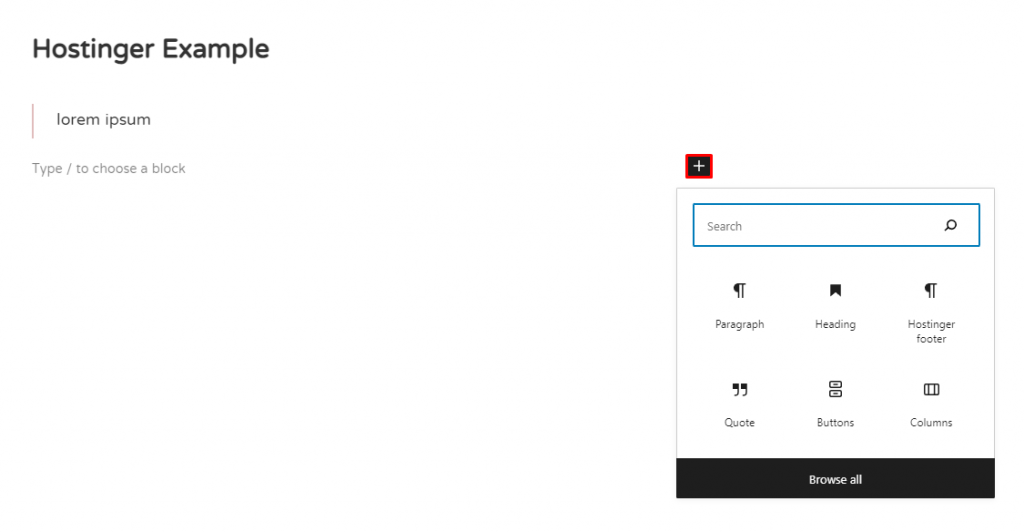
1. Select the Block Inserter+ icon on the top toolbar.
2. Select your desired block. In this example, we’ll choose Quote.
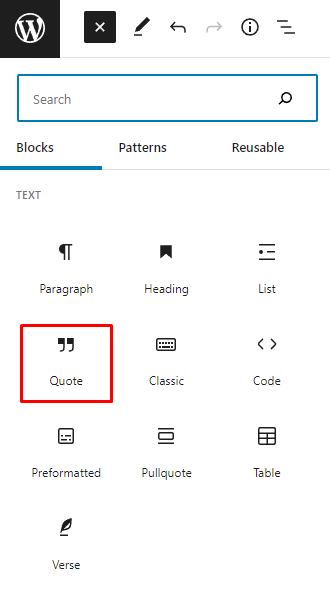
3. To add more blocks underneath the quote, simply click the + icon, as shown below. Keep in mind that whenever you hit Enter, the WordPress block editor will automatically create a new paragraph block.
4. You’ll see a panel showing the frequently used blocks. To search for a specific one, use the search bar or click Browse all.
How to Customize Blocks
You can adjust all blocks inside the WordPress block editor to fit your preference and improve the visual design of your website.
Here’s how to do it:
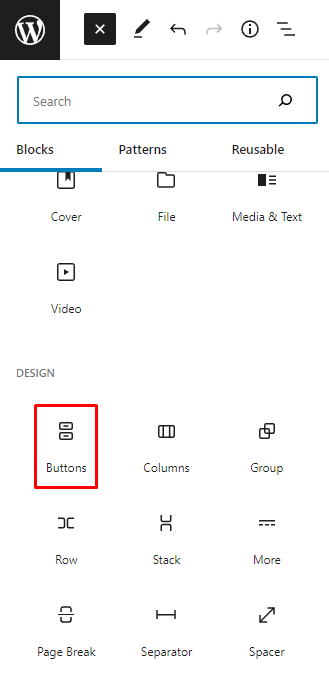
1. Click the + icon on the top toolbar to open the Block Inserter interface.
2. Choose a block. In this example, we’ll select the Buttons block.
3. Once the button is added, the block settings will appear. Alternatively, click Settings on the top-right corner of the editor to load the Sidebar panel.
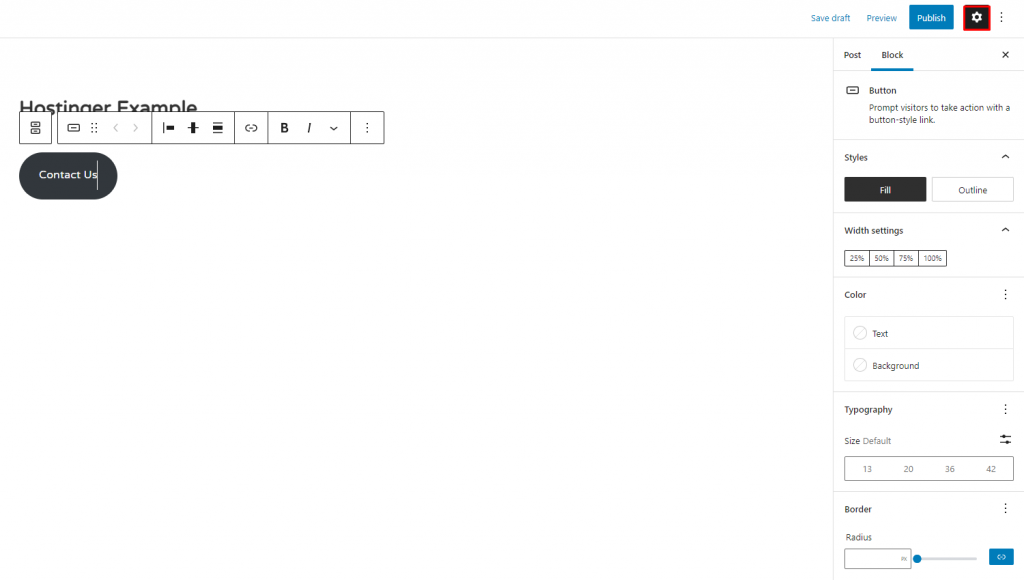
4. On the Block settings, you can style the button using Fill or Outline.

5. You can also adjust the Width Settings, which range from 25% to 100%.

6. In the Color section, it’s possible to change the color scheme of the button’s text and background.

7. On the Typography settings, you can determine the button size by using either the default options or custom sizes.

8. On the Border settings, adjust the button’s border by toggling the dot.

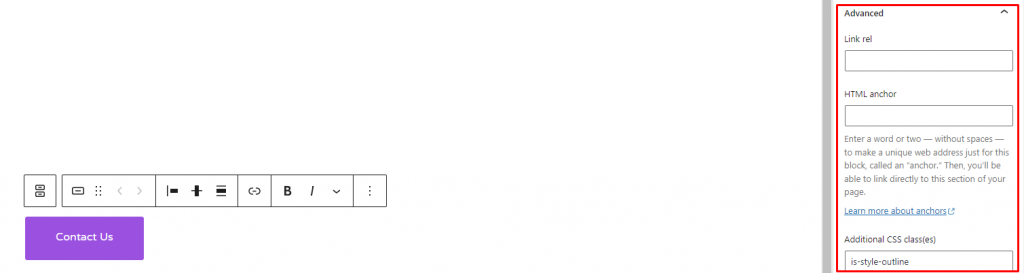
9. At the bottom of the Sidebar, you’ll find the Advanced section for adding Link rel, HTML anchor, and Additional CSS class(es).
How to Add Headings and Text
The next step when building a site page is adding headings and text. Headings define the content’s importance levels and how ideas are interconnected.
Follow these instructions to add headings and text:
1. Select the + icon in the top toolbar. Alternatively, choose the + icon inside the content interface.
2. The list of available WordPress blocks will appear. Click Heading.

3. You can customize its appearance using the block toolbar.
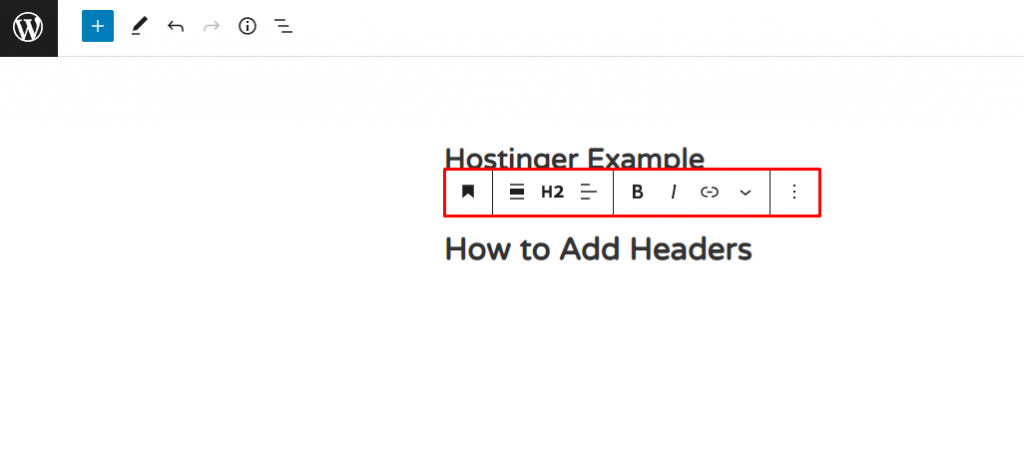
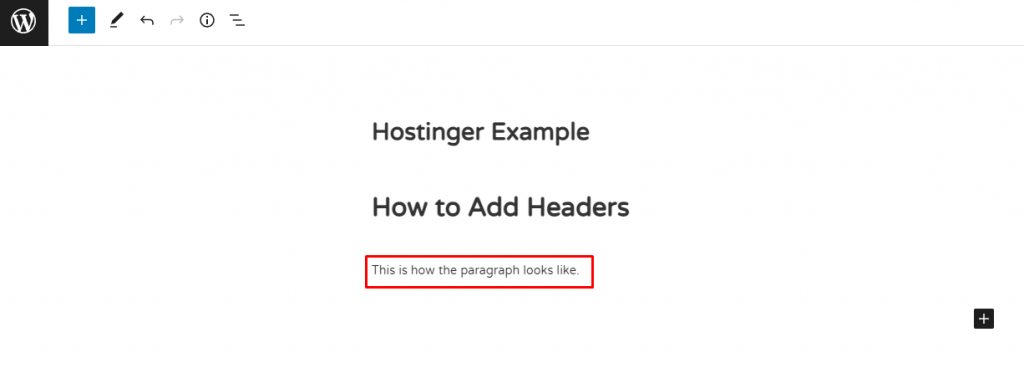
4. To add other text elements, choose an option from the Text section within the available blocks. We’ll choose Paragraph.
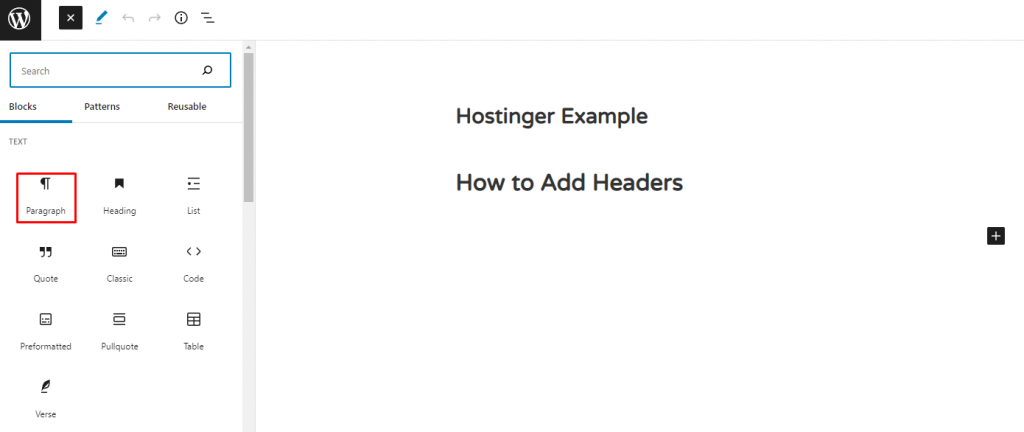
5. This is what it will look like:
How to Add Images and Media
The block editor provides two ways to add images and media files to your site – via the Block Inserter or the + icon inside the content interface.
Here’s how to add images and media using the first option:
1. Click the Block Inserter button on the top toolbar.
2. The list of available blocks will appear. We’ll choose the image block.
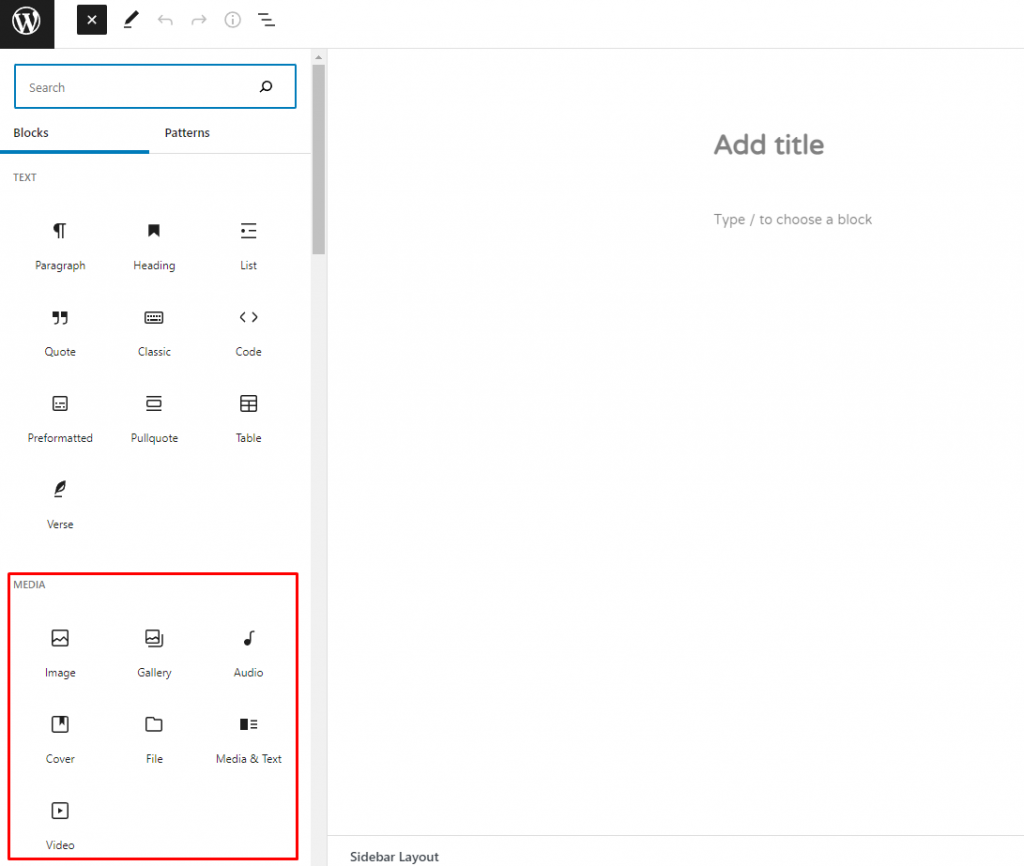
3. The three uploading options will appear – upload, media library, and insert from URL.
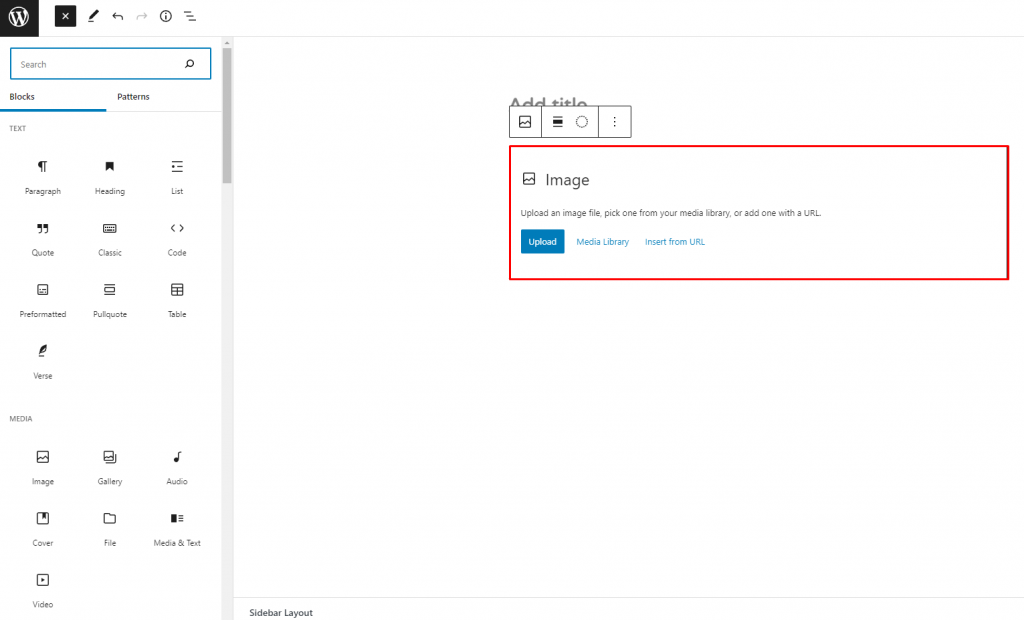
4. Choosing the Upload option, for example, you’ll have to select an image file and click Open. Alternatively, drag and drop multiple image files at once.

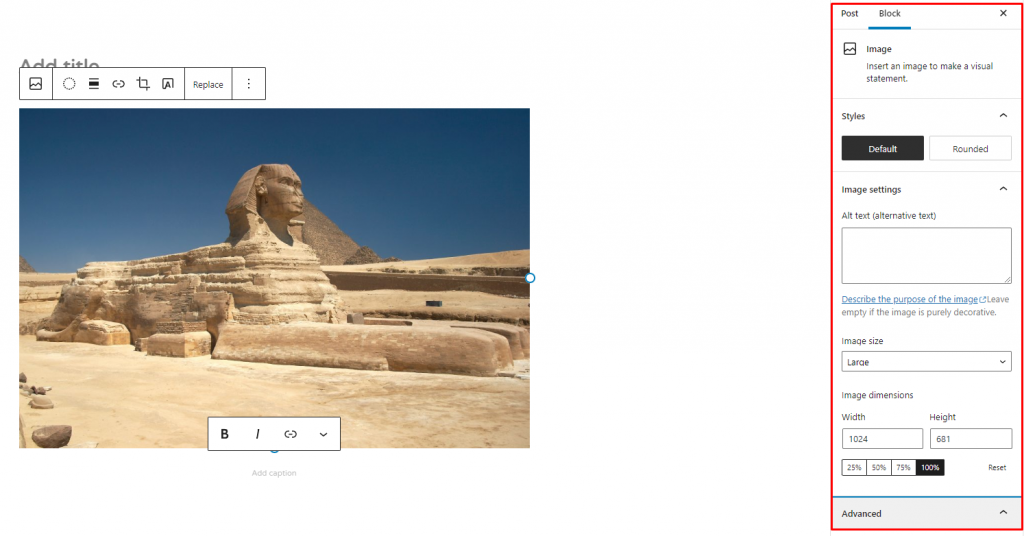
5. Adjust the image by using the Settings Sidebar panel on the right side of the Gutenberg block editor.
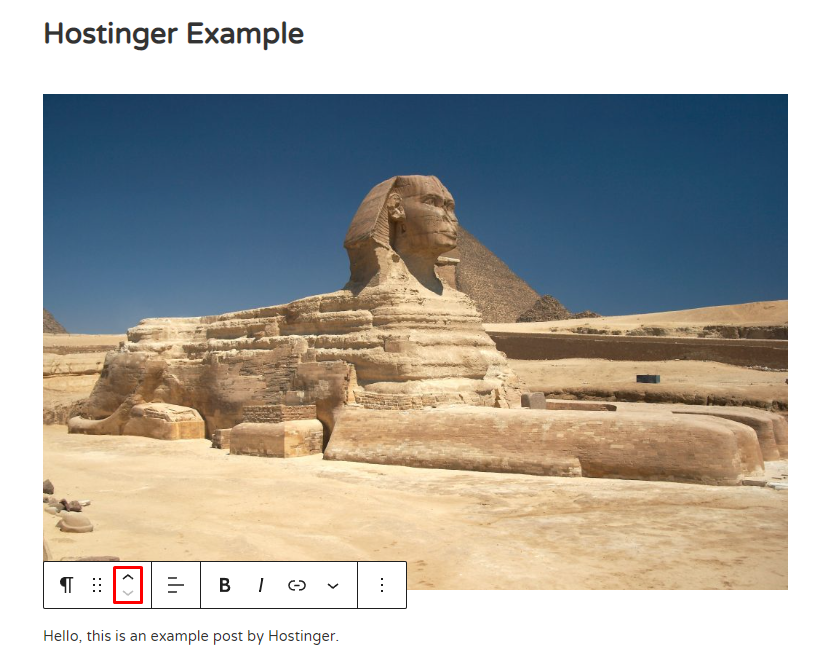
How to Arrange Blocks
Gutenberg provides two ways to rearrange blocks using the floating toolbar. Using the six dots icon, you can select multiple blocks and drag and drop them anywhere.

On the other hand, the up and down arrows allow you to move a block up or down.
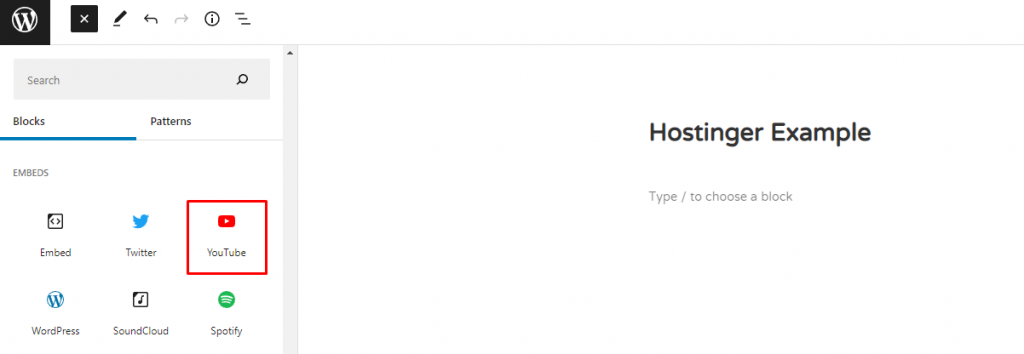
How to Embed Media
When it comes to embedding content from other platforms, the WordPress block editor includes a separate section for embedding media files and provides many sources to choose from.
Here’s how to do it:
1. Click the + icon on the top toolbar.
2. Scroll down to find the Embeds section.
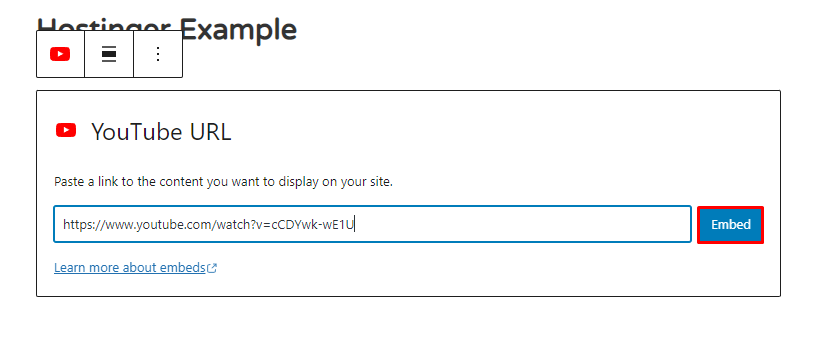
3. Select the media you want to add. In this example, we’ll embed a YouTube video into our content.
4. Paste the video URL and click Embed.
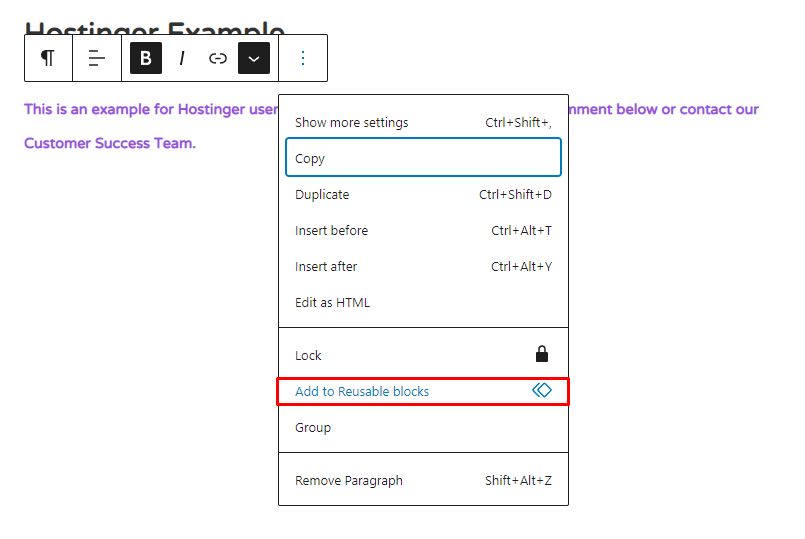
How to Create Reusable Blocks
Reusable blocks are a collection of content snippets that you can use anywhere on your site, helping you work more efficiently.
They work like templates so, if you update one, those changes will apply to all pages and posts that use the block.
Follow these steps to create reusable blocks:
1. Choose a section that you want to save as a reusable block.
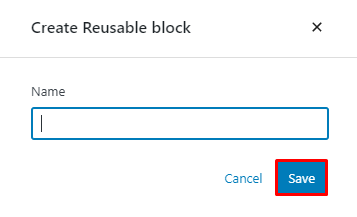
2. Select the three-dots icon from the block’s toolbar and click Add to Reusable blocks.
3. Name the block and select Save.
4. Now you can place the block anywhere on the site.
To use it, search it from the list of available blocks by clicking the + icon.

Alternatively, type “/” (forward slash)and the name of the block.
How to Use Gutenberg Keyboard Shortcuts
The WordPress block editor has many keyboard shortcuts to help you work efficiently and navigate around its interface smoothly.
Here is the list of all the Gutenberg block editor keyboard shortcuts and their functions:
| Keyboard Shortcuts | Functions |
| Shift + Alt + H | Displays all the keyboard shortcuts. |
| Ctrl + Shift + Alt + M | Switches between the visual editor and the code editor. |
| Ctrl + Shift + Alt + F | Toggles the fullscreen mode. |
| Ctrl + Shift + , | Shows or hides the Settings Sidebar panel. |
| Ctrl + S | Saves changes. |
| Shift + Alt + O | Opens the Block List View. |
| Ctrl + Z | Undo the last changes. |
| Ctrl + Shift + Z | Redo the last undo. |
| Ctrl + A | Selects all text while typing. Press it again to select all blocks. |
| Esc | Clears a selection. |
| Ctrl + Shift + D | Duplicates the selected blocks. |
| Shift + Alt + Z | Removes the selected blocks. |
| Ctrl + Alt + T | Inserts a new block before the selected blocks. |
| Ctrl + Alt + Y | Inserts a new block after the selected blocks. |
| del or backspace | Deletes the selected texts. |
| Ctrl + Shift + Alt + T | Moves the selected blocks up. |
| Ctrl + Shift + Alt + Y | Moves the selected blocks down. |
| / | Changes the block type after adding a paragraph. |
| Ctrl +B | Bolds the selected text. |
| Ctrl + I | Italicizes the selected text. |
| Ctrl + K | Converts the selected text into a link. |
| Ctrl + Shift + K | Removes a link. |
| [[ | Inserts a link to a post or page. |
| Ctrl + U | Underlines the selected text. |
| Ctrl + ` or Shift + Alt + N | Navigates to the next part of the editor. |
| Ctrl + Shift + ` or Shift + Alt + P | Navigates to the previous part of the editor. |
| Alt + F10 | Navigates to the nearest toolbar. |
If you use Mac, simply switch Ctrl with Command (⌘).
You can also find this list by clicking on the three-dots icon on the top-right corner of the WordPress block editor and selecting Keyboard shortcuts.
How to Use the Block List View
You can click the Block Inserter icon to search for other blocks. However, if you’re using nested blocks, finding a specific one can be challenging.
Also, when you have many different blocks on your WordPress block editor, it will be difficult to browse through all of them.
To simplify this process, the Gutenberg WordPress editor has a block list view option that lets you see every single block in the design, including indented nested blocks. Simply click the List View button on the top toolbar.

You can select or expand a block by clicking on the list. At the same time, the editor will highlight the block if you hover over it.
In the example above, the feature lists:
- A heading block on top of the post.
- The primary parent columns block.
- Nested blocks inside each column.
- Nested reusable blocks on every column block.
- Nested paragraph blocks inside each reusable block.
- A paragraph block at the bottom of the post.
Blocks vs Widgets
Widgets are one of the oldest WordPress features. Initially, they were created to easily build and manage a site’s contents without coding.
However, legacy widgets have limited formatting options and involve lots of manual work since they were created with the classic widgets editor. Often, they even require additional plugins for advanced features.
Since WordPress 5.8, the block-based widgets editor has replaced the classic option. The newer feature comes with many improvements, allowing users to customize their pages further, even in areas where it used to provide less control.
Moreover, it has many pre-installed WordPress block-based widgets that you can use without additional plugins or code, such as custom HTML, calendar, page list, latest posts, social icons, and tag cloud.
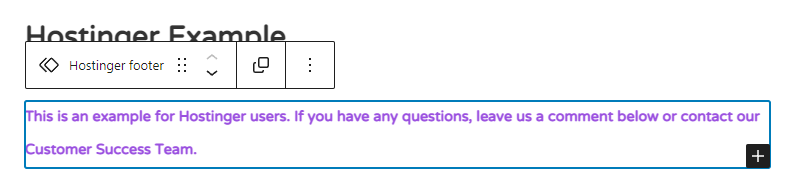
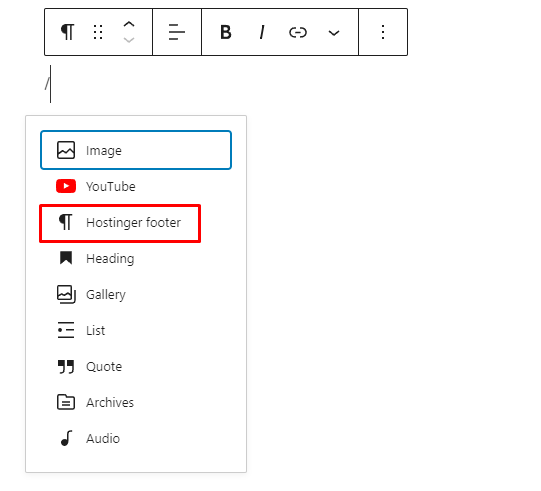
What's new for the Product Page
Awards
The awards block is now a default block. You can add as many awards as you would like to display on the product.
- Click on the "Add New" button, choose the Award type on the dropdown and upload the award image.
- Use a PNG image that is 250x250px in size.
Product Fields
Another default block is called Product Fields.
1) You can modify the Product Header image here and its orientation.
2) Specification and Reviews of the product are now also available (frontend display will look like the below).
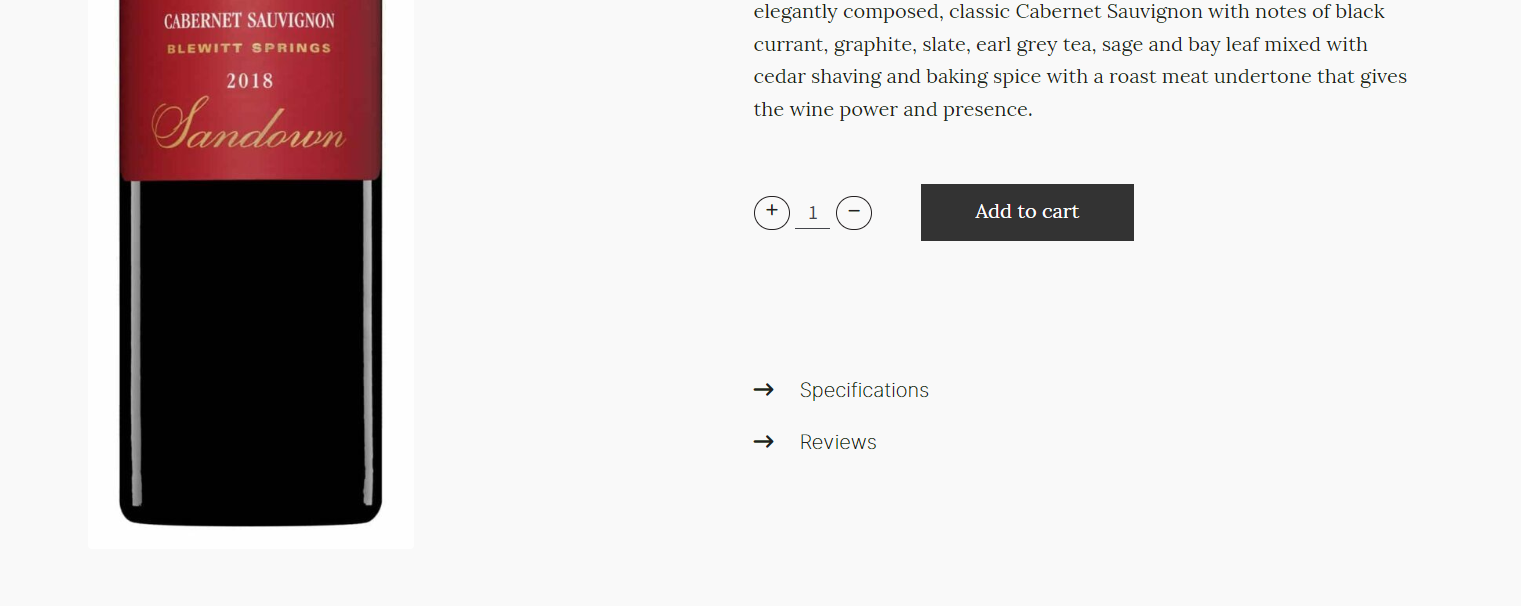
2) Specification and Reviews of the product are now also available (frontend display will look like the below).
Below is where you can modify them, simply look for the Product Fields block.
You may switch to edit the Specifications and the Reviews by clicking their corresponding Tabs
You may switch to edit the Specifications and the Reviews by clicking their corresponding Tabs
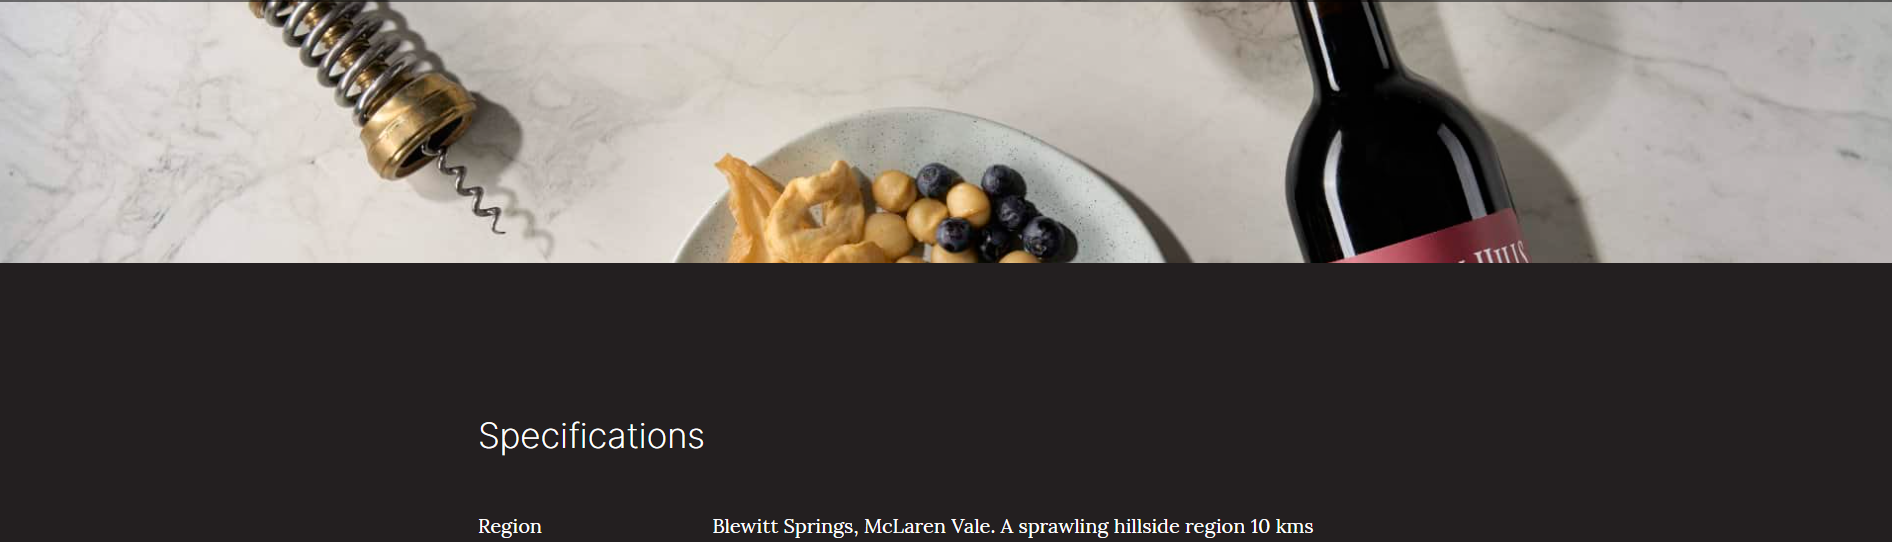
The lifestyle image should show when a user scrolls down to see the specification and reviews, see below:
How to Copy Element
- Go to the page where the section you want to copy is located
- Click on the hamburger logo on the top to open the element list
- Select the column you want to copy and click on the 3 dots icon
- Click copy
- Go to the page you want the element to be pasted.
- Click the blue plus icon
- Select the Paragraph element
- You will see a paragraph element added on the lowest part of the page.
- Paste your copied column here by using ctrl + v or just right click then paste
- You can drag your new pasted element anywhere on the page by dragging and dropping the element on the element list view
Related Articles
Visual Composer
Visual Composer API allows you to develop your own custom elements for the website builder. With custom elements, you are in charge of your element design and functionality which is crucial for advanced projects and allows perfectly aligned element ...WP Bakery
Getting Started See links below: WPBakery Page Builder Tutorial for Beginners Start Building Page or Use Default Templates Video Tutorials We colated a list of videos that can help and guide you. WPBakery Page Builder Navigation Interface Start ...On Page SEO
Description: Search Engine optimisation includes a number of strategies that fall into two main categories - Off-Page SEO (things that occur off your site that often cannot be controlled) and on-page SEO. On Page SEO is the practice of optimising web ...Slider Revolution - User Guide
Adding, Deleting and Duplicating Slides Let’s check out the basics of slide management. The Slides Menu Slide management is done via the Slides menu, found in the module editor’s top menu. Hover over that menu and you’ll see a list of the slides that ...Checking Your Woocommerce Product Image Resolution/Size
To check to see what resolution and size your product images should be follow the below instructions. Navigate through Appearance -> Customise -> Woocommerce -> Product images Main image width is the width to be used for the single product and the ...