Product Add-Ons - User Guide
Setup and configuration
Product Add-ons allows you to add options to multiple products in bulk, or to individual products in your catalog. These are not treated as individual products and thus don’t have their own SKU for inventory tracking. Also note that add-ons added to a variable product are inherited by all variations. It is not possible to define different add-ons per variation.
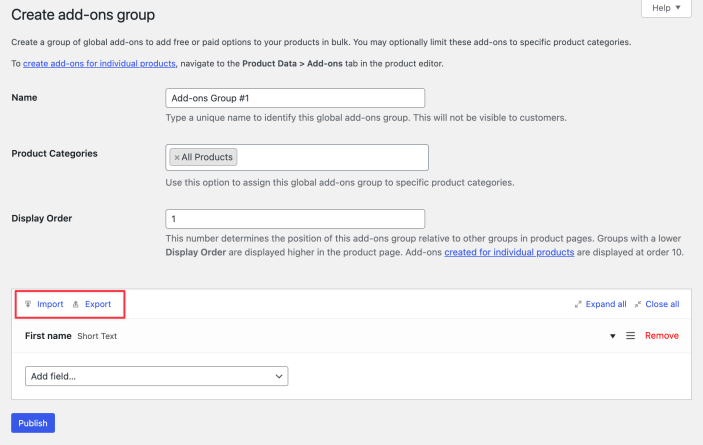
- To add options to your products in bulk, you can create global add-ons. You may optionally limit these add-ons to specific product categories.
- To add options to individual products, you can create per-product add-ons. Optionally, you can also prevent global add-ons from being applied to any individual product.
Global Add-ons
To create Global Add-ons, go to Products > Add-Ons and select Create your first add-on.

Global add-ons are organized in groups. Each group has the following options:
- Name: This is a unique name to identify each global add-ons group and will not be visible to customers.
- Product Categories: By default, Global add-ons are inherited by every product in your store. However, you can use this option to limit individual add-on groups to specific product categories.
- Display Order: This number determines the position of the add-ons group relative to other groups in product pages. Groups with a lower Display Order are displayed higher on the product page. Add-ons created for individual products are displayed at order 10.
To add a new add-on field in a group, pick an add-on type from the Add field dropdown.

Per-product add-ons
To create add-ons for individual products:
- Find and edit a product in your store.
- Go to the Product data > Add-ons tab.
- Select an add-on type from the Add field dropdown.
Alternatively, you can import some add-ons from another product.

To prevent any individual product from inheriting global add-ons, you may uncheck the Use Global Add-Ons? option.
Add-On types
The Extension support the following add-on field types:
- Multiple Choice — Shows a list of options as dropdowns, images, or radio buttons. Users can select only a single option per add-on.
- Using radio buttons, there will be a default option added for None.
- Checkboxes — Shows a list of optional checkboxes. Users can tick more than one checkbox to select multiple additional options.
- Short Text — Shows a short text field where users can enter either any text, or only letters, or only numbers, or only letters and numbers, or only an email address.
- Long Text — Shows a long text field where users can write multiple lines of text. It is possible to limit how many characters users are allowed to type.
- File Upload — Shows a button, which users can use to upload a file.
- Customer Defined Price — Shows a field where users can enter a numerical value that is added to the product price.
- Quantity — Shows a field where users can input a custom quantity.
- Heading — Shows a heading between add-ons to group them into sections.
- Date Picker — Shows a calendar where customers can select a specific date.
Multiple Choice
The Multiple Choice add-on displays a list of options for customers to choose from.

- Title: The title of each add-on is displayed above the individual options. It is possible to format the title as a Label, a Heading or hide it.
- Display as: The Multiple Choice add-on options can be displayed as a dropdown, as a radio buttons group, or as a collection of images.
- Default option: Choose an option to be selected by default.
- Add description: Enable this option to add additional information about the add-on. The description is added below the add-on’s title and can accept HTML code.
- Require selection: Enable this option to require customers to configure this add-on before adding the product to the cart.
Use the Add Option button to create your options. You may specify a label for each option and, optionally, a price. It is possible to:
- specify a flat fee price
- dynamically calculate it based on the product quantity
- define it as a percentage of the total price
- reduce the price of a product by adding a negative value to the price field
Moreover, it is possible to hide some options that are temporarily unavailable.

Checkboxes
The Checkboxes add-on displays a list of additional options as checkboxes. This add-on type is great for offering product updates or additional services, such as gift wrapping. Customers can select multiple checkboxes.
- Title: The title of each add-on is displayed above the individual options. It is possible to format the title as a Label, a Heading or hide it.
- Add description: Enable this option to add additional information about the add-on. The description is added below the add-on’s title and can accept HTML code.
- Require selection: Enable this option to require customers to configure this add-on before adding the product to the cart.
Use the Add Option button to create checkbox fields You may specify a label for each option and, optionally, a price. It is possible to:
- specify a flat fee price
- dynamically calculate it based on the product quantity
- define it as a percentage of the total price
- reduce the price of a product by adding a negative value to the price field
Moreover, you can choose some options to be selected by default, and hide some options that are temporarily unavailable.


Short Text
The Short Text add-on displays a short text field for customers to fill in. This add-on type is great for filling in personal data, like name or email address, and for further customizing a product, by adding an engraving or a printed text.
- Title: The title of each add-on is displayed above the text field. It is possible to format the title as a Label, a Heading or hide it.
- Restriction: By default, users can fill in any text in the Short field add-on. Use this option to allow users to fill in Only Letters, Only Numbers, Only Letters and numbers or Only Email Address.
- Add description: Enable this option to add additional information about the add-on. The description is added below the add-on’s title and can accept HTML code.
- Add placeholder: Enable this option to add a placeholder to this field.
- Require input: Enable this option to require customers to configure this add-on before adding the product to the cart.
- Limit character length: Enable this option to limit how many characters users can type into this field.
- Adjust price: Enable this option to add another cost or discount. The price can be a flat fee, dynamically calculated based on the product quantity, or as a percentage of the product price. To apply a discount, use a negative value in the price field.


Long Text
The Long Text add-on displays a long text field for customers to fill in. This add-on type is great for allowing customers to type lengthier texts, like a gift note or special instructions/requests.
- Title: The title of each add-on is displayed above the text field. It is possible to format the title as a Label, a Heading or hide it.
- Add description: Enable this option to add additional information about the add-on. The description is added below the add-on’s title and can accept HTML code.
- Add placeholder: Enable this option to add a placeholder to this field.
- Require input: Enable this option to require customers to configure this add-on before adding the product to the cart.
- Limit character length: Enable this option to limit how many characters users can type into this field.
- Adjust price: Enable this option to add another cost or discount. The price can be a flat fee, dynamically calculated based on the product quantity, or as a percentage of the product price. To apply a discount, use a negative value in the price field.


File Upload
The File Upload add-on displays a button that customers can use to upload their own picture. This add-on type is great for creating custom product designs on t-shirts, mugs, or business cards.
- Title: The title of each add-on is displayed above the upload button. It is possible to format the title as a Label, a Heading or hide it.
- Add description: Enable this option to add additional information about the add-on. The description is added below the add-on’s title and can accept HTML code.
- Require upload: Enable this option to require customers to configure this add-on before adding the product to the cart.
- Adjust price: Enable this option to add another cost or discount. The price can be a flat fee, dynamically calculated based on the product quantity, or as a percentage of the product price. To apply a discount, use a negative value in the price field.


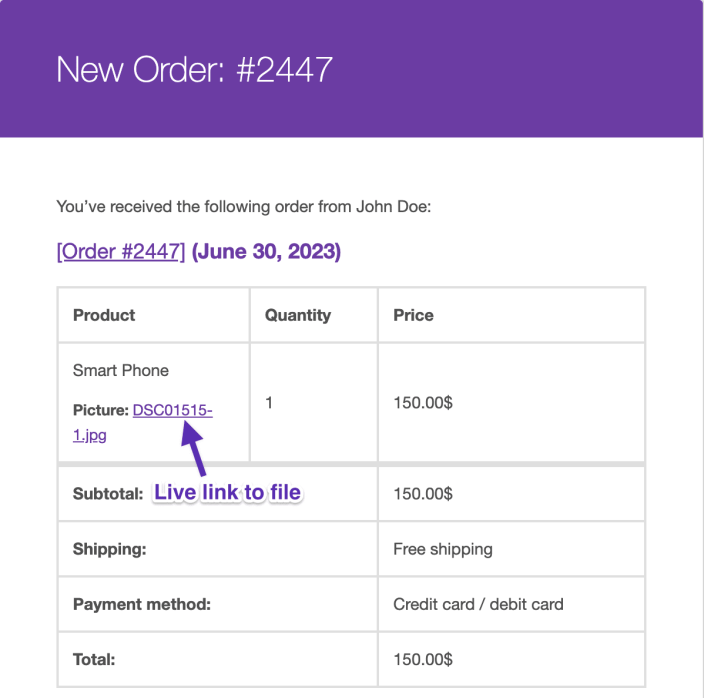
The uploaded file will show up below the line item when editing an order. It will also be listed in the order confirmation emails to the site administrator and shopper.
For added security, uploads are stored in randomized folders under wp-content/uploads/ to make them difficult to find. For example, wp-content/uploads/product_addons_uploads/{customer-id-md5-hash}/filename.ext.

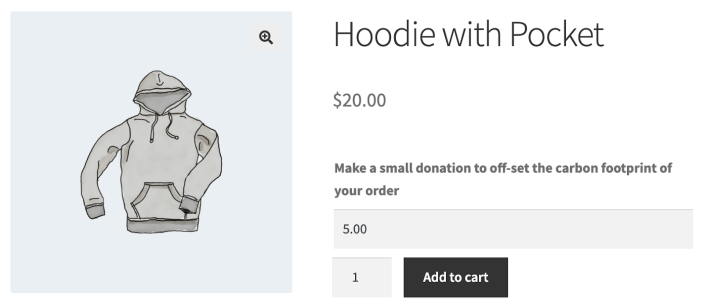
Customer Defined Price
The Customer Defined Price add-on allows shoppers to define the price they want to pay. This price is added to the total product price. This add-on type is great for setting up donations or allowing customers to add a tip to their order.
- Title: The title of each add-on is displayed above the text field. It is possible to format the title as a Label, a Heading or hide it.
- Pre-filled price: The default price for this add-on.
- Add description: Enable this option to add additional information about the add-on. The description is added below the add-on’s title and can accept HTML code.
- Require input: Enable this option to require customers to configure this add-on before adding the product to the cart.
- Limit price: Enable this option to set the allowed price range.

Quantity
The Quantity add-on displays a field where customers can fill in a custom quantity.
- Title: The title of each add-on is displayed above the text field. It is possible to format the title as a Label, a Heading, or hide it.
- Pre-filled quantity: The default quantity for this add-on.
- Add description: Enable this option to add additional information about the add-on. The description is added below the add-on’s title and can accept HTML code.
- Require input: Enable this option to require customers to configure this add-on before adding the product to the cart.
- Limit price: Enable this option to set the allowed quantity range.
- Adjust price: Enable this option to add an additional cost or discount. The price can be a flat fee, dynamically calculated based on the product quantity, or as a percentage of the product price. To apply a discount, use a negative value in the price field.


Heading
The Heading add-on adds a heading to the page, and it is great for separating add-ons into sections.
- Add description: Enable this option to add additional information about the add-on. The description is added below the add-on’s title and can accept HTML code.


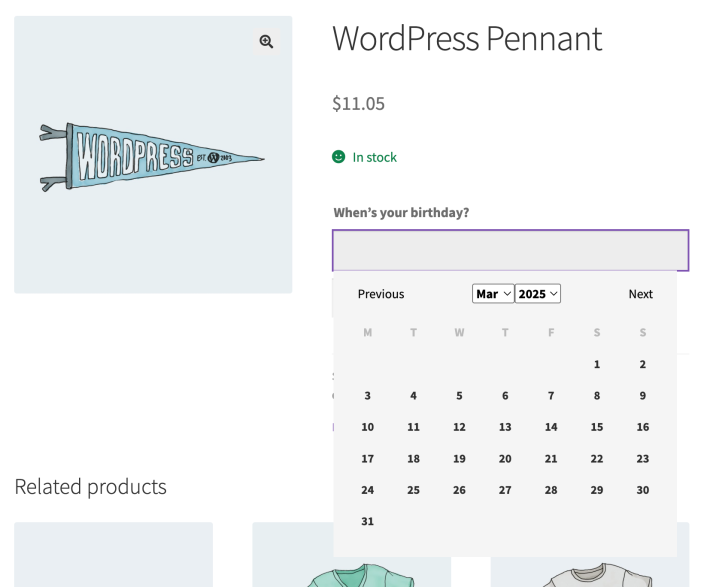
Date Picker
The Date Picker add-on displays a calendar where customers can select a specific date.
- Title: The title of each add-on is displayed above the date picker field. It is possible to format the title as a Label, a Heading or hide it.
- Add description: Enable this option to add additional information about the add-on. The description is added below the add-on’s title and can accept HTML code.
- Require selection: Enable this option to require customers to configure this add-on before adding the product to the cart.
- Adjust price: Enable this option to add another cost or discount. The price can be a flat fee, dynamically calculated based on the product quantity, or as a percentage of the product price. To apply a discount, use a negative value in the price field.

Add-on pricing options
Add-ons can either be free or paid. Add-ons can also apply a discount by using negative values. The selection of a paid add-on increases or decreases the total product price.
Paid add-ons can be:
- Flat fee: The add-on price applies only once, regardless of the quantity ordered.
- Quantity based: the product quantity multiplies the add-on price.
- Percentage based: The add-on price is calculated as a percentage of the product price.
By default, Product Add-Ons only display flat fee rates next to the add-on name on the cart and checkout pages. If you were using quantity for percentage-based pricing, those won’t be shown by default.
To display prices for all price types on the cart and checkout pages, as well as on the order received page, the order in your customers’ account, order emails, you can use the following filters:
For cart and checkout pages:
add_filter( 'woocommerce_addons_add_cart_price_to_value', '__return_true' );For order received, order details, and order emails:
add_filter( 'woocommerce_addons_add_order_price_to_value', '__return_true' );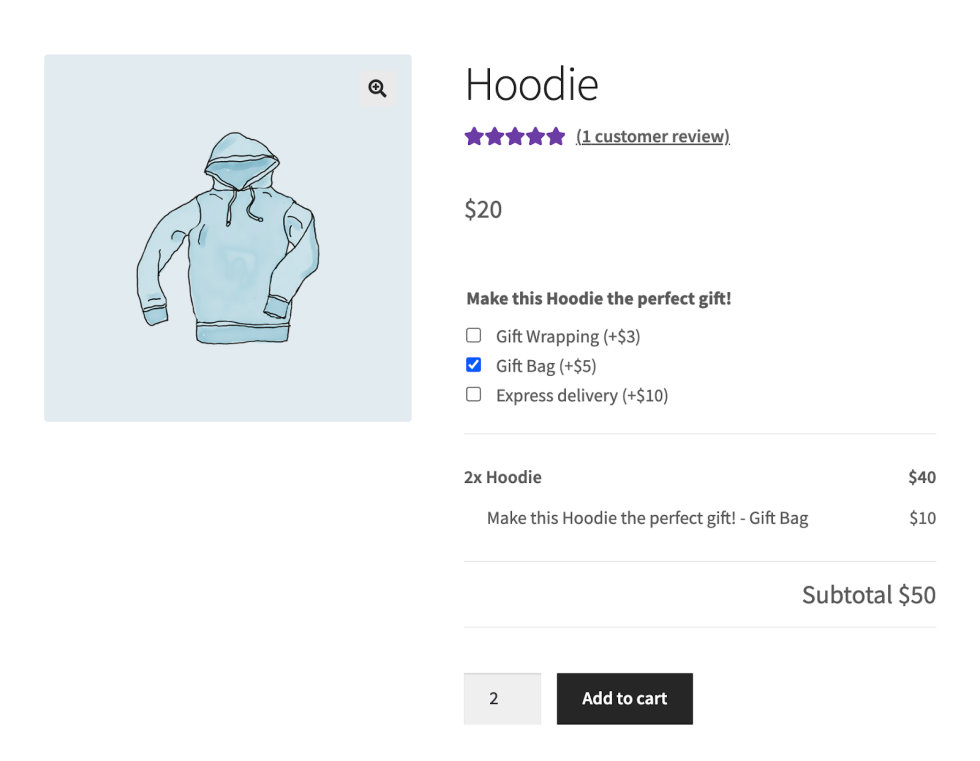

Quantity-based pricing; the add-on price is multiplied by the product quantity Percentage based; the add-on price is calculated as a percentage of the product price
Importing and exporting add-ons
You can import and export add-ons between products or global add-on groups. This does require that you first create an add-on that you’d want to share between products, groups, or other sites using Product Add-ons.
Product Add-ons does not support importing add-ons via a CSV file, nor can you export existing add-ons to a CSV file. The Add-Ons themselves are made up of serialized metadata that would be difficult to do in a product CSV row as plain text. CSV Import can only import meta that is unserialized, unless otherwise stated.
To transfer add-ons between products or global add-on groups, you can use the Import and Export buttons in the add-ons configuration screen.
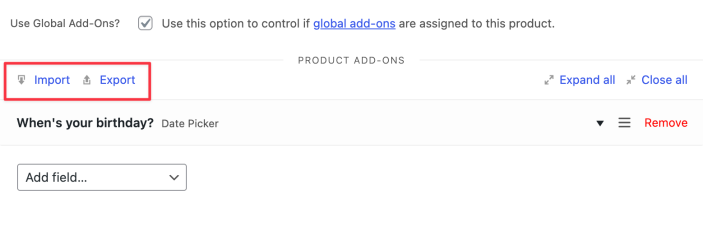
To export the add-ons you have created in a product or global add-on group:
- Select the Export button.
- A success message will show up informing you that the add-ons data have been copied to your clipboard.

To import add-ons to a product or global add-on group:
- Select the Import button. If you don’t have any add-ons yet, the Import / Export won’t show up, and you must select the click here button instead.
- Paste the exported add-on data from your clipboard to the popup field that shows up.
- Select OK. A success message should show, confirming that the add-ons were successfully imported. Then, you will see the new add-ons added to the product or global add-ons group.
- Select Update to save your changes.


Adding an Add-On to a manually created order
If manually creating an order in WooCommerce, you can configure available add-ons for each product as needed. This can depend on if the product has its own add-ons, and if your store has global add-ons.
Once you’ve added a product, you’ll see a Configure button. Selecting that will show available add-ons you can then set on the product. This updates the product price as needed, etc…

Related Articles
CRU Club Replace Product
This feature allows you to update individual products within Choose Your Own subscriptions at a bulk level, instead of editing each subscription individually. This feature is ideal for out of stock / sold out / low stock products. You can switch out ...Groups/Dynamic Pricing
The way we assign groups to users for discounts be it members or special privileges groups is by using a Groups plugin. This, in conjunction with Dynamic pricing (see below), not only allows you to assign membership pricing for ad hoc purchases but ...Manually Creating Subscription via Admin
Add the user to the site first by going to Users > Add New. Fill out the users' details: User Role is Subscriber, for the Send User Notification Checkbox, CRU recommends unchecking this so the customer DOES NOT get sent an automated email - This is a ...Coupons
Adding a coupon To add a coupon: Go to: WooCommerce > Coupons. A fresh installation of WooCommerce will show you an initial screen to create a coupon or to learn more. Existing stores start on the Coupons screen. Create a new coupon by selecting Add ...PDF Vouchers
Creating a voucher template Follow the steps below to create a voucher template: Go to WooCommerce > Vouchers > Voucher Templates. Click Add Voucher Template. On the General tab, determine the template name, voucher type, whether the voucher can ...