AutomateWoo - User Guide
For pricing and how to add to your website see at the bottom of the page.
AutomateWoo is a marketing automation plugin which integrates directly with your WooCommerce store. Using automated marketing campaigns and a unique set of tools, AutomateWoo streamlines the managing of your store while saving you time and effort! With so many online stores to choose from, it can be difficult to distinguish yourself from the crowd and maintain customer loyalty. AutomateWoo is here to help!
Workflows
The key component of AutomateWoo is Workflows. Workflows are the format in which your automated tasks and marketing campaigns are designed.
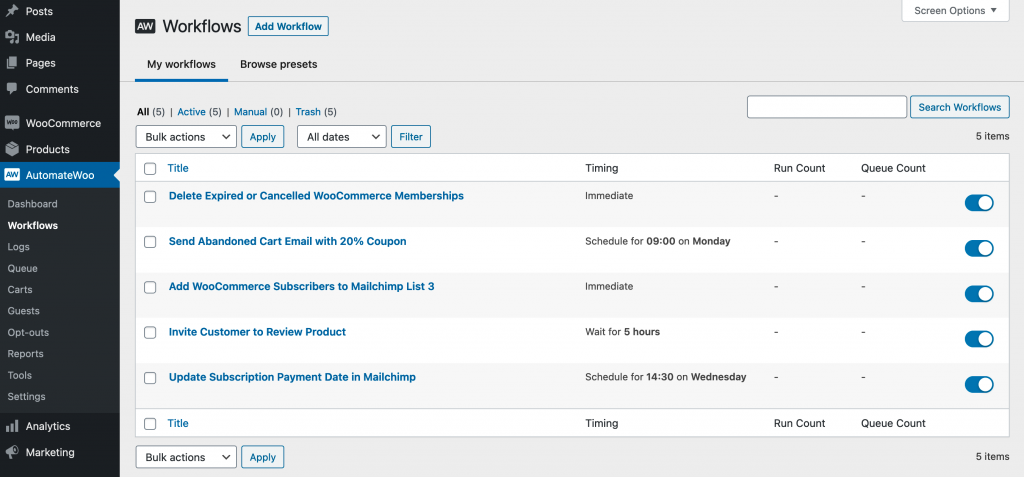
A workflow is made up of different combinations of Triggers, Actions and Rules. Once activated, AutomateWoo will do all the hard work for you in the background.

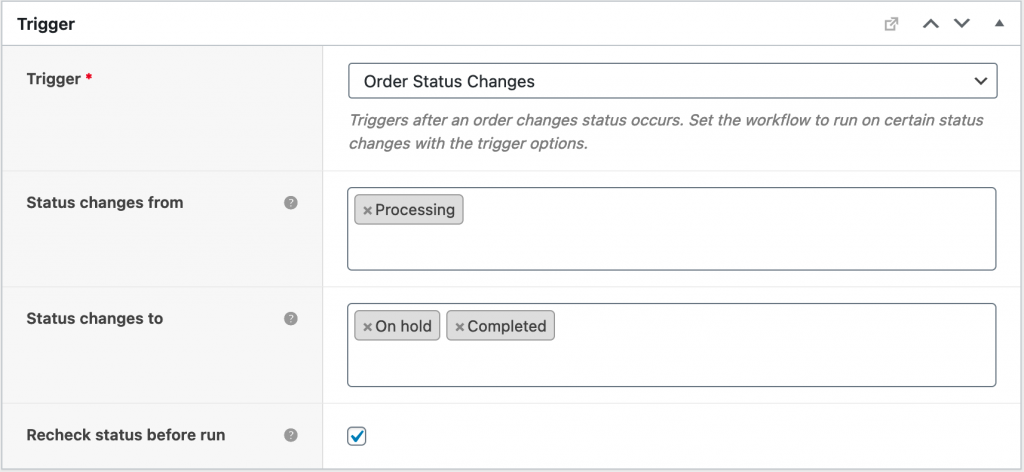
Triggers
When you first create a workflow, you can choose a trigger to determine the circumstance in which the workflow will run. This could be anything from an abandoned cart to when an order has been placed in your store. After you select a trigger, the compatible rules, actions and variables will be displayed, so you can continue creating your marketing campaign with ease.
Actions
Once a trigger has been selected, you can use an action to determine the response which happens afterwards. For example, you could pair the trigger Abandon Cart with the action Send Email. When a cart has been abandoned in your store, the response will be an email that is sent to increase your chances of recapturing that customer.

Rules
You can make a workflow more specific using Rules. These restrict workflows so that they only trigger in certain situations, giving you a high degree of flexibility in your marketing campaigns. Each rule comes with its own comparison statements such as is, matches any of, is less than and is greater than which you can pair with a value. For example, you can pair the rule Order Total with the comparison statement is greater than and include the value 100. This means your workflow will only trigger for orders which have a total value over 100.

Variables
AutomateWoo also provides you with over 80 variables to choose from. These can appear daunting at first, but are key tools to creating your own personalised marketing campaigns. Variables act as cheat codes – letting you add dynamic content at the click of a button. Here’s an example of a variable which displays all the items in a customer’s order.

Timing
Using AutomateWoo, you can schedule workflows to run at any time you want. Whether immediately, after a set time. or even at a particular hour or day of the week. This allows you to target your customers when they are most receptive to your marketing content!
Marketing opt-in and unsubscribes
AutomateWoo adds an unsubscribe link to the footer of every non-transactional workflow but you must choose whether to use opt-in or opt-out mode for your workflows. Opt-in means customers must opt-in before email or SMS is sent to them. Opt-out means email and SMS will be sent automatically until the customer chooses to opt-out. When in opt-in mode, customers can opt-in on the checkout page, account registration page, in the account area or the AutomateWoo signup page. You can manage these options on the AutomateWoo settings page. You can also import opted-in customers via the AutomateWoo admin tools.

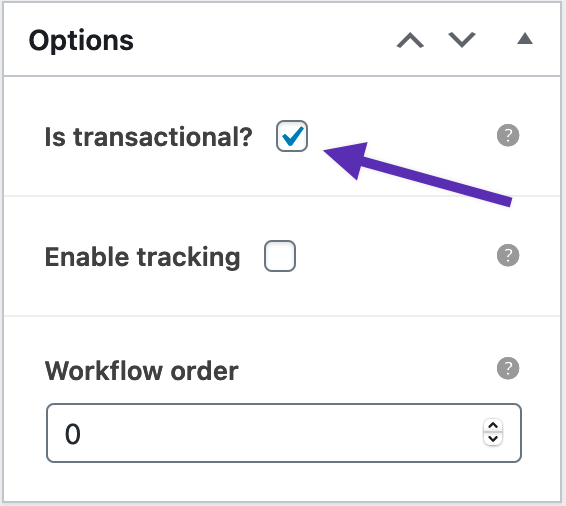
You can exclude workflows from requiring opt-in if they are transactional.
How to Create a Simple Follow-up Email
Ready to get started? Here’s a quick example of a workflow you might use….
1. Choose a trigger
Imagine a customer cancelled their order, and you want to encourage them to come back. Choose the trigger Order Cancelled.

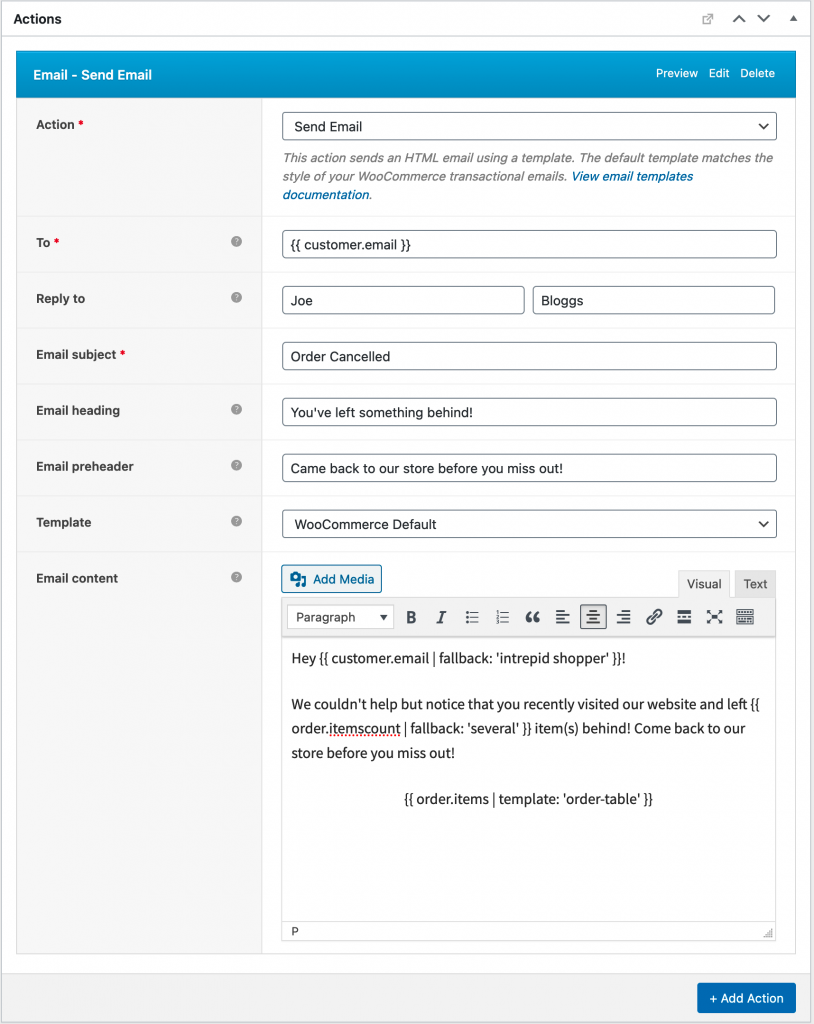
2. Choose an Action
To send a follow-up email, choose the action Send Email. Now add an email address, title and your email content. In addition, you can personalise the content of your follow-up email by using a variable such as {{ customer.first_name }}.
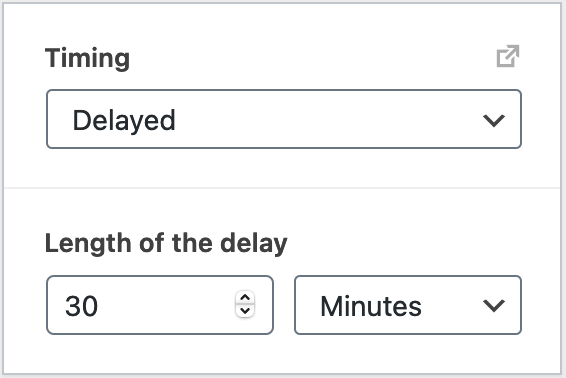
3. Choose your timing
You can set your workflow to run at virtually any time using the timing options we’ve described above. For this example, you could set the delay to 30 minutes after the order has been cancelled.
4. Add a rule (optional)
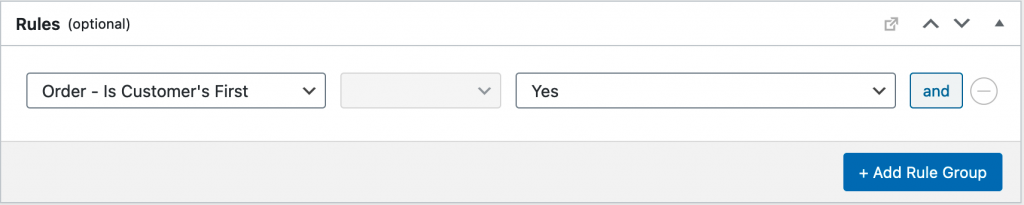
If you’re feeling confident, you can begin to experiment with rules. For example, by choosing the option Order is Customer’s First, you can tailor your workflow so it only targets first-time customers.
Edit your Email Template
- Go to AutomateWoo -> Workflow
- Then select the email template you wanted to edit

 Troubleshooting this feature? Click here
Troubleshooting this feature? Click here
Related Articles
AutomateWoo - Features
View Guide Links at the bottom of the page Installation 2 CRU CREDIT Setup (optional) 2 CRU CREDIT Ease Of Use Intermediate Want this feature? Request Here Purchase CREDITS Here Powerful marketing automation for WooCommerce. AutomateWoo has the ...Automatewoo - Troubleshoot Guide
Check the table of contents in this article for each troubleshooting topic How to check email/workflow logs You may have Automatewoo as an add-on to your website which automates emails for different scenarios including wine club emails, win back user ...Mailchimp for Woocommerce - User Guide
For pricing and how to add to your website see at the bottom of the page. Connect or Disconnect Mailchimp for WooCommerce As you move through each step, new tabs will appear with different configuration options. To connect your WooCommerce store to a ...Basic Wordpress - User Guide
Permalinks Overview Permalink is short for “permanent link.” Permalinks are permanent URL structures used to help organise the content of your website (pages, posts, products, etc.) so it can be efficiently navigated, shared, and referenced by users ...Gravity Forms User Registration - User Guide
For pricing and how to add to your website see at the bottom of the page. Create Your Form The first step in integrating the User Registration Add-On is going to be creating the form you would like to use. This can include existing forms. The only ...