


In this tutorial, we are going to show you how you can use Rank Math’s content analysis to optimize your posts, score a 100 on 100 in the tests, and set up your articles to receive the most traffic from search engines.
When you create a new post, one of your goals is obviously to attract traffic to your post, and Rank Math’s content analysis and optimization features are designed to achieve just that.
With each post you create, Rank Math assists you in optimizing your post to receive maximum traffic by giving you strategic recommendations based on your content. If you follow all the recommendations, then your post will be completely optimized from a content perspective, and the probability of your content ranking will be higher as well.
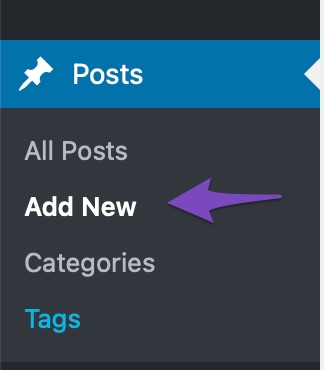
The process of optimization begins when you start creating the post. That is why all the tools for the optimization have been placed on the post creation screen. To see all the tools available, either add a new post from the WordPress menu or edit an existing post. For our demonstration, we will create a new post from WordPress Menu > Posts > Add New.
Rank Math fully supports the classic editor that everyone is accustomed to, and also the new block-editor. If you’re using the classic editor, then you’ll have to scroll down below the text area to see Rank Math’s Meta Box.
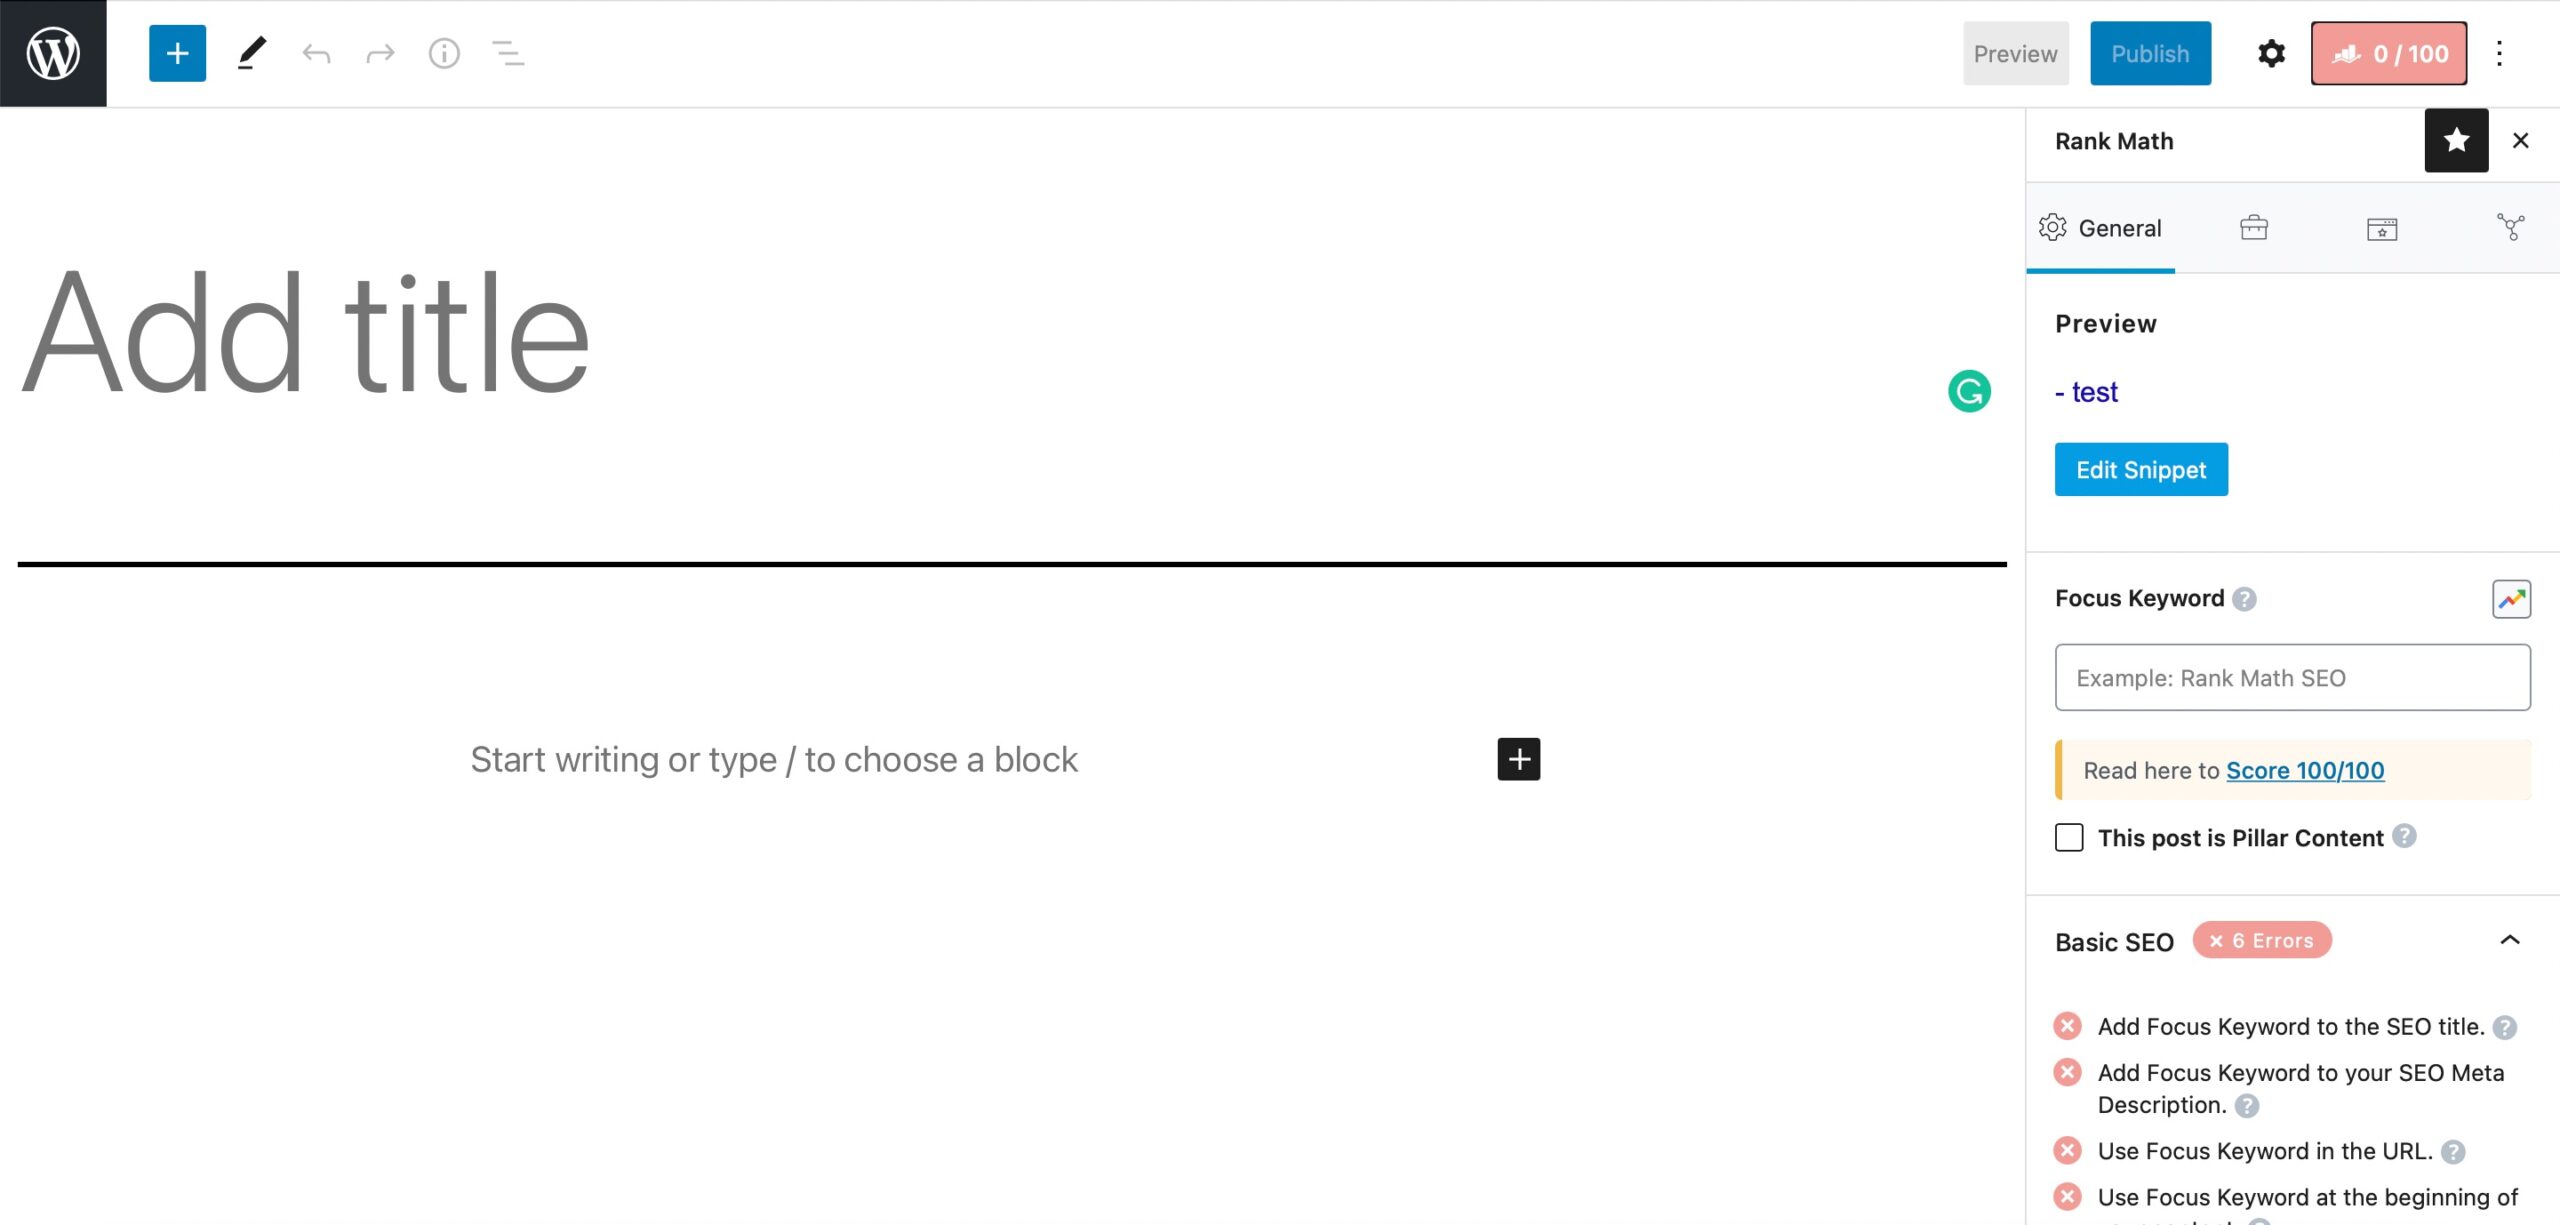
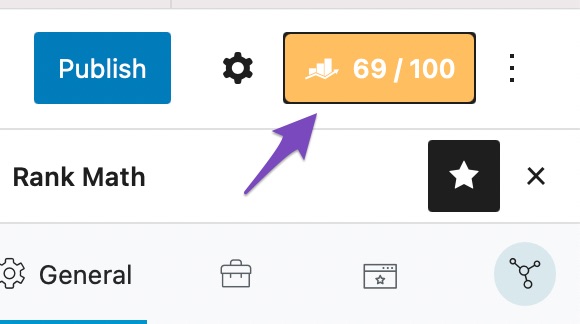
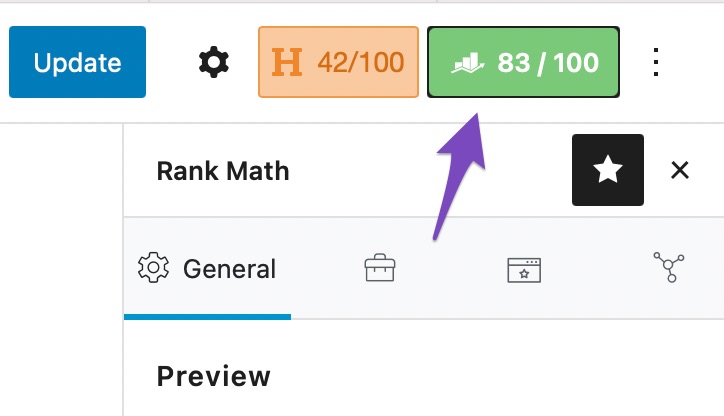
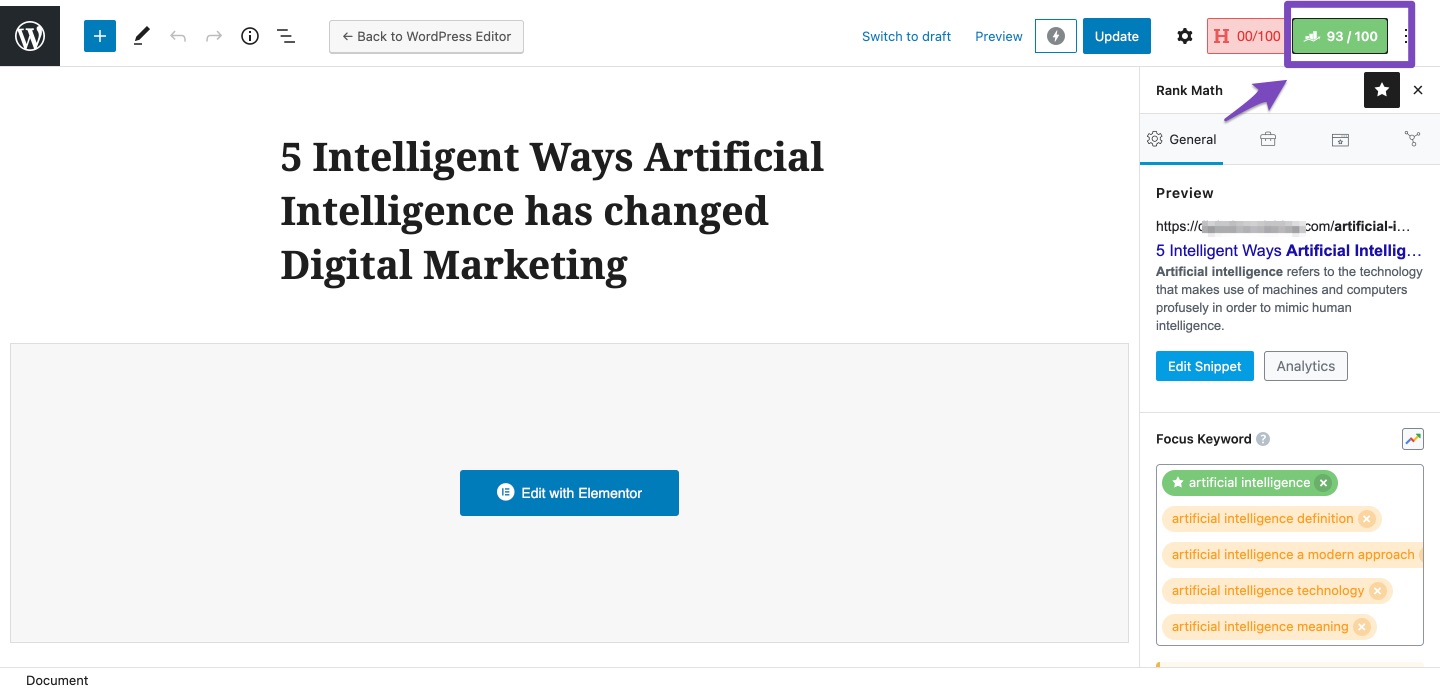
On the new block editor, Rank Math is not below the content area but is fully integrated into the block editor. To see Rank Math, click the SEO Score button on the top-right corner of the screen.
And you will see all of Rank Math’s tools and suggestions in block-view.
In this article, we will go through the process of writing an article in WordPress. Then we will optimize the post completely using Rank Math’s SEO custom recommendations.
1 Writing the Post
The usual workflow for writing articles is that you write the articles first, then you optimize them. Some people also optimize the post while they write it, but we find the first method to be more efficient.
For the sake of this example, we are going to add an existing Rank Math KB to the post area. That should be interesting, as the KBs are written to be helpful for you, but are not really optimized for SEO. The contrast will help us understand how Rank Math will help in optimizing posts, even if you are writing a post for the first time.
Do note that we are not talking about the formatting of your content here. We could dedicate a whole new post on that topic, but fortunately, there is already a good resource on how to do proper formatting of your content.
2 First Step – Choosing Focus Keywords
As we mentioned, we will be using an existing Rank Math KB to demonstrate the optimization process. But, you will have to write the actual post before you can experience how Rank Math works.
Once you’ve written the content, the first step in the optimization process is to choose the right focus keywords.
Focus keywords are the words you want your post to rank for. It can range from a single word, like “coffee”, to a whole phrase, like “play the ukulele”.
If you’ve ever done keyword research, you’ll have no difficulty in understanding what you should keep as your focus keywords. The words that users type in the search engines are the best focus keywords to choose from. If you’re not familiar with the process, we would recommend that you read our detailed guide on keyword research to learn the process.
You might be thinking, if Rank Math is so powerful, why do I need to set focus keywords? Shouldn’t Rank Math be able to figure it out?
Well, Rank Math is powerful, but it can only perfect your SEO recipe if you tell it what you want to cook. What we mean is that Rank Math definitely does a lot of work; you just have to provide a direction by setting up some essentials.
For this example, we’ve added the content of the “What are HTTP Redirections” to our demo article. Keeping that in mind, we will use “HTTP Redirections” as our first focus keyword.
Rank Math PRO lets you choose unlimited focus keywords per post. That means you can optimize your post for unlimited keywords and attract a lot more traffic than if you were optimizing for 1 focus keyword.
However, do not get carried away with adding multiple keywords. Only add a reasonable number of keywords to optimize a single post for, and adding more focus keywords than necessary would do more harm than good.
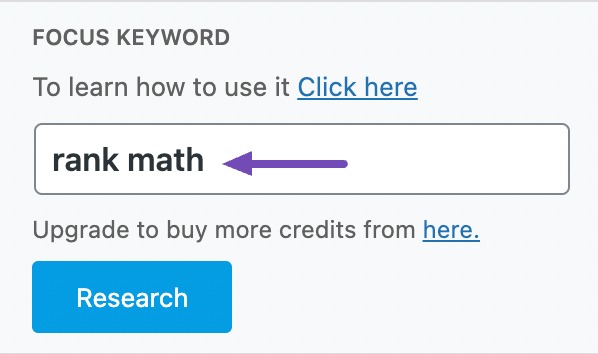
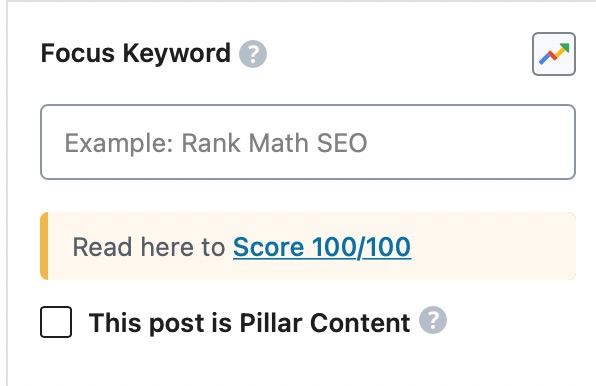
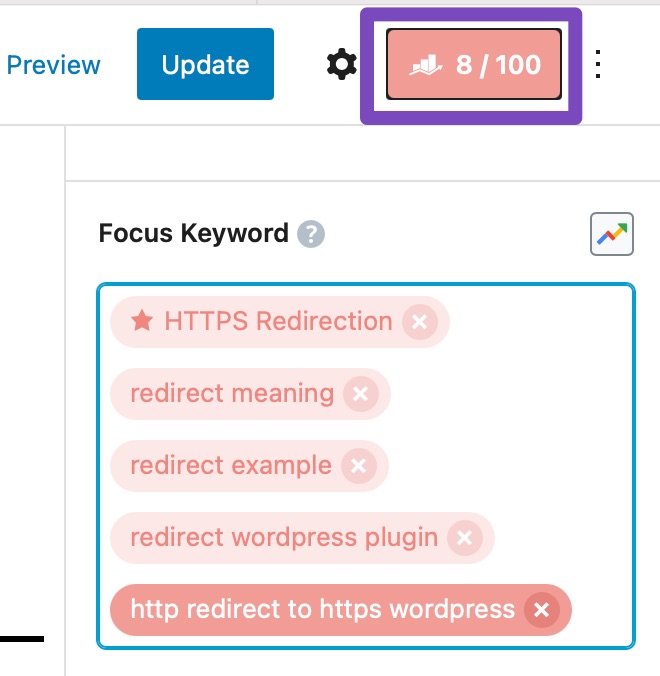
You might also have noticed an error just below the focus keyword section.
The error is quite self-explanatory. If you activate your copy of Rank Math, then Rank Math can fetch keyword suggestions for you when you’re adding focus keywords. These suggestions are fetched right from Google, and they can be a powerful way not only to discover related keywords but use those related keywords as focus keywords and optimize your post around them.
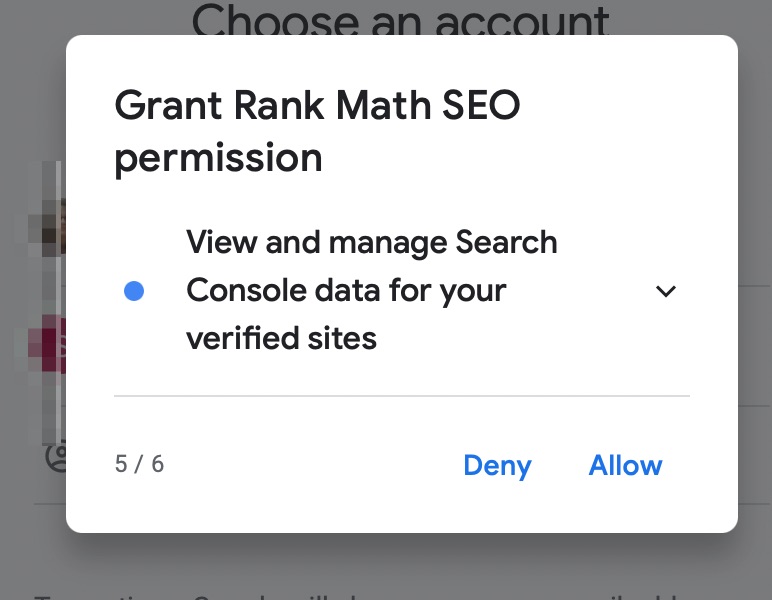
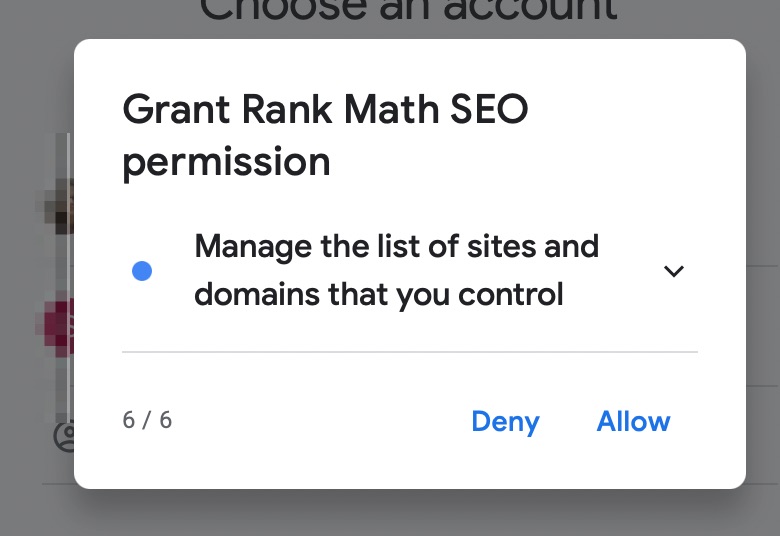
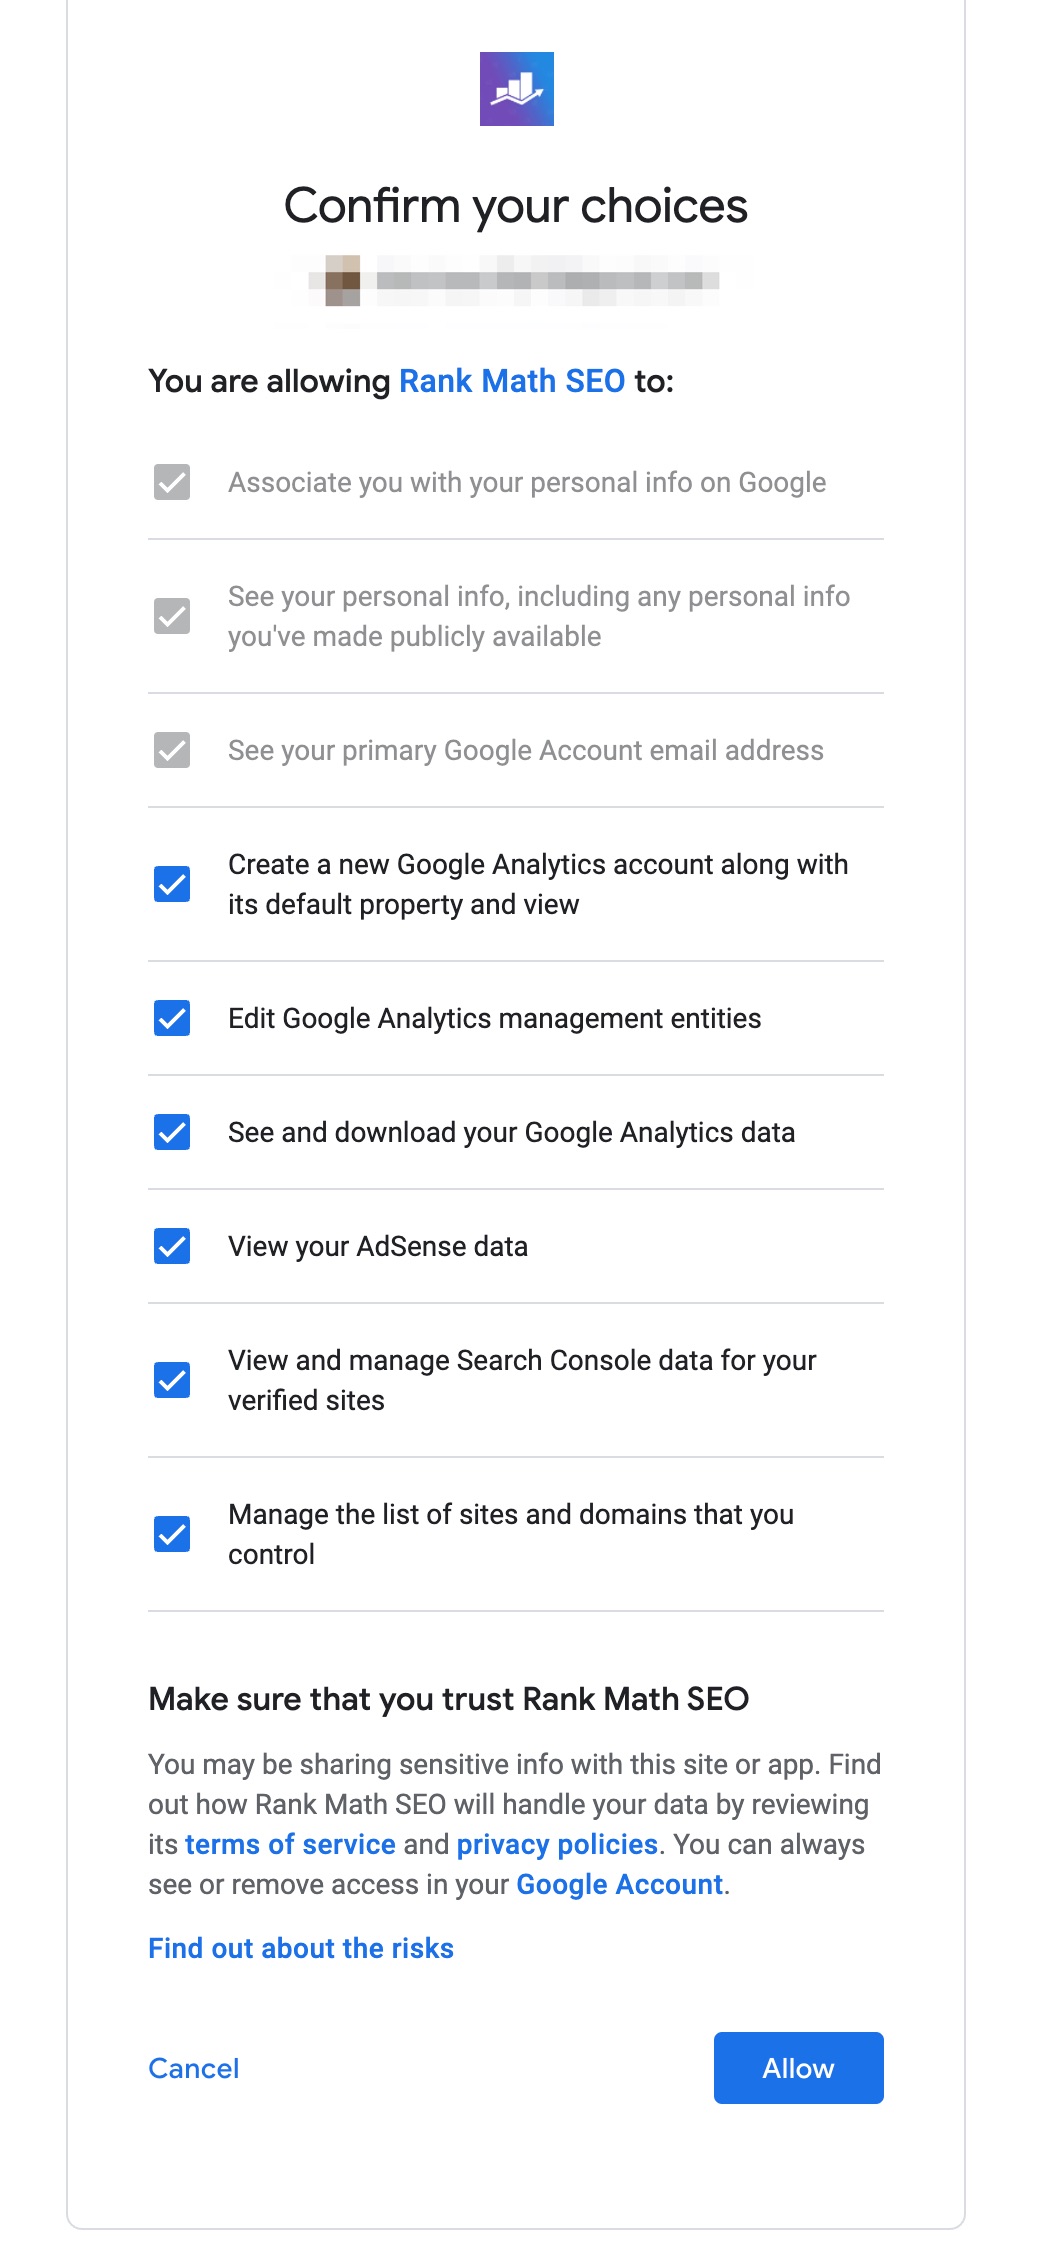
To connect your account, simply click the link in the error, and you will be taken to the Rank Math activation screen.
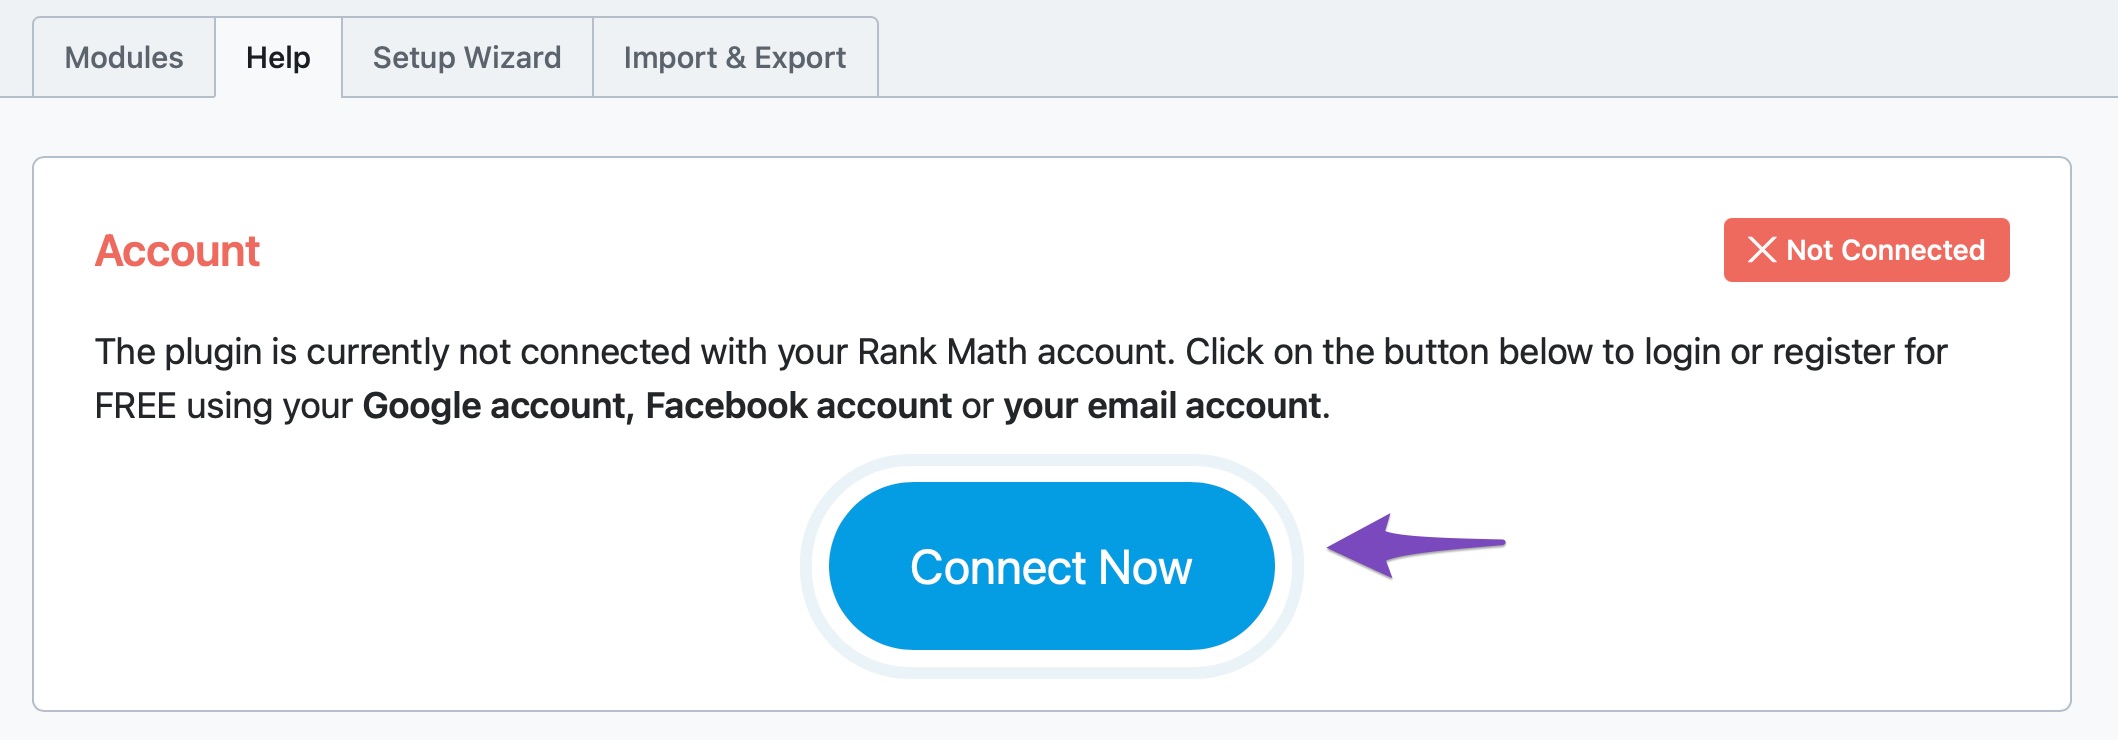
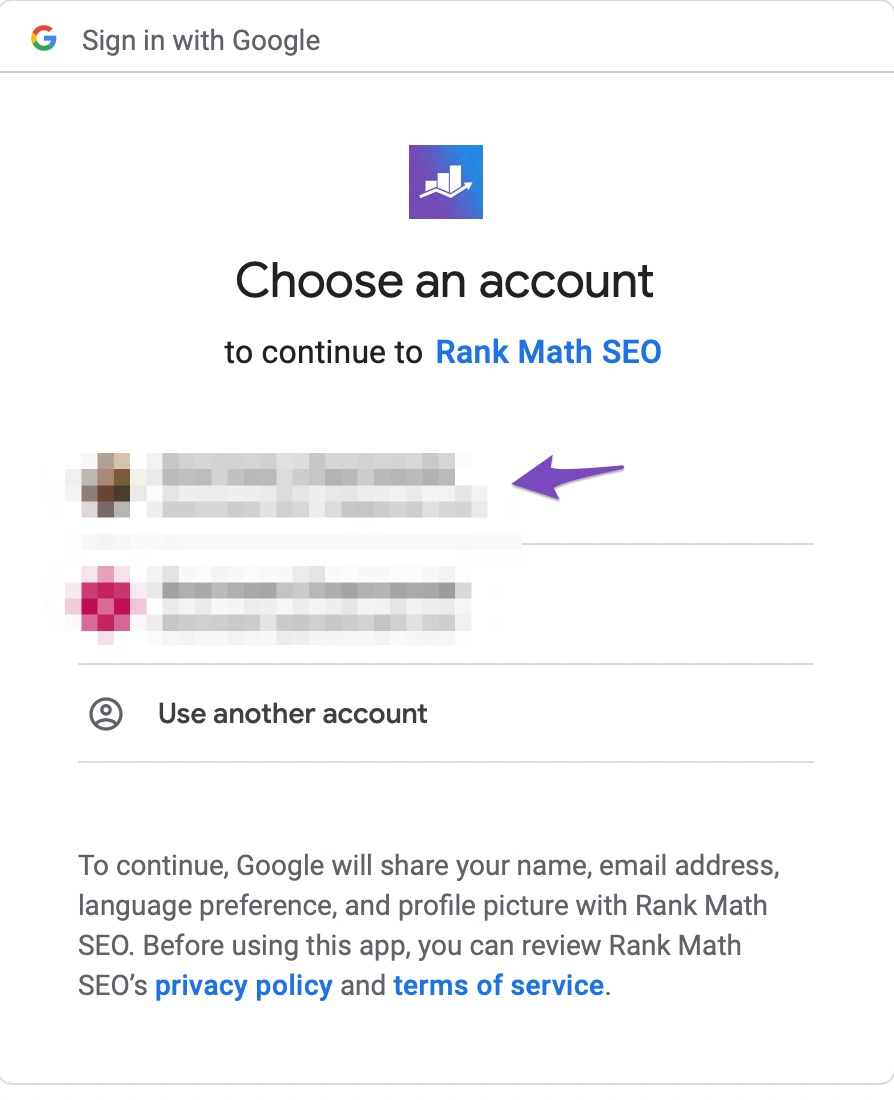
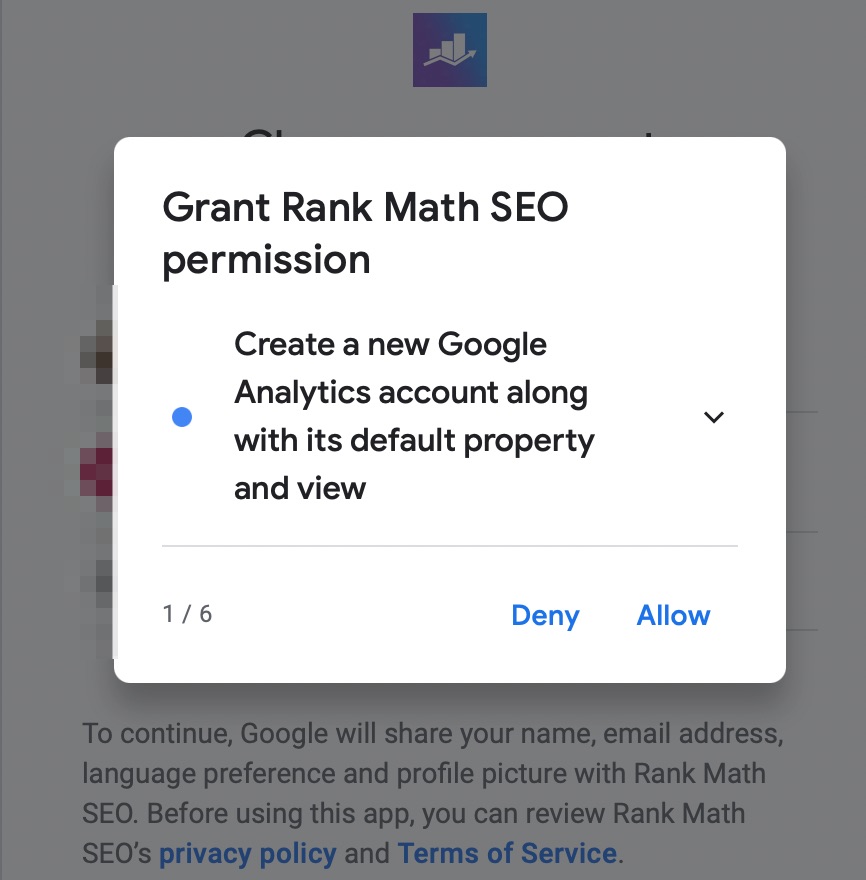
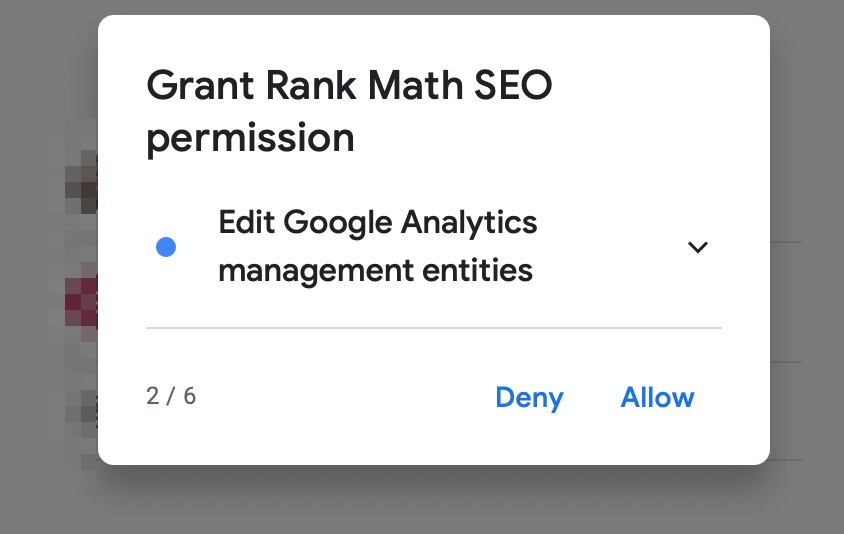
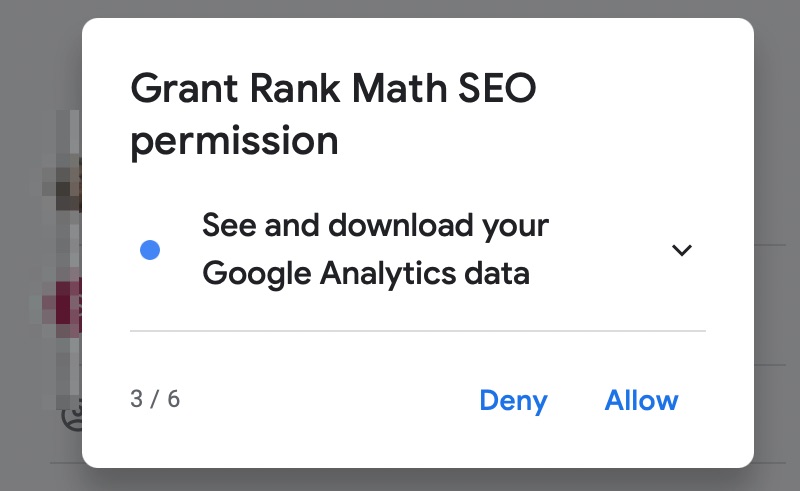
Once you click the “Connect Now” button, you will be taken to Rank Math’s Login Page. Choose your preferred method to log in & continue. If you don’t already have an account, you can also create one by clicking the “Register Now” link at the bottom of the login form.
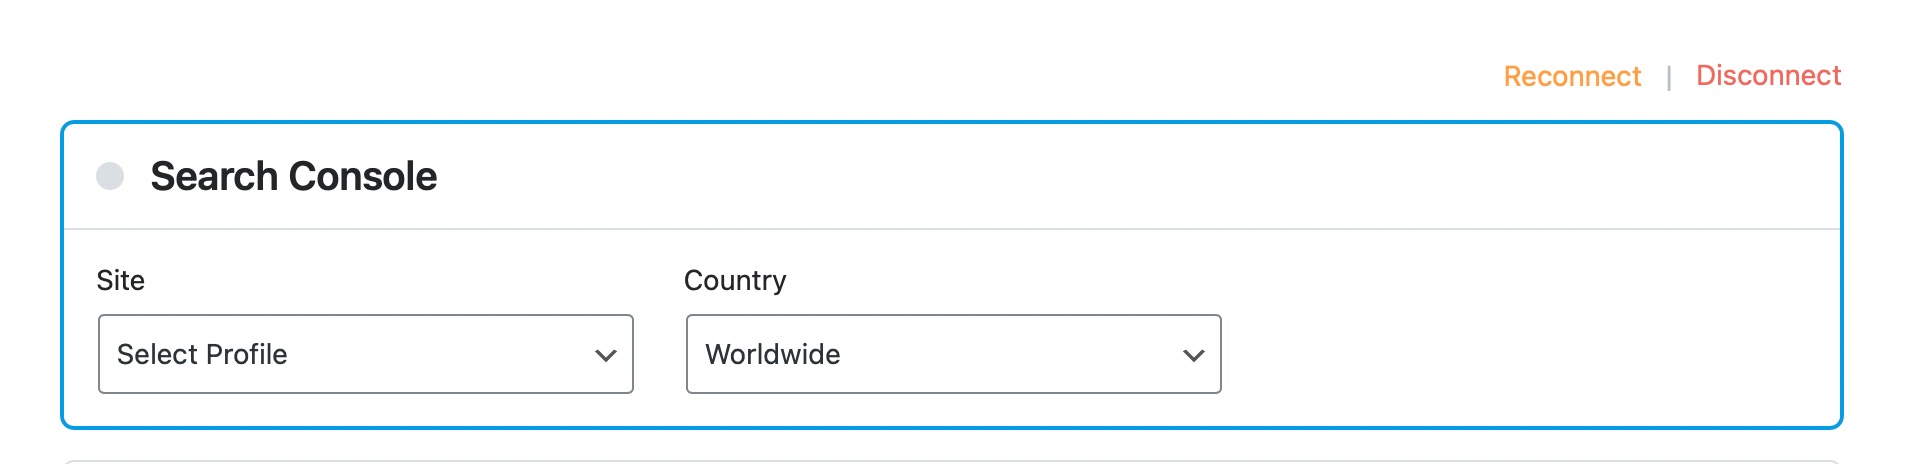
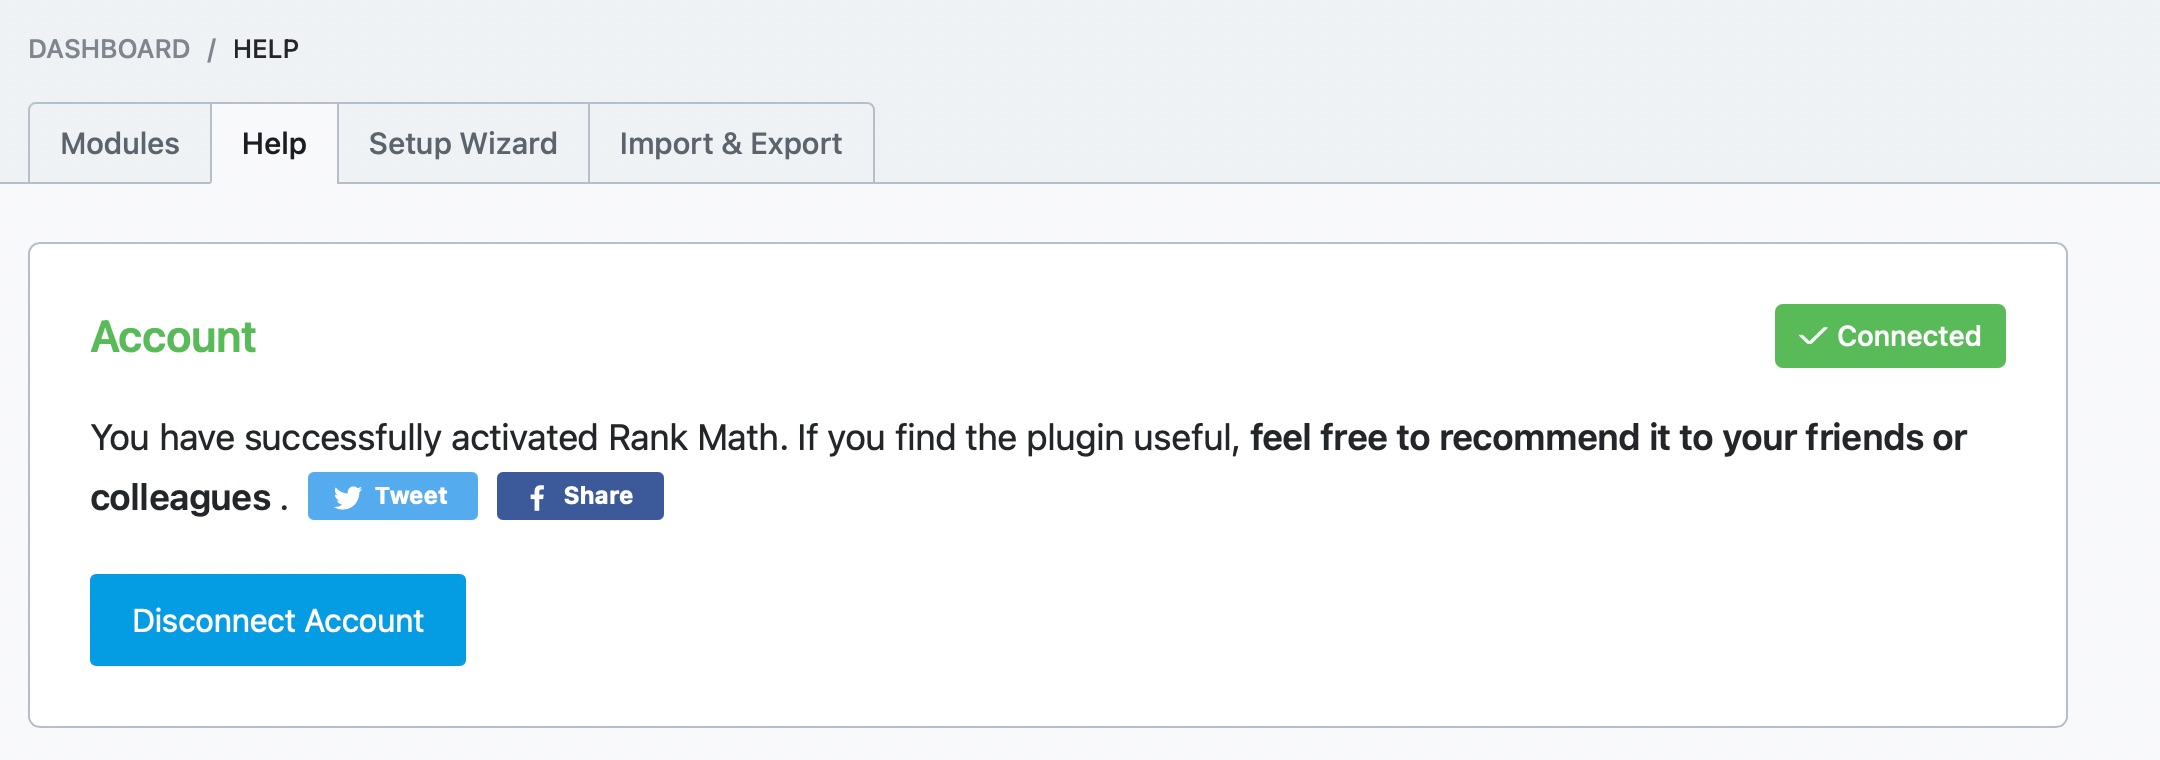
After registering/logging in, you will be taken back to the Activation Screen, and your copy should be activated.
Now, head back to the post and refresh the page. Make sure to save your changes before refreshing. After the refresh, the error will be gone, and you will start seeing suggestions when you add any focus keywords to your posts, similar to the animation below.
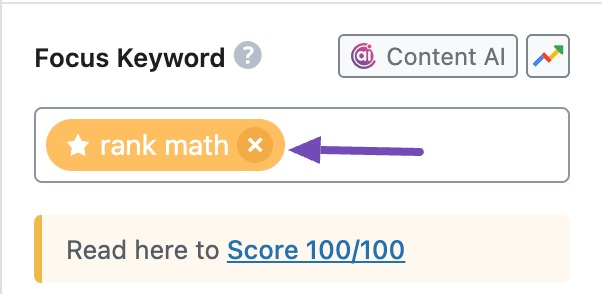
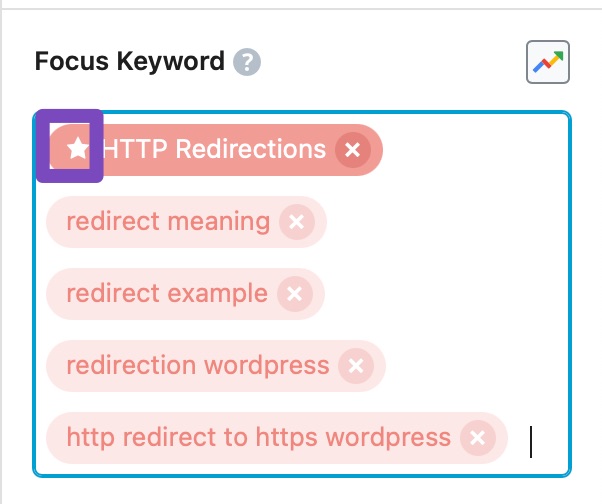
To add more focus keywords to your post, simply go to the focus keyword area and type in more focus keywords. The first focus keyword that you add will be considered the Primary Focus Keyword, and the rest will be considered secondary focus keywords. The Primary Keyword will also have a “*” icon on its left. Here is how it should appear on the screen.
3 Google Trends for Focus Keywords PRO
When you are writing a post around a particular topic, you need all the help you can get to make a decision on whether the target you have chosen is good and if there is any traffic on that keyword.
Even more than that, how do you choose which keyword to target when you have to select one of two closely related keywords?
Enter Google Trends.
Google trends offer you a quick way to show how a term or a topic has fared against another term or topic over a period of time. It gives you an idea of what type of traffic to expect and, most of all, which keyword to target amongst a pool of closely related keywords or topics.
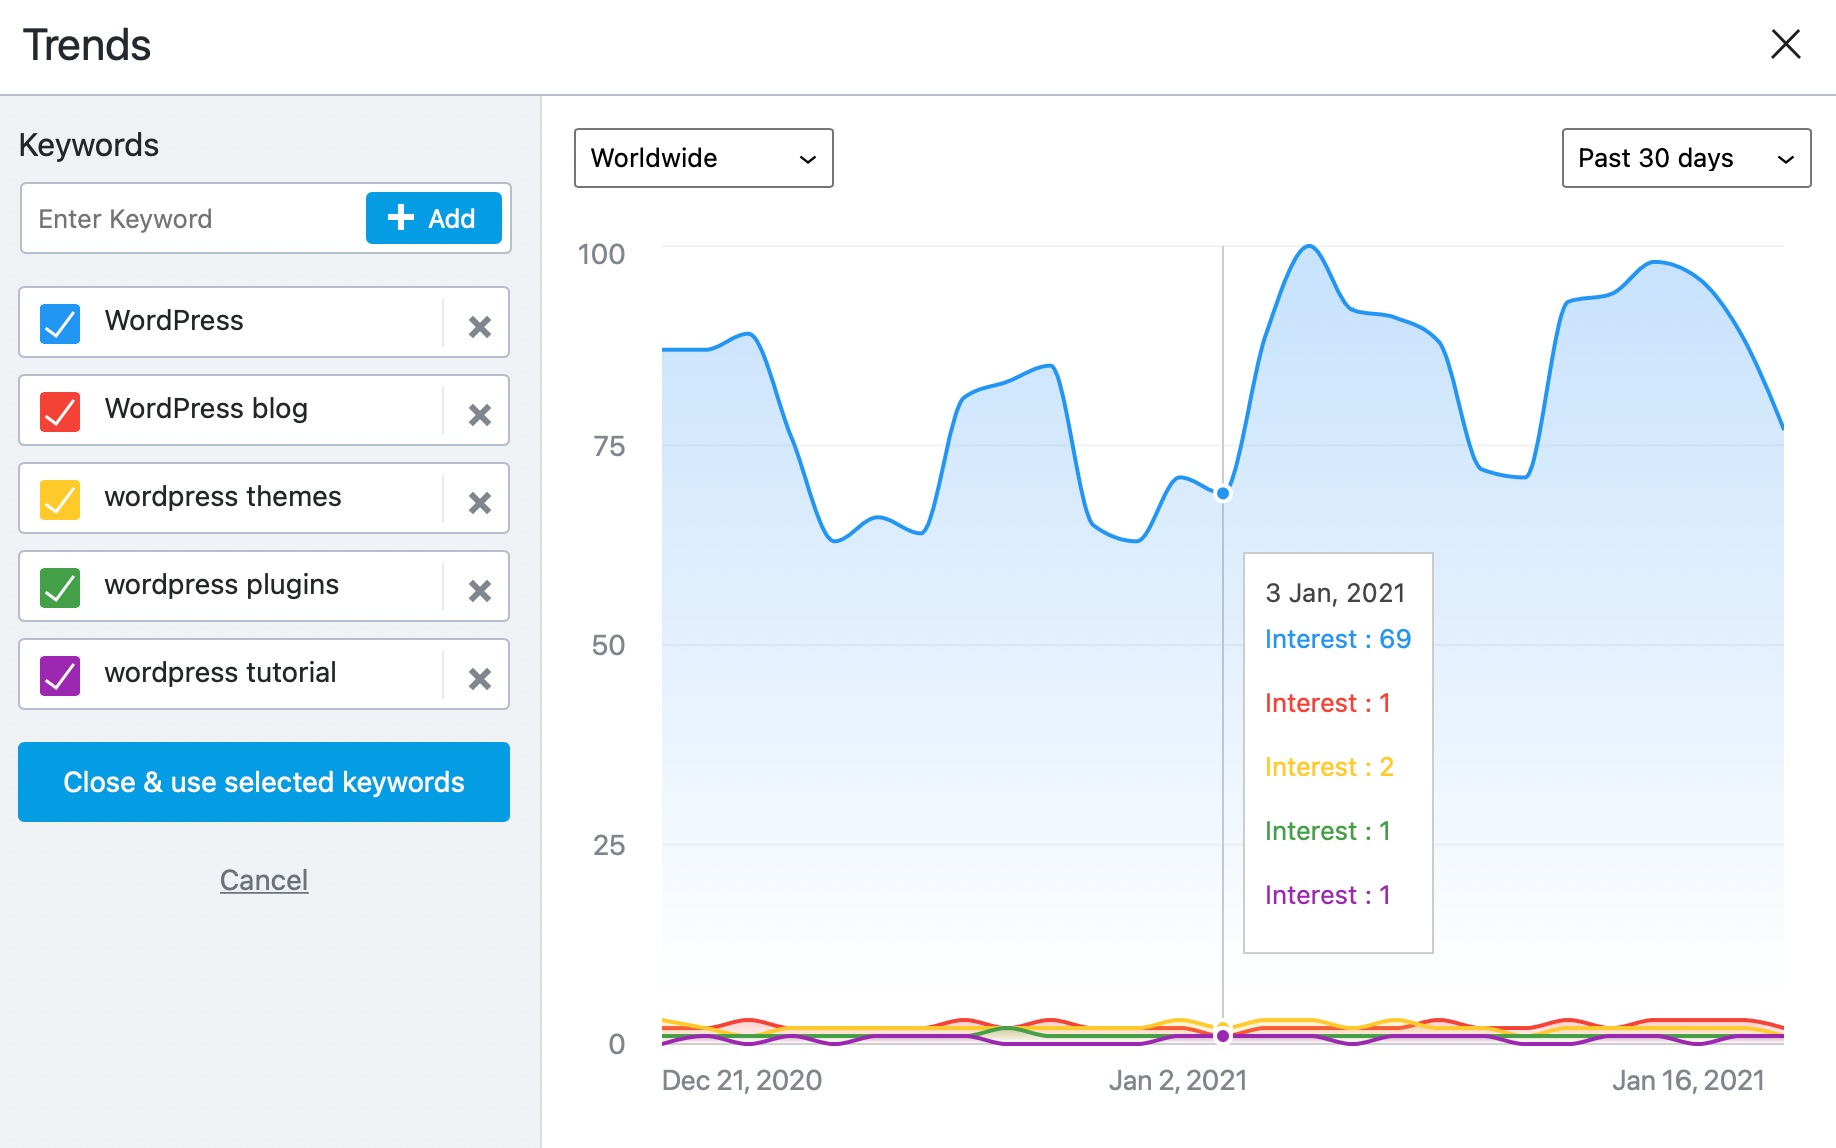
Rank Math brings that function right inside your WordPress dashboard. After you enter a focus keyword or a set of focus keywords, clicking on the Google Trends icon will bring up a graph showing more information on your selected keywords:

Once you have determined which focus keyword to use, choose it from the Trend screen and click Close & use selected keyword(s) button to use the selected keyword as the focus keyword and remove the rest of the keywords you had added for checking the Trend.
Other options offered in the Google Trends overlay are:
- Choose your target country
- Choose a date range between 7 days to 12 months.
4 Understanding the Tests from a Keyword Perspective
From a user (or your perspective), having the post optimized for more than one keyword is great. It lets you target wider topics and aim for more traffic with each post.
But, from an optimization standpoint, it does propose some challenges.
For example, all the tests that Rank Math performs won’t work well if Rank Math considers all the focus keywords at the same time. Some tests only work well if you’ve decided on a single keyword, and you’ll see inconsistent results if they are performed on more than one keyword.
An obvious workaround to that is to use only a single keyword for the test, but that’s defeating the purpose of having more than one focus keyword. To counter this problem, we’ve configured some tests to run on all focus keywords, while some tests work for only some of the keywords. Here is how we divide the tests.
- Tests that run on all Focus Keywords
- Tests that run only on the Primary Focus Keyword
- Tests that run only on the Secondary focus keyword
- Tests that run only on the content
Let us explain what the differences between each of them are. When we discuss the actual tests, we will identify which type of test it is.
Tests that run on all Focus Keywords
These are the tests that run on all focus keywords, and they may consider all the focus keywords at once, or individually. You won’t have to do anything special for the tests that consider all the focus keywords, but for the tests that consider only one test at a time, you’ll have to click the individual focus keywords to see their results and optimize them individually for the best results.
To check out which tests run on which keywords, you can click on any of the secondary keywords, and the tests will be filtered to show to the ones that run on that keyword. Here is a visual representation of that concept.
4.1 Tests that run only on the Primary Focus Keyword
These are the tests that work only on the Focus Keyword and ignore the rest of the keywords altogether.
4.2 Tests that run only on the Secondary focus keyword
These are the tests that only consider the secondary focus keywords and ignore the primary focus keyword.
4.3 Tests that run only on the Content
There are several tests in Rank Math that don’t depend on focus keywords and analyze the content in different ways. For these tests, you don’t have to pay attention to the focus keywords, just follow the recommendation Rank Math gives with the test.
5 Pillar Content
Just below the focus keyword, we can see this tick box about pillar content.
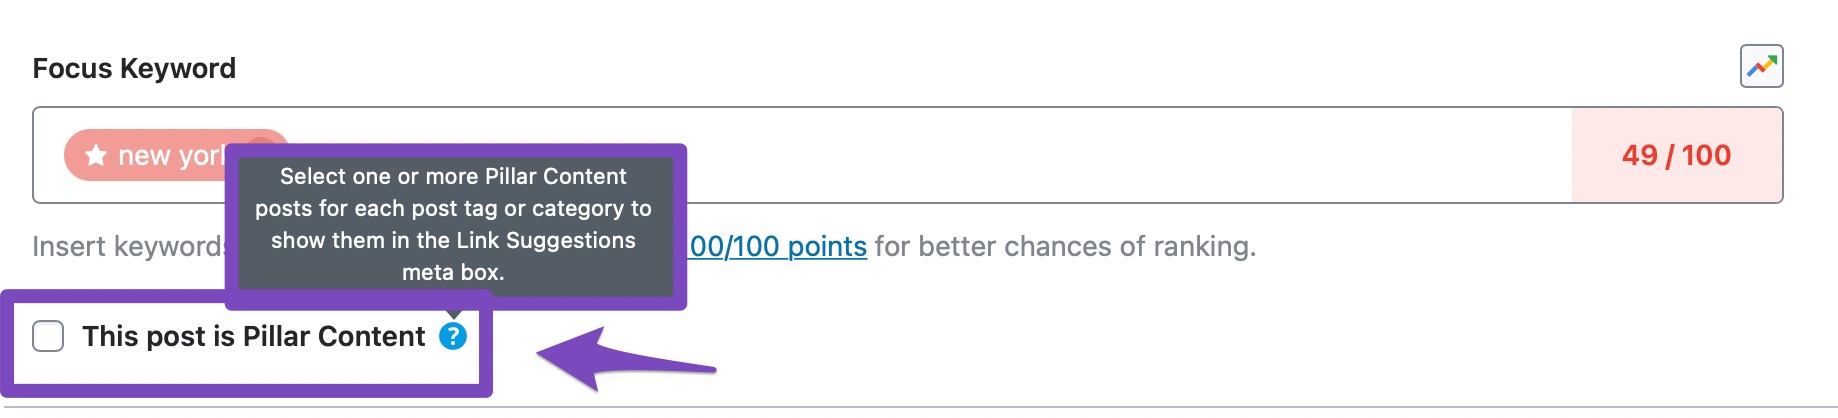
Rank Math has a feature where it can mark a piece of content as “Pillar Content” – which is usually used for posts. Pillar Content is an evergreen piece of content that is designed to answer age-old questions which are bound to be asked for years to come. If you’re not familiar with Pillar content, we would recommend that you read How to Use Pillar Content to Build Internal Links.
6 Making Sense of Rank Math’s Recommendations – The Color Codes
We’ve kept the recommendations’ language as simple as possible so that everyone, even if they are not familiar with SEO, will be able to understand and follow the recommendations easily.
To help navigate the recommendations faster, we’ve used basic color codes to tell you what tests you’ve passed and what you still need to work on. Here is what the colors mean.
Green Tick: A Green tick in front of a test means you’ve passed with flying colors.
Yellow: If you see the color Yellow on a test, that means your post isn’t optimized for the test, and you should spend some time fixing it.
Red Cross: If you see a Red Cross icon, then that means your post has performed poorly on this test. We would recommend that you spend some time to optimize the content before you publish it to maximize the chances of rankings and traffic.
Important Note: Just because a post is optimized for certain keywords does not guarantee that it will rank well. There are other factors like competition, domain authority, relevance, and hundreds of other factors that determine a page’s rankings. Many of these factors will actually be out of your control. SEO is a moving target, and our recommendations are based on the data we have collected and our experience. There are no guarantees in SEO, and our goal with these recommendations is to improve the probability of your page to rank. Even a post with a lower score can rank very well if all the other factors are optimized well. So, take these optimizations tests as a framework or guide, not as absolute answers.
Apart from color codes, Rank Math also gives your post a cumulative score based on how well the entire post is optimized. The score is visible on the button you clicked to open up Rank Math inside the post editor screen.
You might have noticed that this score is also color-coded. Depending on how you score, it might appear in Red, Yellow, or Green.
Green [81+ Score]
If your overall score is over 80, then the score will appear Green. When you see a green score, that means the post is ready to publish. If you’re just above 80, we would still recommend you to optimize your article further and get a score closer to 100.
Yellow [51-80 Score]
You’ll see a Yellow overall score is your post scores somewhere between 51-80. It means that your post is not fully optimized, and there is plenty of room for improvement. We would recommend that you optimize the post a little more for a higher probability of ranking in the search results.
Red [Below 50 Score]
If your test score is Red, that means it scored below 50 – which is bad. As you can understand, that means your post is terribly optimized for your focus keywords. If you see Red, that means that your post is not even following basic SEO practices, let alone advanced optimizations. Obviously, we would recommend that you follow all the recommendations that Rank Math gives you, and get to a decent optimization score to better the chances of your post ranking higher.
6.1 Some Clarifications on the Optimization Score
If you’ve been in the SEO world for some time, then you understand that SEO is not an exact science. It is based on research, testing, experimenting, and experience. The recommendations that Rank Math provides are based on all of these factors. The recommendations are great, but they are still not perfect. Whenever you are writing a post, take the recommendations as suggestions, not absolute rules. Your goal is to please the reader of the article first, the search engines second. We understand the desire to optimize every post 100%, but if it is detrimental to the user experience, you are doing more harm than good. Follow the recommendations, use them, but don’t let them be the only guideline you use when writing any post.
6.2 Color Code in the Focus Keywords
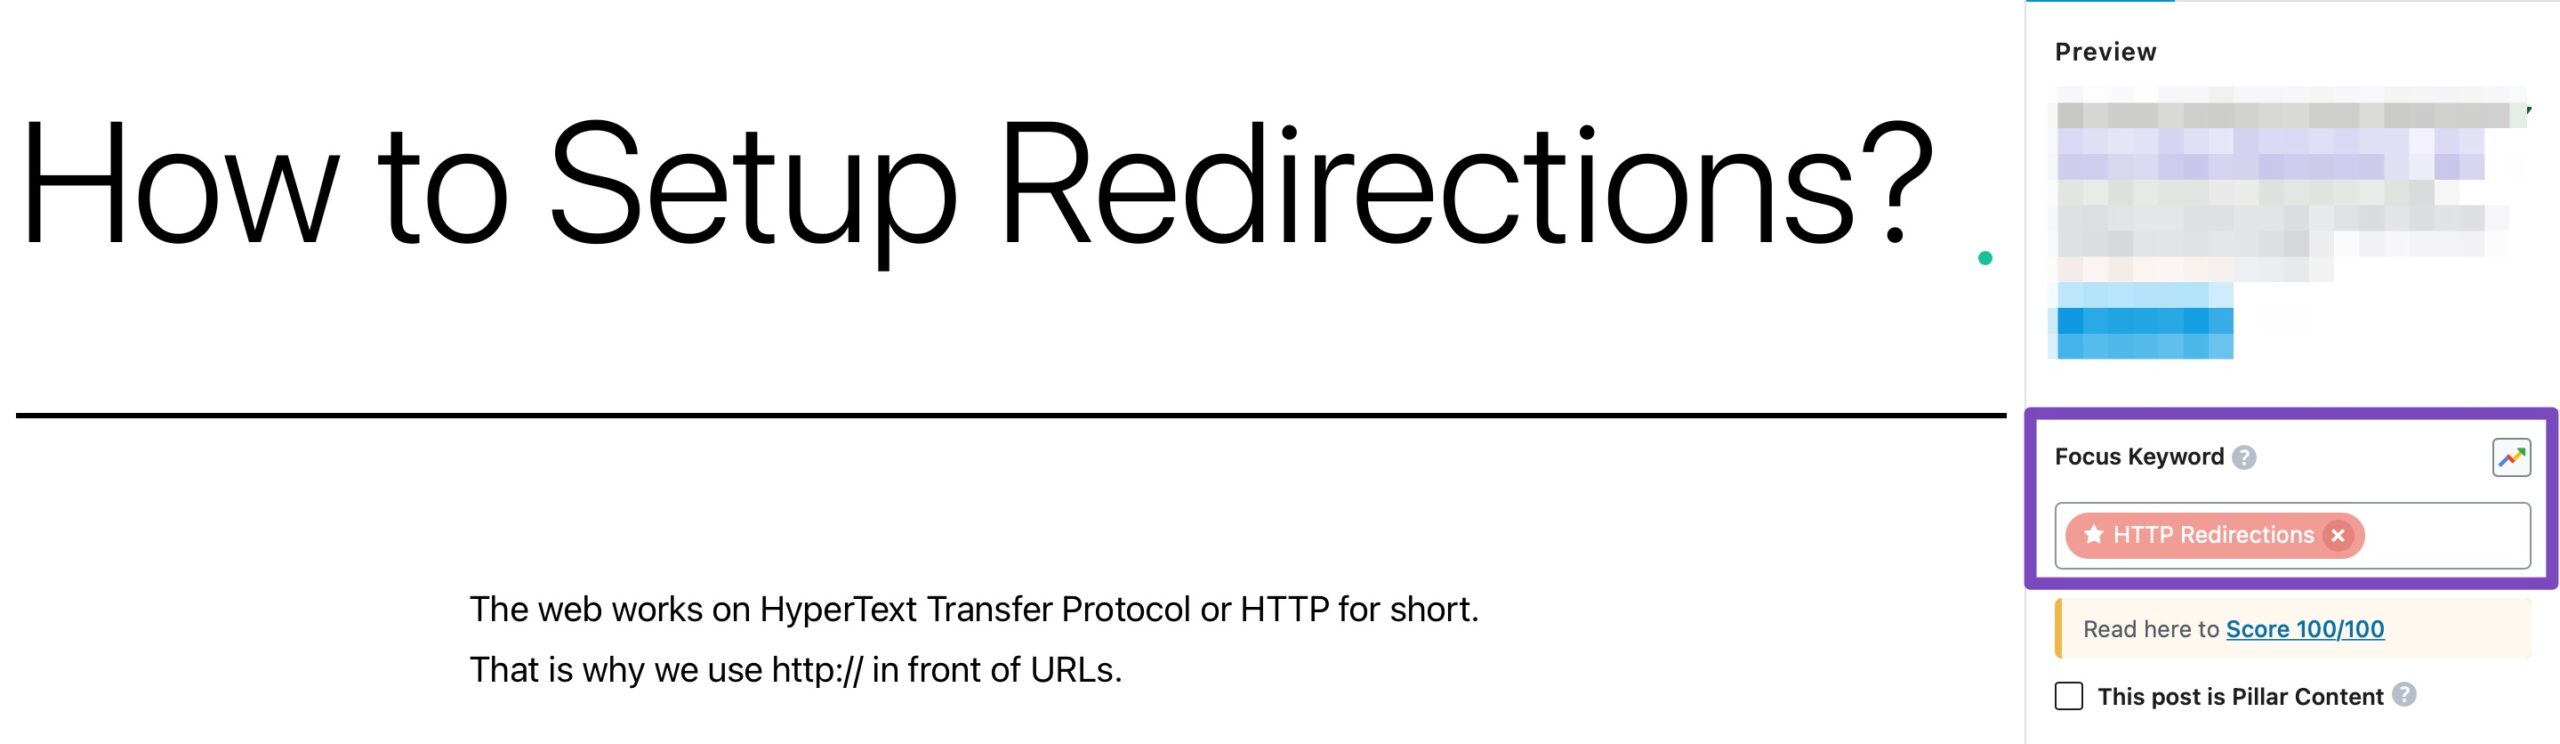
A great way to quickly understand how your post is optimized for individual keywords is by looking at the focus keywords themselves. As you improve your post and optimize it for certain keywords, those keywords themselves will change color to represent how well the post is optimized. Here is a demonstration.
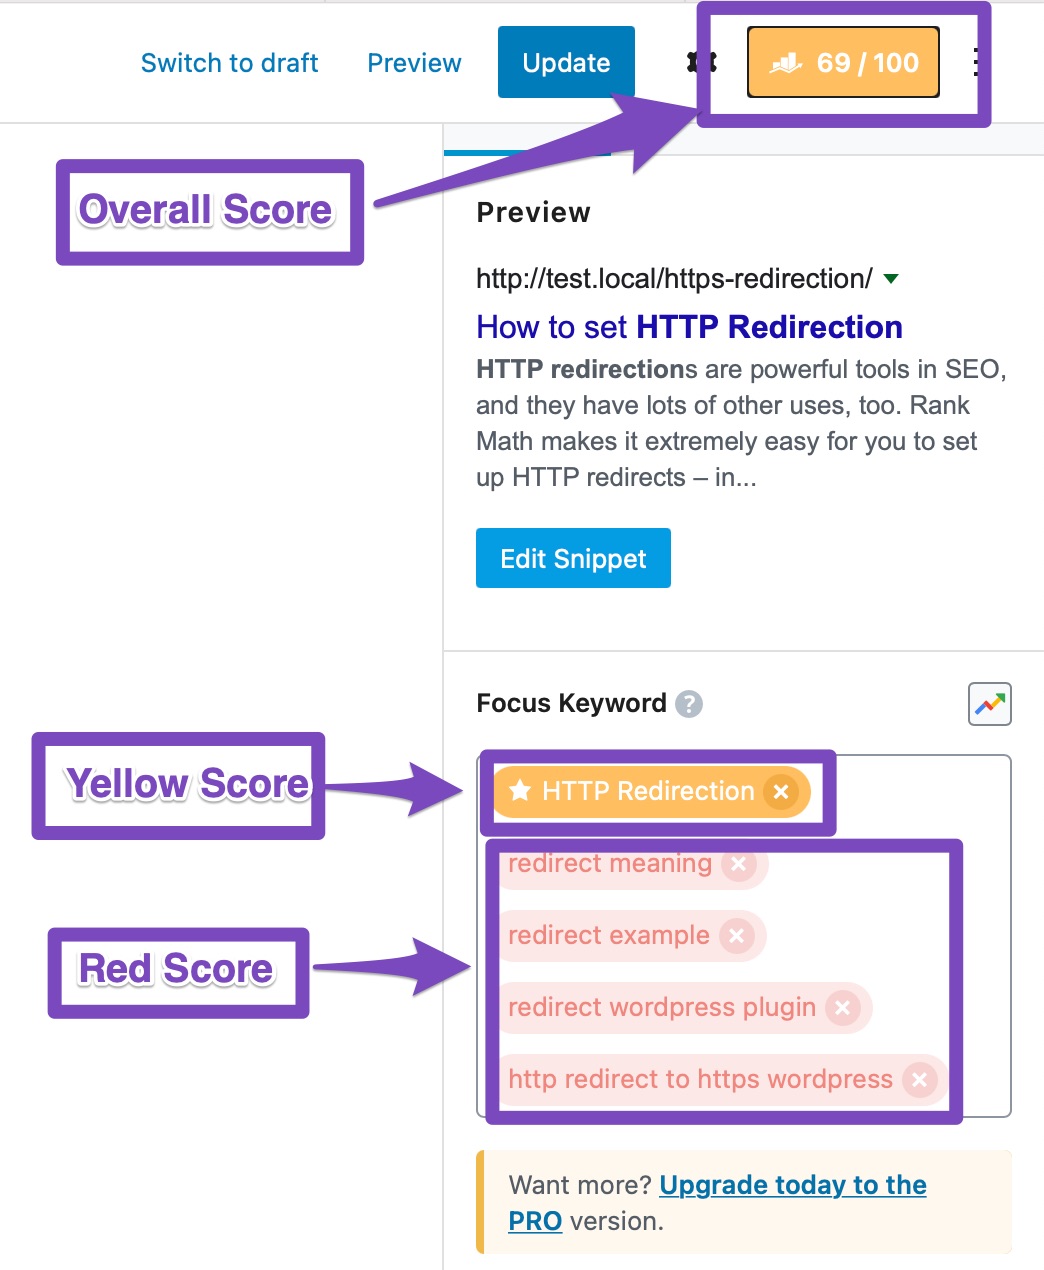
In the image, you can clearly see that our post is moderately optimized for the term “HTTP Redirections”. Therefore, the keyword is highlighted with the Yellow color. On the other hand, the post is not optimized well for any of the secondary keywords, and therefore, they are highlighted with the Red color. The overall post score is also in the moderate range, and the Yellow highlight is a reference to that.
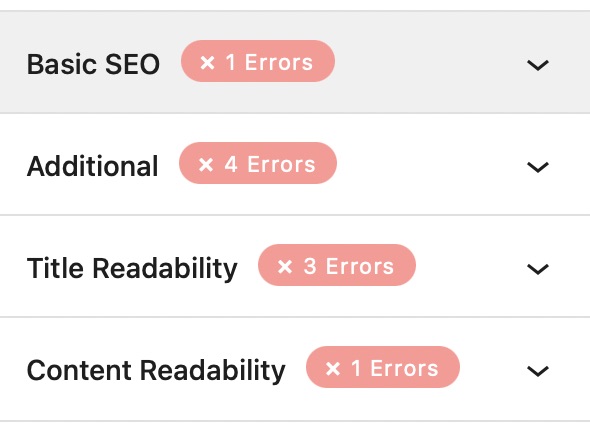
Now that you understand how to read through the tests and recommendations, it’s time to get into the optimizations themselves. Since there are many tests, we’ve categorized them into 4 categories.
- Basic SEO
- Additional
- Title Readability
- Content Readability
Let us start learning with the Basic SEO tests first.
7 Test Color Codes
Each test shows a colored icon on their left side. Most of the tests show a completely solid green or a red-colored icon. But some of the tests like Content-Length, Keyword Density, and Image/Video presence shows partially filled icons depending on the percentage of the score acquired out of the total score assigned to that test.
8 Basic SEO
The Basic SEO section gives you some basic SEO tips to optimize your post. Just because the section is called Basic SEO doesn’t mean that the tips aren’t powerful. It’s called basic SEO because it reminds you to perform “basic” optimizations—basic referring to foundational, rather than simple.
There are different basic tests for primary and secondary keywords, and you have to pass all the basic SEO tests for your keywords to achieve a 100/100 score in Rank Math—so don’t ignore the basic tests. Here are the sections that you would see in the Basic SEO section.
8.1 Focus Keyword in the SEO Title (Primary Focus Keyword Only)

The first test is about the focus keyword being present in the SEO Title of the page. This test only checks for your primary keyword in the SEO page title, as it’s not practical to have all your focus keywords in the title.
As you already know, the presence of your primary focus keyword in the title of the page is an important ranking signal for Google and other search engines. Also, Google displays around 60 characters of your title on desktops and around 50 characters on mobile. Therefore, it’s important to add your primary focus keyword within 50 characters to be displayed on both desktops and mobile devices.
Most of the time, you would include the focus keyword in the title already, and this test will automatically pass. But, if you fail the test, head over to the title of the page and re-word it so that your primary focus keyword appears in the first 50 characters.
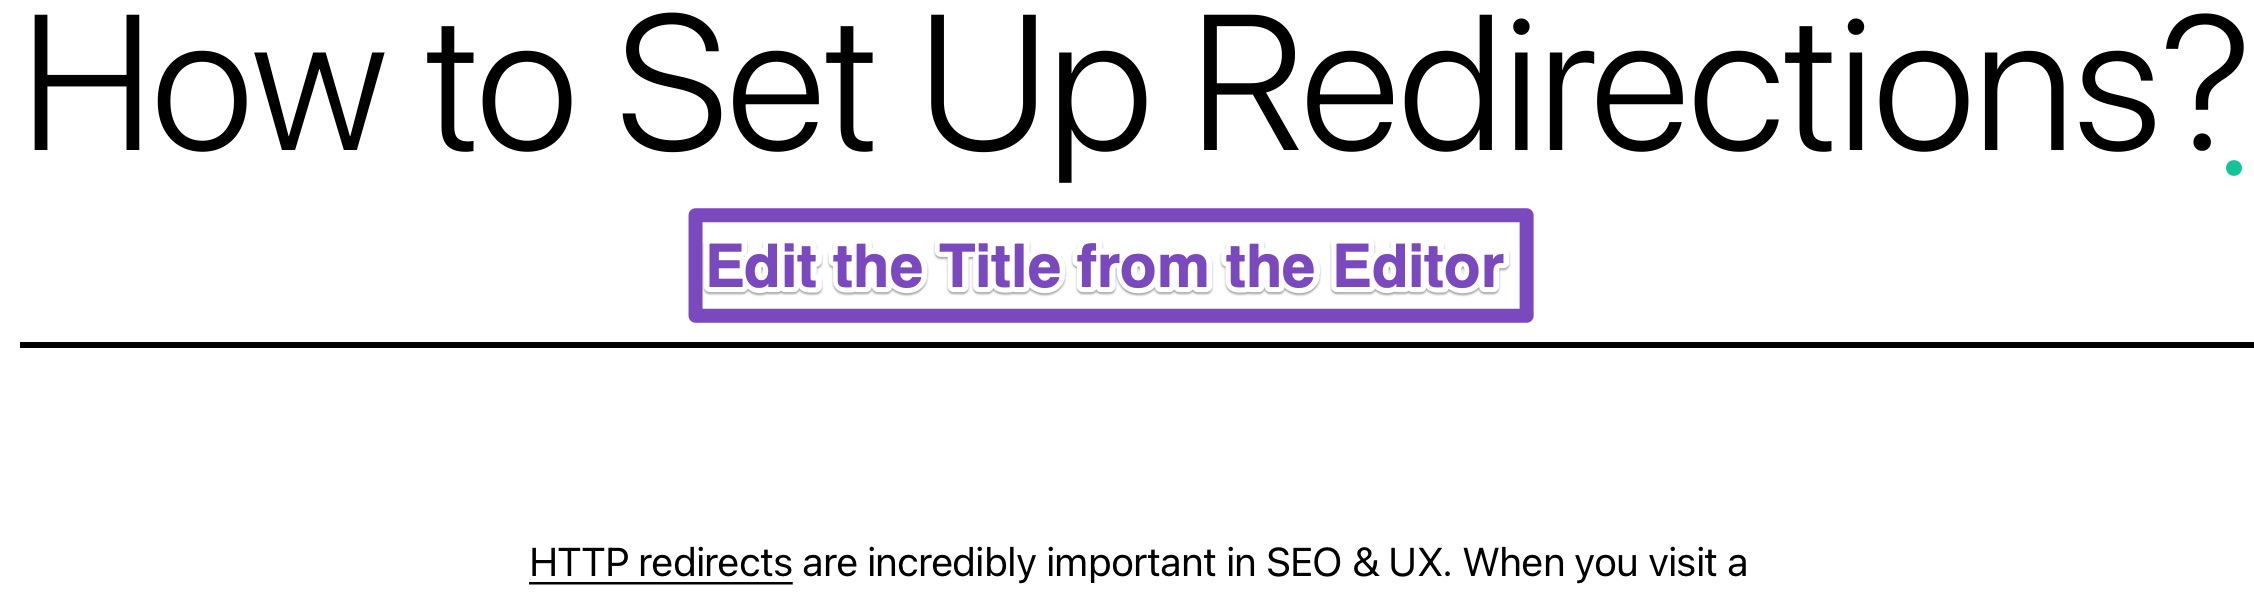
You can do that by editing the post’s title directly, or by editing the title in Rank Math’s Snippet editor. Using the Post Title editor looks something like this.
And using Rank Math’s Snippet editor looks something like this.
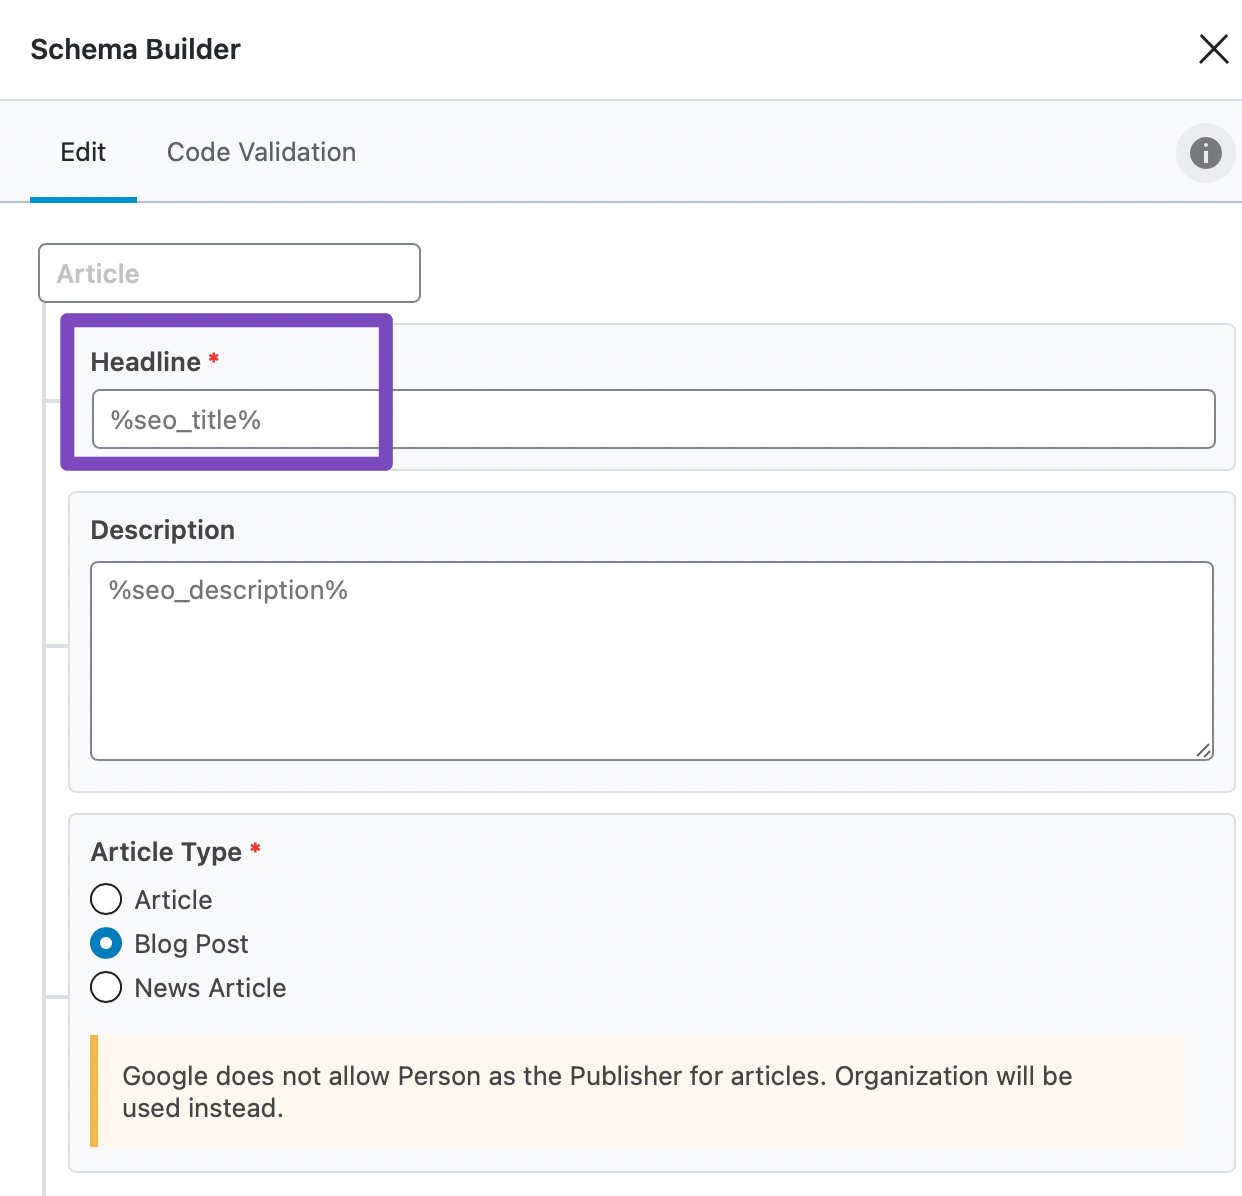
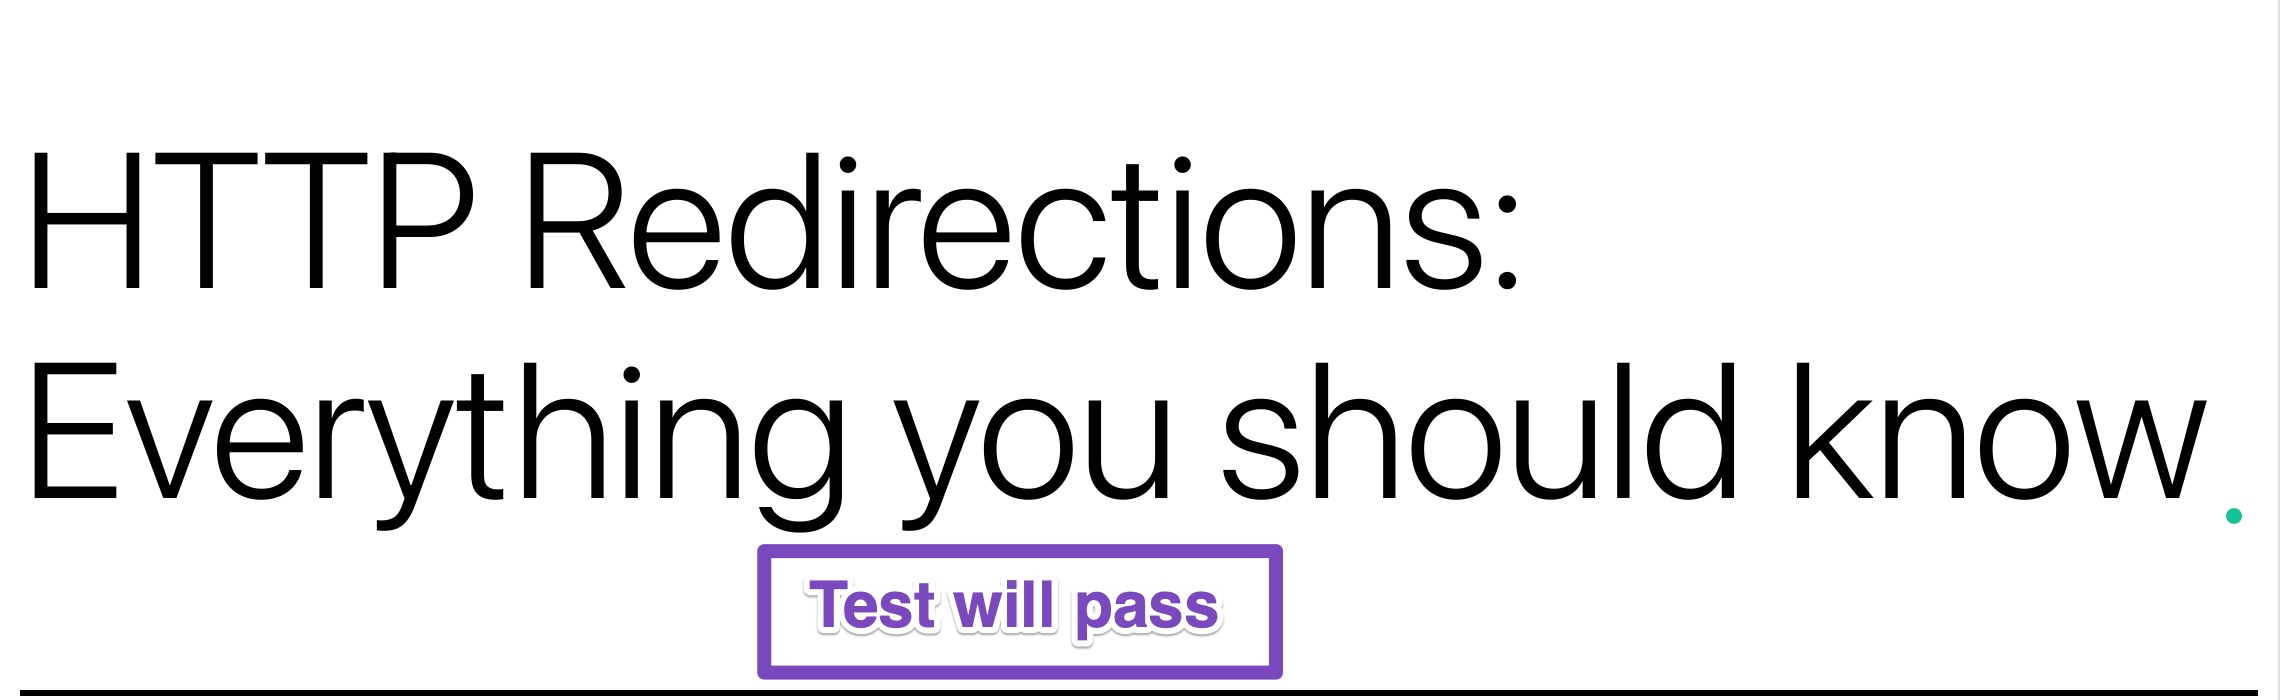
Regardless of the method you use, once Rank Math detects the primary focus keyword in the post title, the test will pass.
8.2 Focus Keyword in the Meta Description (Primary Focus Keyword Only)

The SEO description is the snippet that appears just below the title in the SERP. Its job is two-fold.
It gives Google and other search engines a glimpse of what the post is about, which helps them make ranking decisions. It also gives the users a reason to click through to your website rather than click to any other website.
By including your focus keyword in the SEO Description, you are taking care of both, which means better rankings and better traffic for you.
To understand how to pass this test, you have to understand how Rank Math evaluates this test as well. Obviously, Rank Math looks for your primary focus keyword in the SEO description, but that’s not all. If you haven’t entered an SEO description, Rank Math will create a description automatically and then test it to see if the focus keyword is included.
The generated SEO Description will use data from the following areas.
- Custom Meta Description set for the post
- Description Templates set in Titles and Meta settings in Rank Math
- Post Excerpt
- The first paragraph of the content in the post
Rank Math will use the text in the order they are mentioned. For example, if no custom meta description is set, Rank Math will use the description template set in the settings. If the setting is not configured, then Rank Math will try to find if the post excerpt is set, else the first paragraph of the post will be considered.
The easiest and the recommended way to pass this test is to set a custom meta description for the post. It gives you more control, and you can optimize your description for users and search engines alike.
Here is how to do it.
Head to the Snippet Editor from the top icon navigation in Rank Math.
On the Schema/Snippets page, enter a custom description for your post.
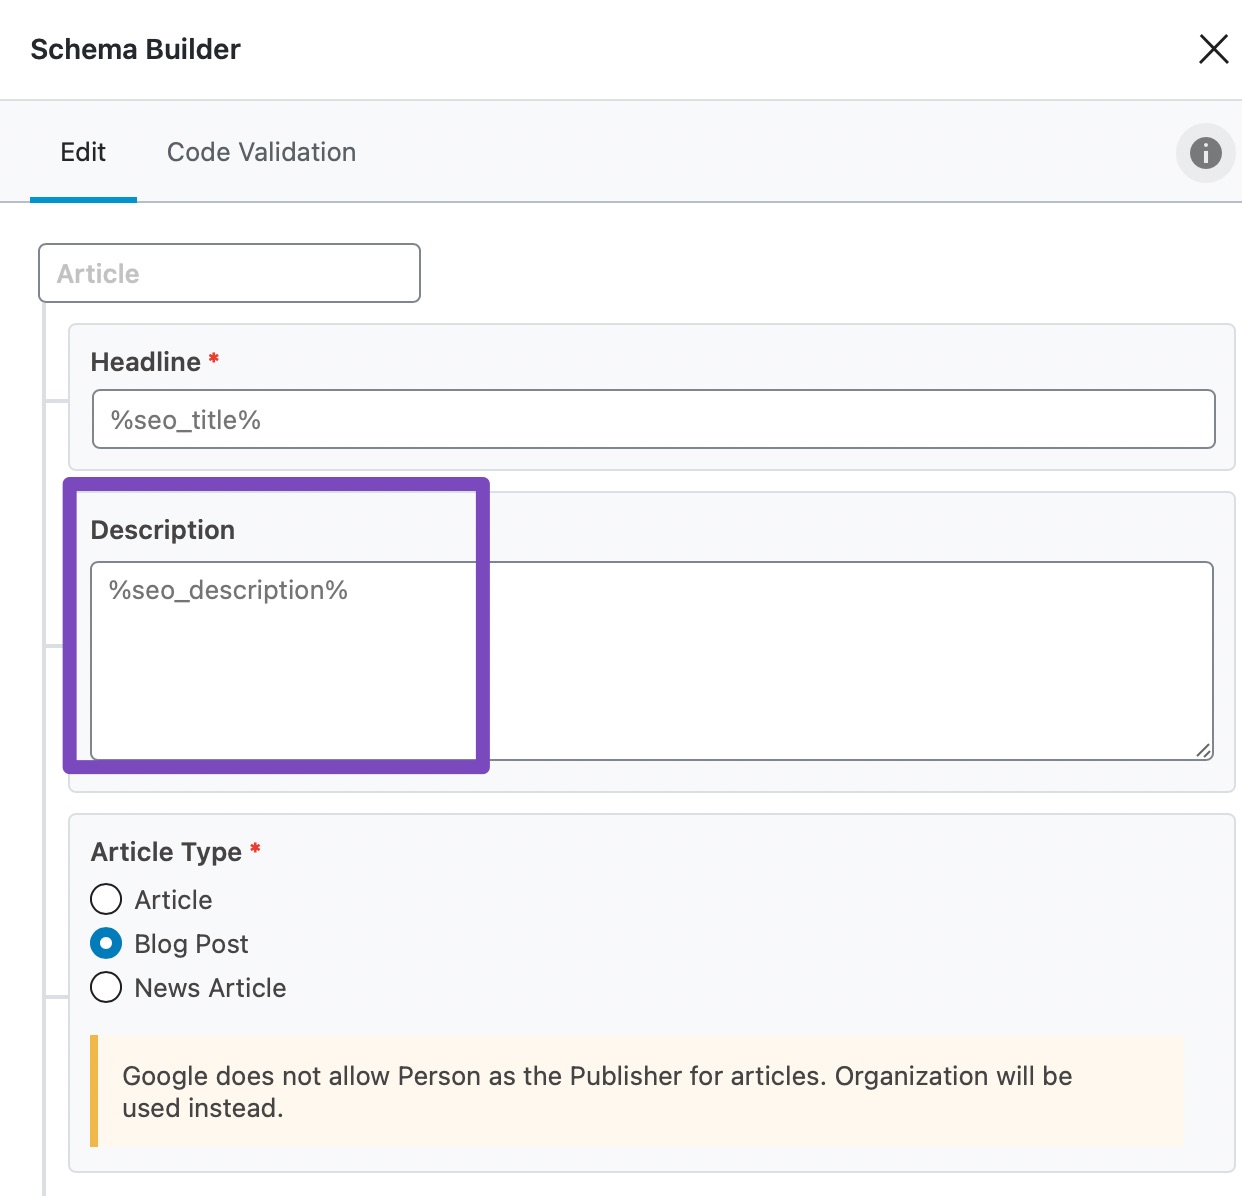
Keep an eye on the ideal length meter too. Rank Math updates the ideal length signal almost instantaneously, and the ideal length should be between 120 to 160 characters.
Once you make the change, Rank Math will instantly pass the test.
Important Note: If you’ve installed Rank Math on a website that has plenty of posts already, then you don’t have to go back and manually fix the meta descriptions of your posts. Rank Math is intelligent enough to generate a meta description based on your primary focus keyword. If a focus keyword is not found, then, Rank Math will use the excerpt text as the meta description. If even that’s not set, then Rank Math will pick the first paragraph of your text as the SEO description.
8.3 Focus Keyword in the URL (Primary Focus Keyword Only)

The presence of the focus keyword in the URL is another ranking signal that all search engines use. It’s also important from a user’s perspective.
As users perform a search on a search engine, they subconsciously choose to click on one result. We don’t exactly know what a user is thinking, but we can safely assume that they are looking for relevance and authority. Presence of the focus keyword in the URL is another way to show the users that the link they are about to click is about the topic they searched for, and the search engines like it too.
Obviously, this test is only performed for the primary focus keyword, as it is impractical to add all the focus keywords in your URL without making a mess.
Most of the time, WordPress is smart enough to add some keywords to the URL. The test generally passes because of that. But, if you failed this test for some reason, here are the steps you need to take to pass.
First, enable document settings in the block editor, if they are not already enabled by clicking the gear icon in the top right area. The keyboard shortcut to open the settings is Ctrl + Shift + , on Windows and Cmd + Shift + , for Macs.
From the settings that appear, click on the “Permalink” setting.
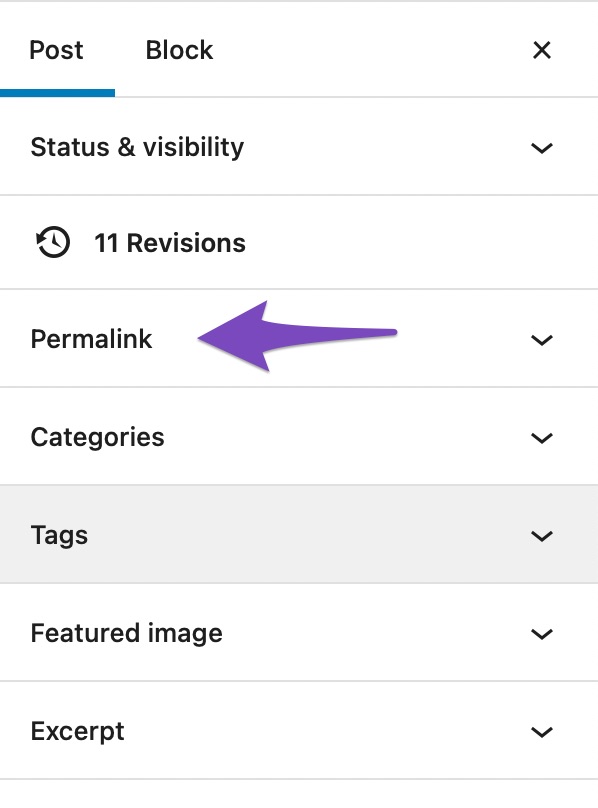
Re-write the Permalink and add the primary focus keyword in it. Make sure to save your post as a draft or update it, whatever you prefer.
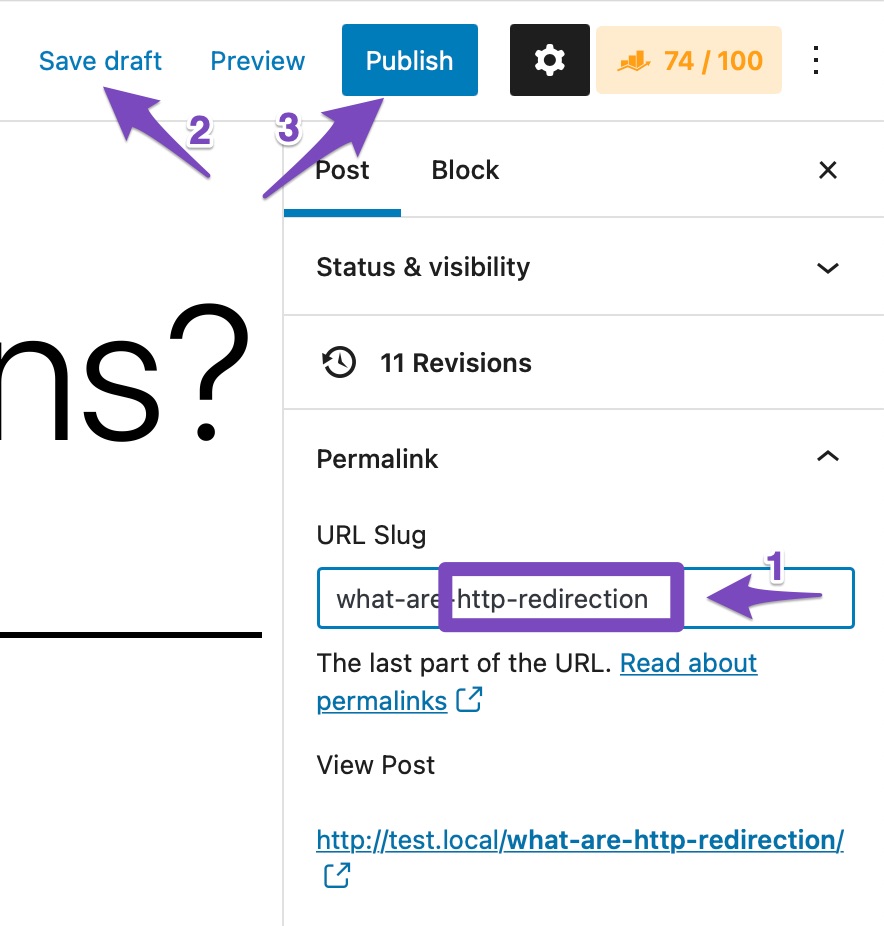
If you don’t see the Permalink setting, then your post is likely not saved. Save a draft of your post, and you will start seeing the Permalink setting.
Things are even simpler on the classic editor as the Permalink is displayed just below the title of the post. Click the edit button, edit the permalink, and save your post to pass this test.

An important thing to note is that this test will not run if you’re not using friendly URLs. Since there is no possibility of adding keywords to plain or numeric URLs, this test will be disabled.
To check if you’ve enabled friendly URLs, head over to WordPress settings, and check your permalink settings. The existing URL created by WordPress should be a good indicator of your current settings. To update your settings, head over to WordPress permalink settings in Settings > Permalinks.
8.4 Focus Keyword at the beginning of the content (Primary Focus Keyword Only)

Apart from the title, description, and URL, it’s also important to have the focus keyword at the beginning of the post. This reinforces to the search engines what your post is about and also re-assures the users that they’ve clicked the correct link.
In this test, Rank Math checks your content to see if the primary focus keyword is present in the first 10% of your post. If it’s found, you pass the test.
However, there is an exception to the rule. In situations where the post itself is under 300 words, Rank Math will check the entire 300 words for your focus keywords. Once the post goes over 300 words, Rank Math will again check the first 10% of your post.
To pass this test, just make sure that your focus keyword is present in the first 10% of your post.
8.5 Focus keyword in the Content (Runs of All Focus Keywords)

This test is kind of obvious. Apart from all the places we’ve discussed, Rank Math also checks if your focus keywords are present in the content as well. Since Rank Math attempts to optimize your post for all your focus keywords, this test runs for all your focus keywords. Rank Math also tries to find both the singular and plural versions of your keywords and consider them in the test. Currently, this feature is limited to the English language, and it utilizes a small word base—so it might not work all the time. If you have a relatively unknown focus keyword, then Rank Math might not be able to understand its plural version, in which case, it will look only for the singular version of the keyword.
To pass this test, all you have to do is make sure that all your focus keywords appear in your content. This shouldn’t be hard as the focus keywords should be the topic of the post as well, and you can naturally include them in the content.
One thing that you should keep in mind is that it’s easy to overdo this. Your ultimate goal is to attract visitors and encourage them to read your content. If your content has too many keywords, then it will look unnatural to your readers. Even if the search engines find it better and send you marginally more traffic, your readers will be put off by excess keyword usage. To avoid this, pass the test, then read the content on your own. If you feel that the post has excessive use of keywords, then you should reduce your keyword usage and make the post sound natural.
8.6 Overall Content Length

Since Google does not tell the world how their algorithm works, webmasters are forced to rely on gut, experience, and research to understand the mysteries behind Google Search.
There have been many studies that have shown that content length and higher rankings have a positive correlation. Maybe Google prefers pages with more content, or maybe the long-form content gives you the opportunity to explain the topic better. Whatever may be the reason, your website rankings should improve once you start, including long-form content.
In this test, Rank Math scores your content based on its length. Here is a simple reference guide to remember.
- More than 2500 words: 100% score
- 2000-2500 words: 70% score
- 1500-2000 words: 60% score
- 1000-1500 words: 40% score
- 600-1000 words: 20% score
- Below 600 words: 0% score
An obvious exception to this rule is product pages. It is rare to see a product page with thousands of words of content, and Rank Math understands that and excludes any product pages from this test.
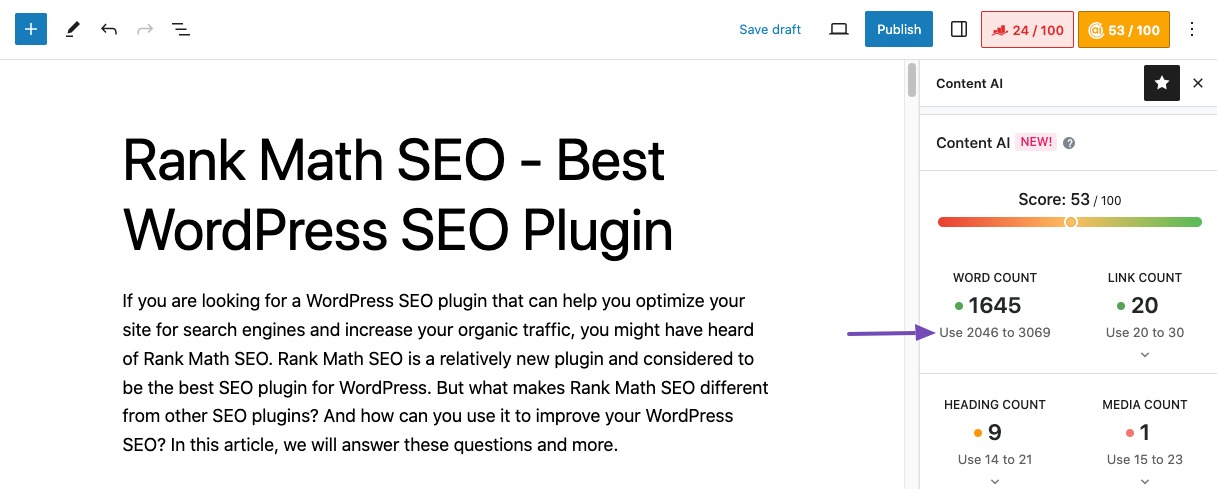
To pass this test, make sure your content is at least 2500 words. You can pass the test with a lower word count too, but you won’t score 100% on the test.
Note: In the PRO version of Rank Math, WooCommerce users will see Rank Math’s content test recommending 200 words.
Content AI: When you use Content AI for optimizing your content, Rank Math would score your content for this test based on the word count recommendations from Content AI. The above list of scoring is not relevant when you’re using Content AI.
8.7 Use Product Schema PRO
This test is available only for WooCommerce and Easy Digital Downloads products in the PRO version of Rank Math.
Rank Math automatically fetches the WooCommerce and Easy Digital Downloads product data and includes them in the Product Schema.
If you’ve configured Rank Math to add Product Schema for WooCommerce and Easy Digital Downloads, you’ll pass the test. We’ve dedicated knowledgebase tutorials to guide you with adding product data for WooCommerce and Easy Digital Downloads.
9 Passing All Basic SEO Tests
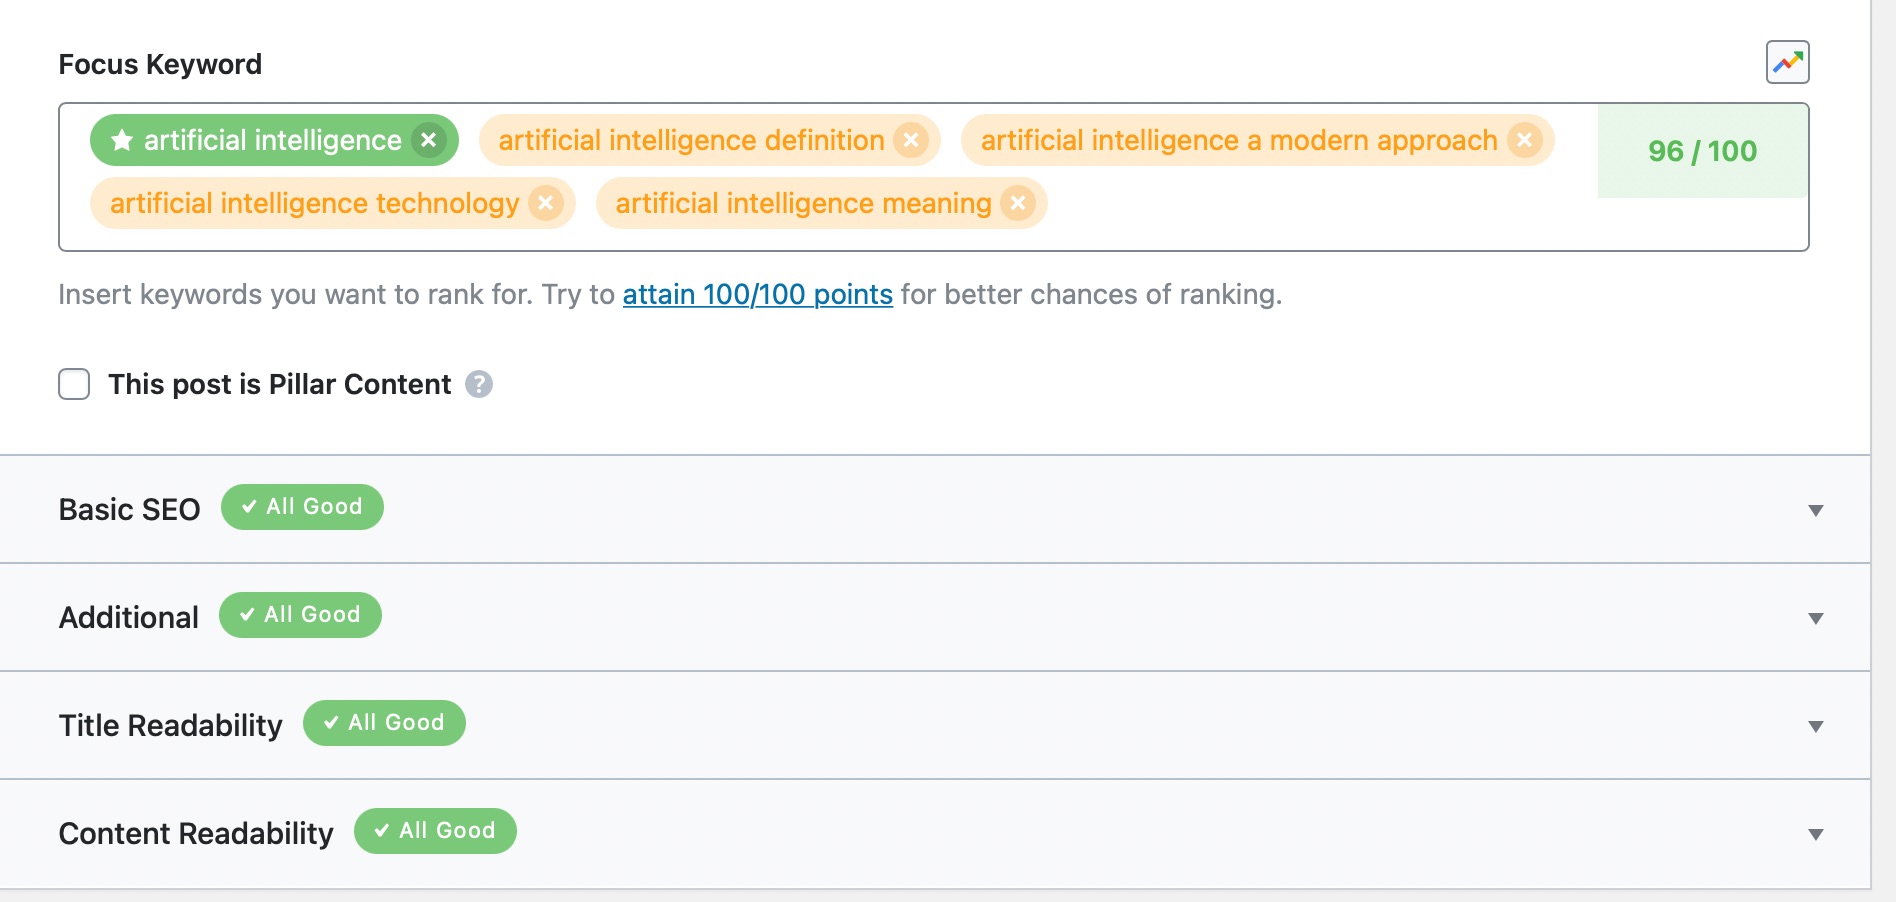
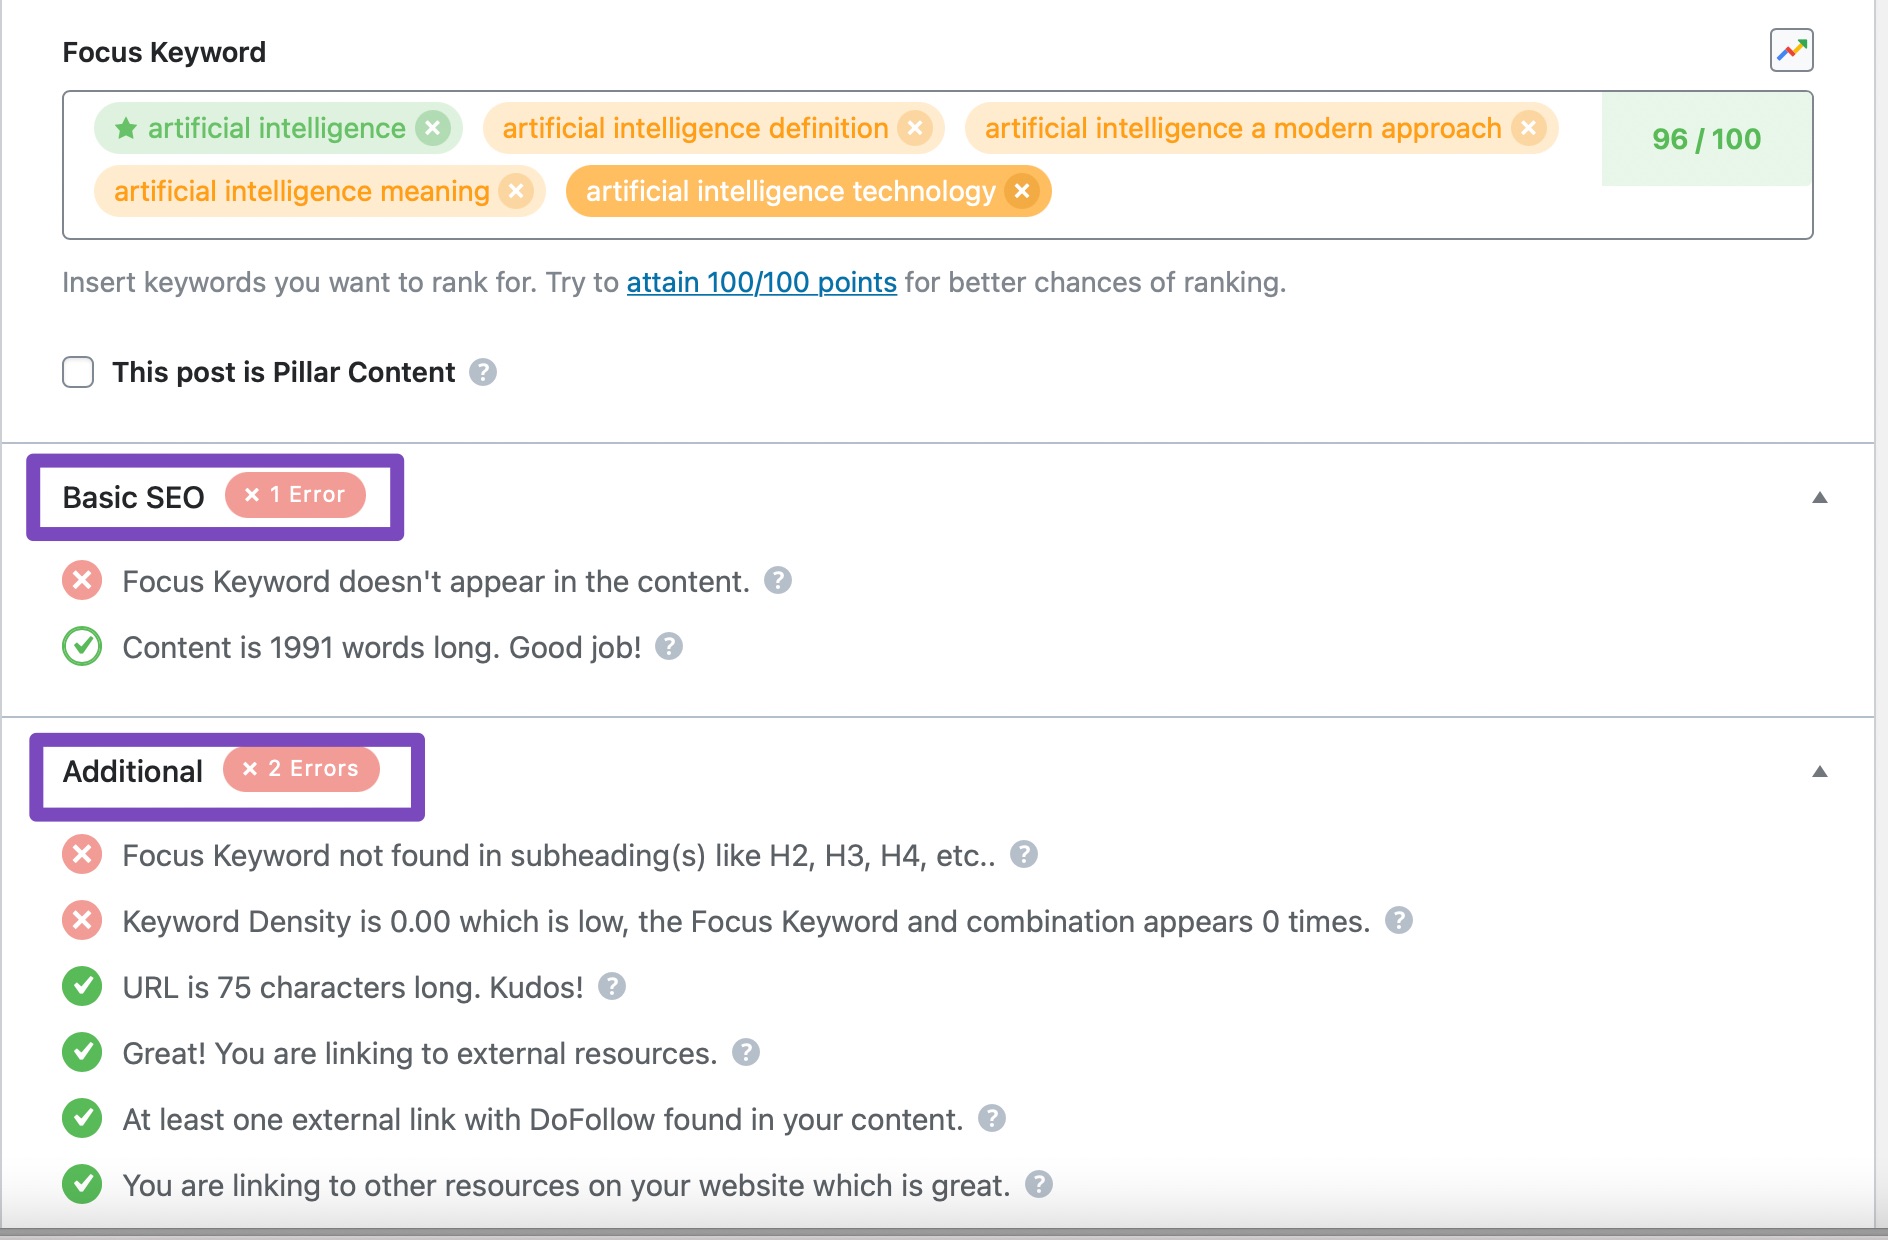
Once you follow the recommendations and optimize your post, the Basic SEO section of Rank Math should appear like this:
Once you see this, your overall post score should also be at-least 50.
That’s all the recommendations in the Basic SEO section. Let us move to the Additional SEO recommendations.
10 Additional SEO
The Additional SEO section gives more actionable tips to optimize your post. The reason that we’ve placed these tips in the Additional SEO section is that they don’t have as big of an impact as the Basic SEO tips. Think of the Basic SEO tips as the base of a pizza and the Additional SEO tips as the toppings. Without the base, there is no pizza, and without the toppings, the pizza isn’t as good. The bottom line is, you should use the Basic tips and the Additional tips for the most SEO impact. Here are the optimizations you should see in the Additional tips section.
10.1 Focus Keyword in Subheading (Primary and Secondary Focus Keywords)
An often ignored on-page SEO factor is the presence of your focus keyword in the H2, H3, and other tags. While Google does pay the most attention to the H1, the H2 and other tags are not ignored, and they are actually important for many reasons.
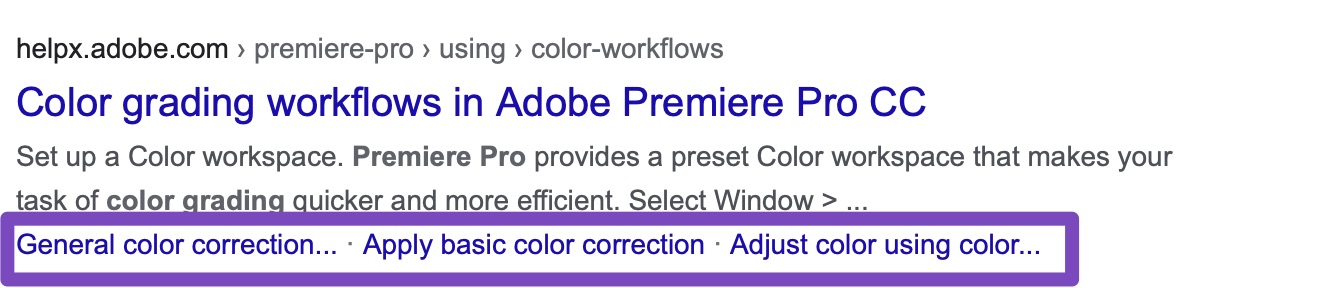
Not only does including your keywords in your headings bring relevancy, but it also helps in achieving site-links in the results. Site-links are quick links that appear below your search result that helps the user quickly jump to a specific section of the article. Here is how they look.
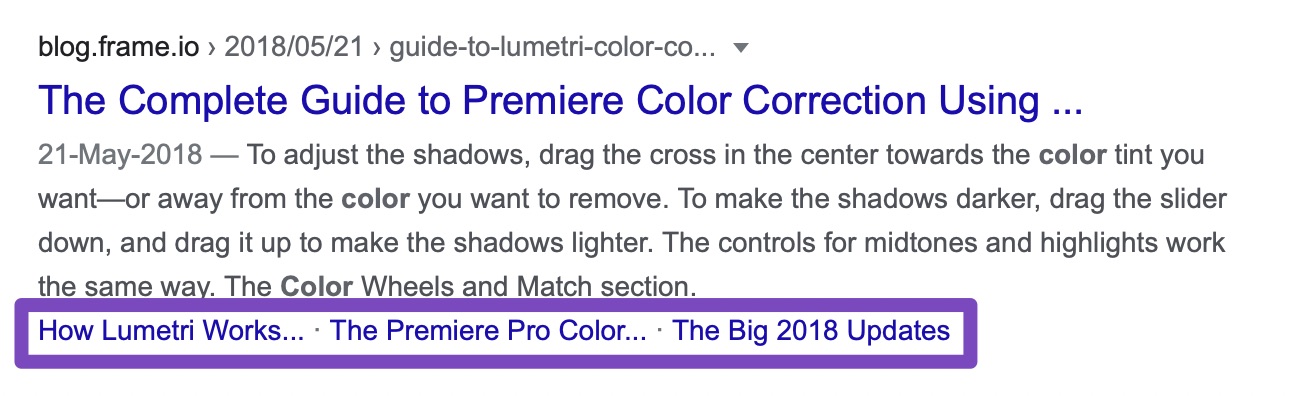
Site-links not only help build authority in your visitor’s eyes, but they also help achieve a higher click-through rate, both of which are essential to your website’s growth.
In this test, Rank Math will check if you’ve included your focus keywords in your headings and pass the test if it finds them. This test runs on all your focus keywords, so make sure that you’re using all of them in your headings. As is the case with any SEO optimizations, try to naturally incorporate the keywords in your article instead of stuffing them just for the sake of it.
An important thing to remember is that this test runs for both primary and secondary focus keywords, and you’ll need to incorporate both of them in your subheadings to achieve a full score. You can always check if you pass the test for a secondary keyword by clicking on it.
Note: This test is not applicable for WooCommerce Products and Easy Digital Downloads in the PRO version of Rank Math.
10.2 Focus Keyword in Image Alt Attributes (Primary Focus Keyword Only)
In this test, Rank Math looks for your primary focus keyword in your images’ ALT text. Both the singular and the plural version of the keyword are considered when performing this test, and the test passes if Rank Math finds any one of the variations in the ALT text.
Image ALT text is supposed to be the text that appears on the screen if the image fails to load. In the early days of the Internet, bandwidth was scarce, and even just a few kilobytes were considered gigantic. That is why having some alternate text that could take the place of an image that could not be downloaded was considered a good practice, as it helped the users understand the context of the image.
Search engines soon realized that since ALT text simply describes the image, they could read it to understand what the image was about. Think about it, what would be the ALT text of an image of Roger Federer?
As we mentioned, to pass this test, you need to have your primary focus keywords in the ALT text of your image. Here is how you do it if you didn’t already know it.
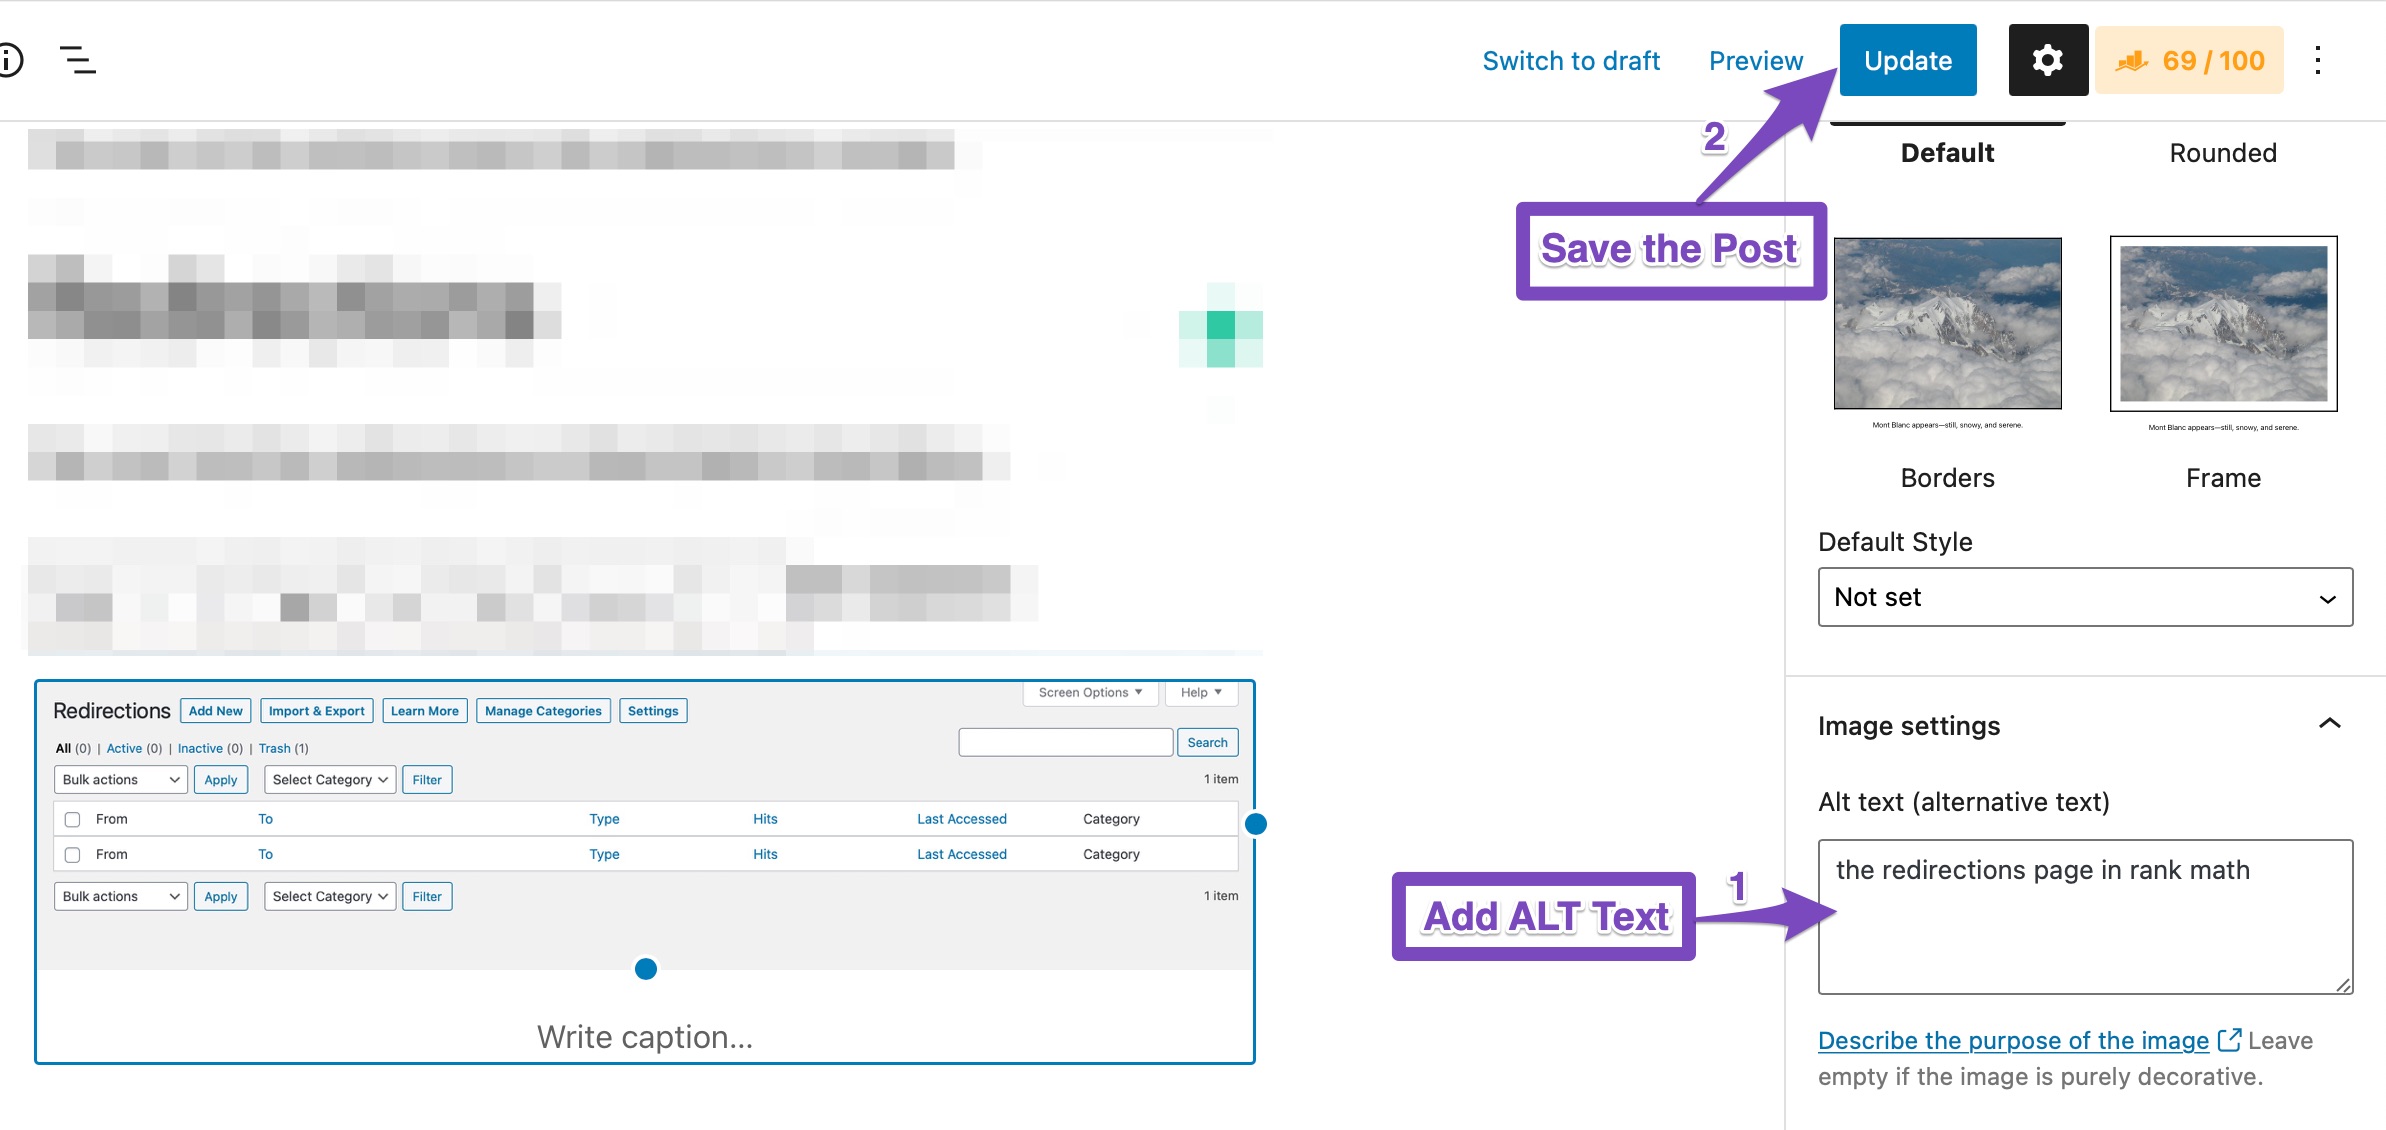
Click on the image you want to set the ALT text for in the block editor.
The settings bar on the right should shift to “block” settings, which means you get the opportunity to change the image’s settings. You should see the Alt Text area in the first few settings, and all you have to do is add the Alt text there and save your post.
If you’re using the classic editor, then the steps are a little different. First, click the image you’d like to set the Alt text of. You should see a bunch of options appear on the image. Click the Pen Icon to open the image settings.
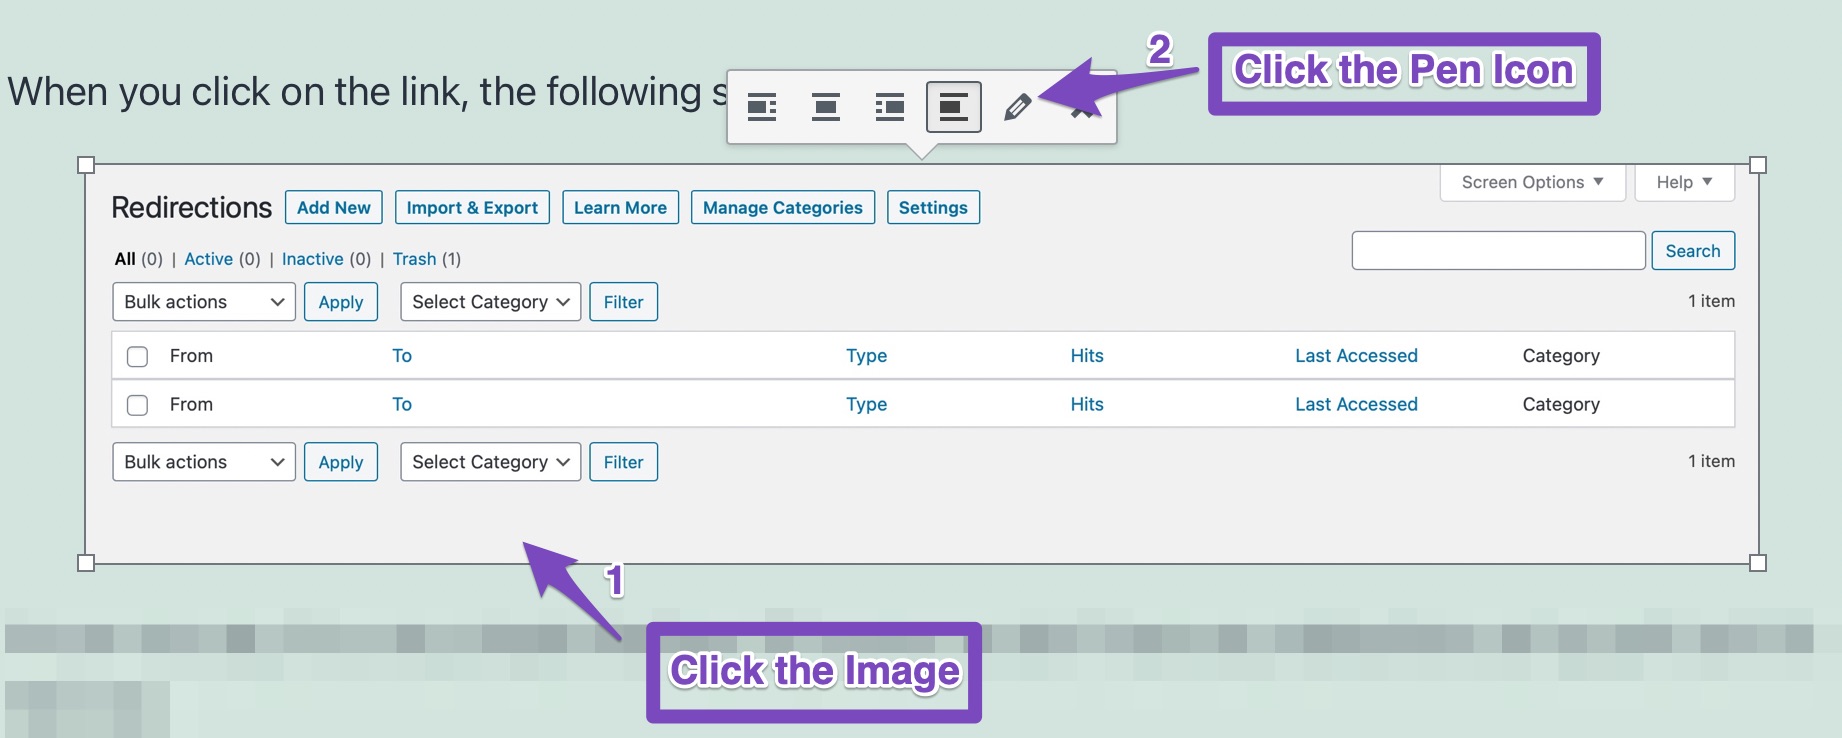
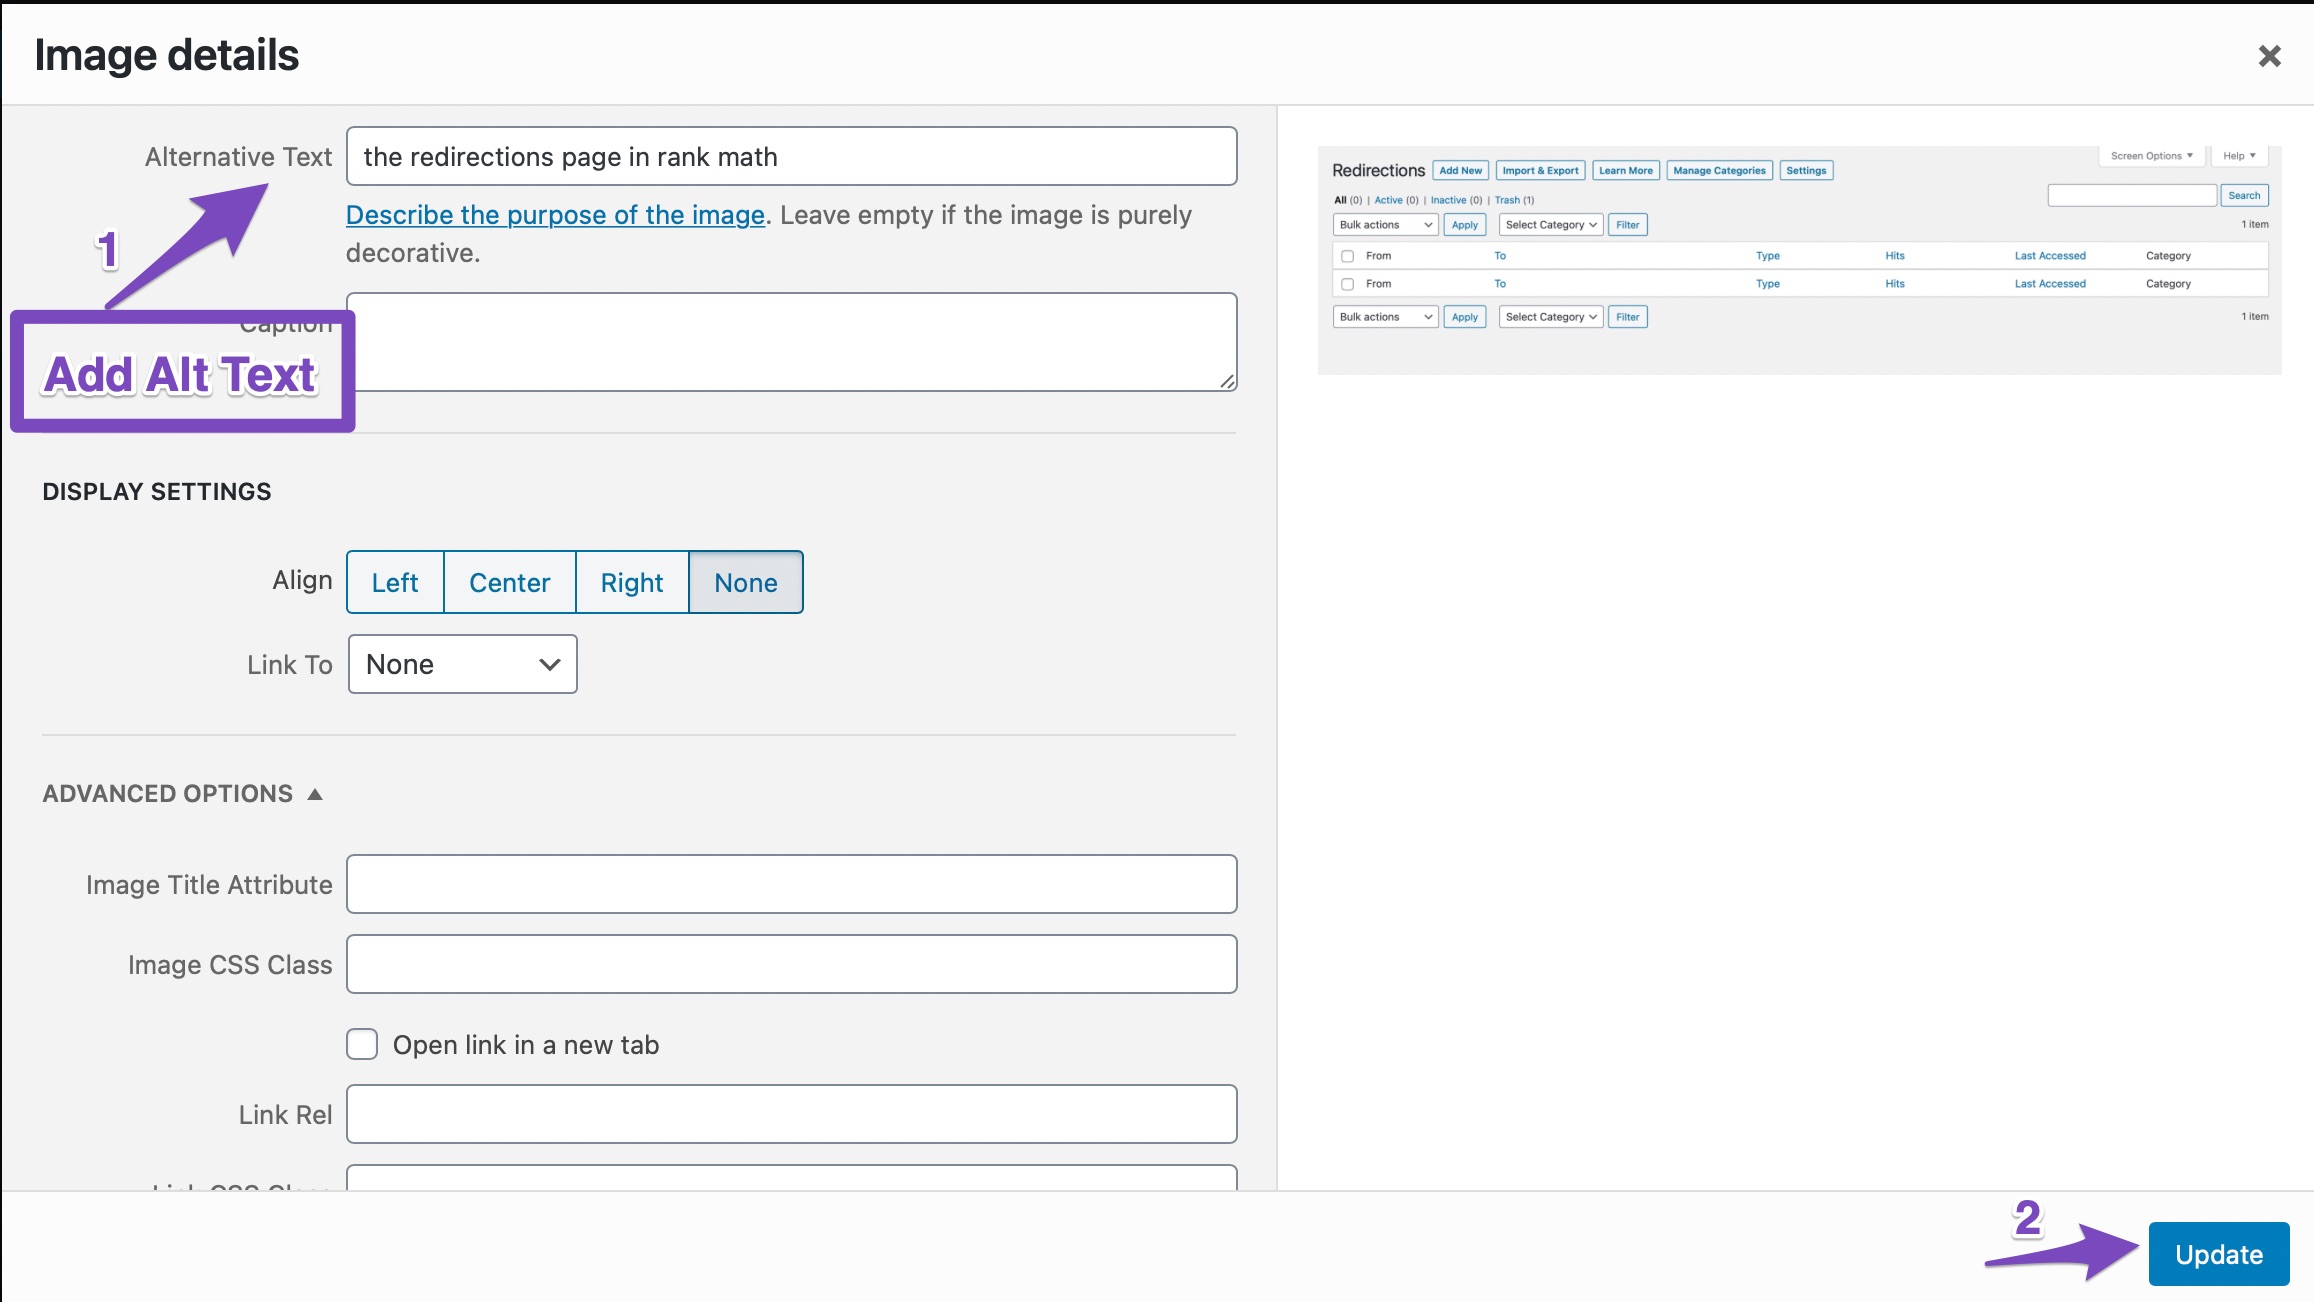
You should see Alternative Text as the first option, which is the same as the Alt text. Add your desired Alt Text there, and update the image settings.
10.3 Keyword Density (Primary and Secondary Focus Keywords)
Although Keyword Density is becoming less important, optimizing your post with a good keyword density will give you an edge in the search results.
However, Keyword Density should never be overdone. A low keyword density is better than a high keyword density. Even with a low keyword density, there is a good chance that Google will pick on your focus keyword. But, a high keyword density is a bad quality signal, which might get you kicked out from the search results.
While there is no perfect keyword density, a keyword density of 1-1.5% is sufficient in most cases, the more important thing is to keep your language natural because if search engines don’t pick on the high keyword density, your users definitely will.
In this test, Rank Math checks how many times your focus keyword(s) and their combinations have been used in the post. Rank Math looks for both the primary focus keyword and secondary focus keywords to determine your keyword density.
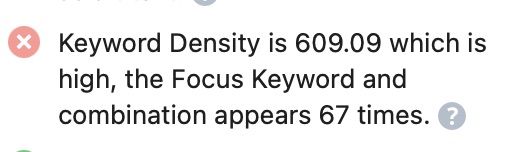
To get full marks on this test, make sure that your keyword density is between 1% and 1.5%. If you overdo it and exceed a keyword density of 2.5%, you’ll get a warning about that too and we saw that in the screenshot at the beginning of this topic.

10.4 URL Length

Multiple URL length studies have shown that shorter URLs have a higher chance of ranking in the SERPs. Short URLs are simple, to the point, and specific enough to drive clicks. Just think about it. Which of the following URLs look better to you?
www.site.com/best-plugin-to-do-search-engine-optimization-for-wordpress-sites/Or,
www.site.com/best-wordpress-seo-pluginThe difference is clear and obvious.
Long URLs are also prone to be either keyword-stuffed or being unnecessary long. Google doesn’t prefer either one of them, and neither should you.
Although short URLs are preferred, there are no guidelines to say which URLs are considered “short”, and therefore, it is not easy to quantify the length of a good URL. Instead of trying to hit a certain length, we recommend that you ask yourself, “Can I shorten the URL and make it more precise at the same time?” If the answer is yes, then you should reduce the length of the URL.
In this test, Rank Math checks the length of your URL and lets you know if it is too long. As we mentioned, it is not easy to specify an exact length that can be considered good, but in Rank Math’s case, that is the only option possible.
After careful testing and considering plenty of real-world examples, Rank Math’s “good” URL length has been set to less than or equal to 75 characters. So, if your URL length is equal to or less than 75 characters, then this test will pass.
There are a couple of things to keep in mind with this test.
First, this test checks your entire URL, not just part of it. That means HTTP, your domain name, separator characters, and your post URL, all are included in the test.
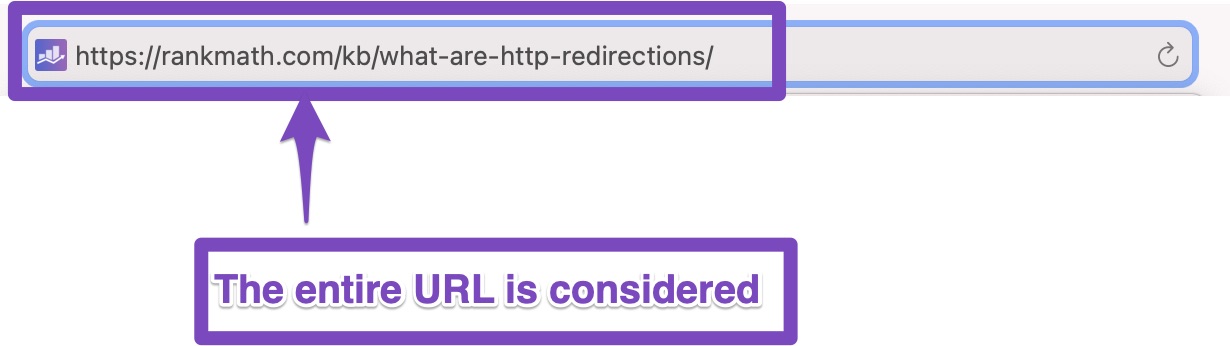
For this reason, if your domain name is too long, you should probably ignore this test. Because of the long domain name, you won’t be able to create a meaningful URL while pertaining to the 75 character limit. The test will appear as failed in that case, but you can safely assume that your post is optimized.
10.5 Linking to External Sources
You already know that links from other websites pointing to your website are great for your website’s SEO. What you might not have known is that links from your post to other websites are also, albeit small, a ranking factor.
Think about it this way. When you write a post, it’s natural to reference other articles, tools, websites, and research available elsewhere – just like we did in this article. Referencing them in your post just makes your copy look natural to the search engines and the users. Just make sure not to link out to your direct competitors if you want to keep an edge in the SERPs.
In this test, Rank Math checks if you’re linking out to a few external websites. If you’re not, then you’ll fail this test, and you will need to add a few relevant links to external websites to pass this test.
Note: This test is not available for WooCommerce Products and Easy Digital Downloads in the PRO version of Rank Math.
Content AI: When you make use of Content AI, this test is synced with the External link count suggestions from Content AI. Hence, if Content AI recommends not to add external links, this test would be hidden.
10.6 Linking to External Content with a Followed Link
If you’re familiar with SEO, then you know that not all links are created equal. There are “followed” links and “no-followed” links. Technically there are no “followed” links, as it is the default behavior of links, but the terminology on the Internet has developed in a way that saying a link is “followed” is considered normal.
In the initial days of the Internet, there was no “nofollow” or “dofollow”, all links were followed. This led to a massive spam problem where people would use automated software to create thousands of spam links to their sites. To combat this, Google introduced the nofollow tag.
This led to another problem. Earlier, websites linked to other websites freely and whenever it made sense. As soon as the nofollow tag was introduced, most websites started to nofollow all their links to external websites, trying to keep all the SEO power to themselves. This phenomenon was called PageRank Sculpting, and Google did not like it. After all, the entire purpose of the web (and their algorithm) was being defeated.
To combat this problem, they started rewarding sites that linked to other websites without a nofollow tag, i.e., with followed links. And, that is the reason you see this recommendation in Rank Math.
This test is obviously dependent on the test above it. If you’re not linking out to external websites in the first place, then how would the link be followed?
To pass this test, pass the test above it, and then make sure that at least one of your external links is followed.
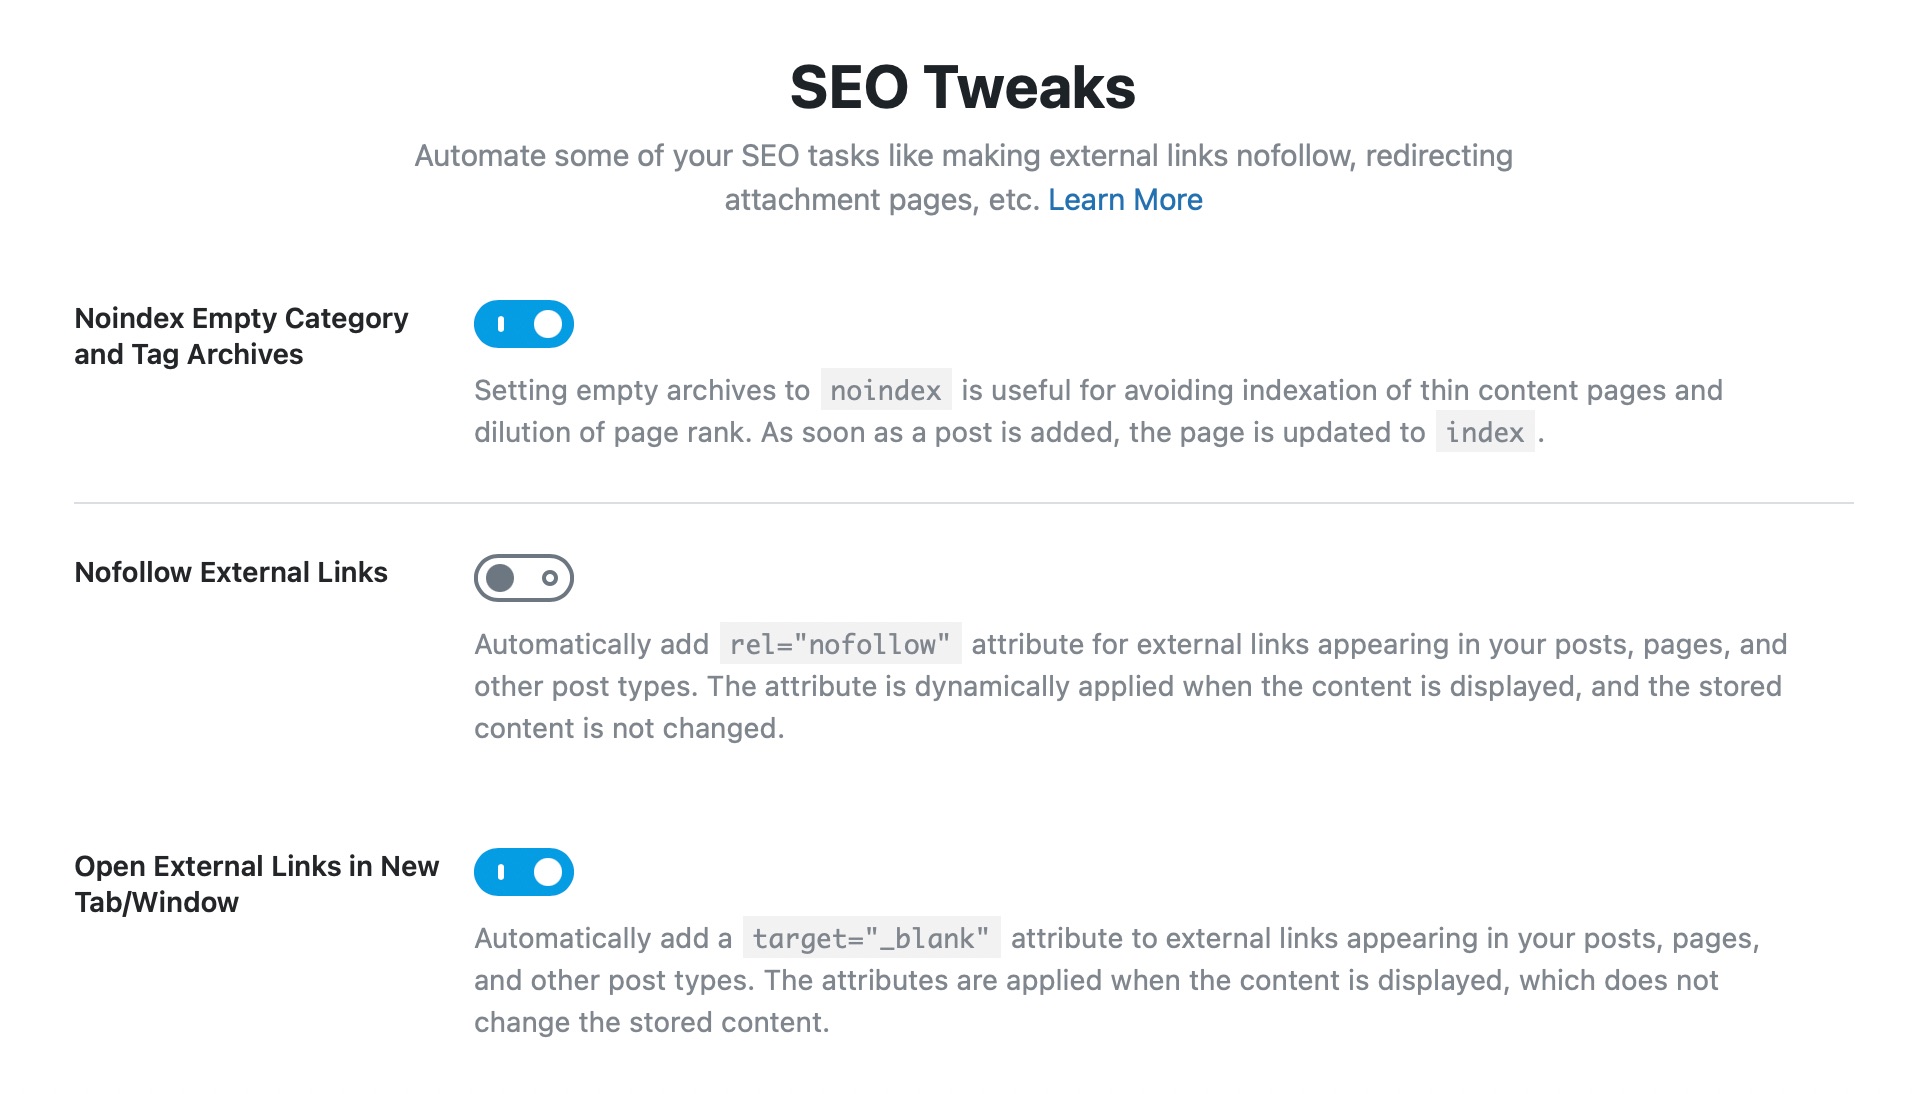
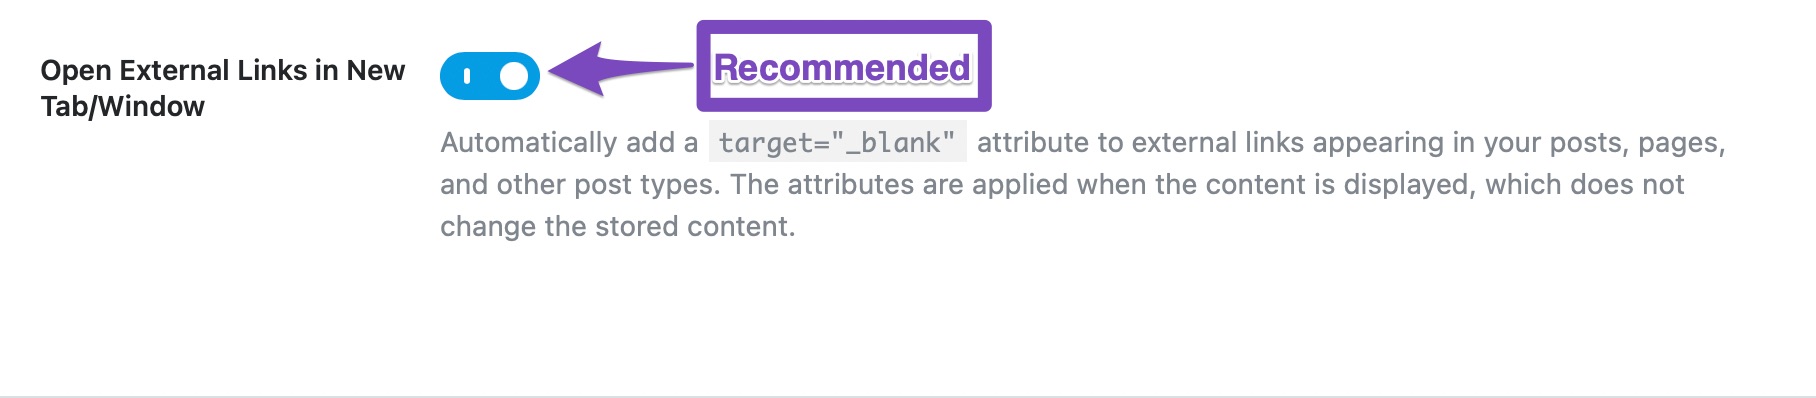
Now, you might wonder, doesn’t Rank Math have an option to automatically no-follow all external links? What if that option is enabled?
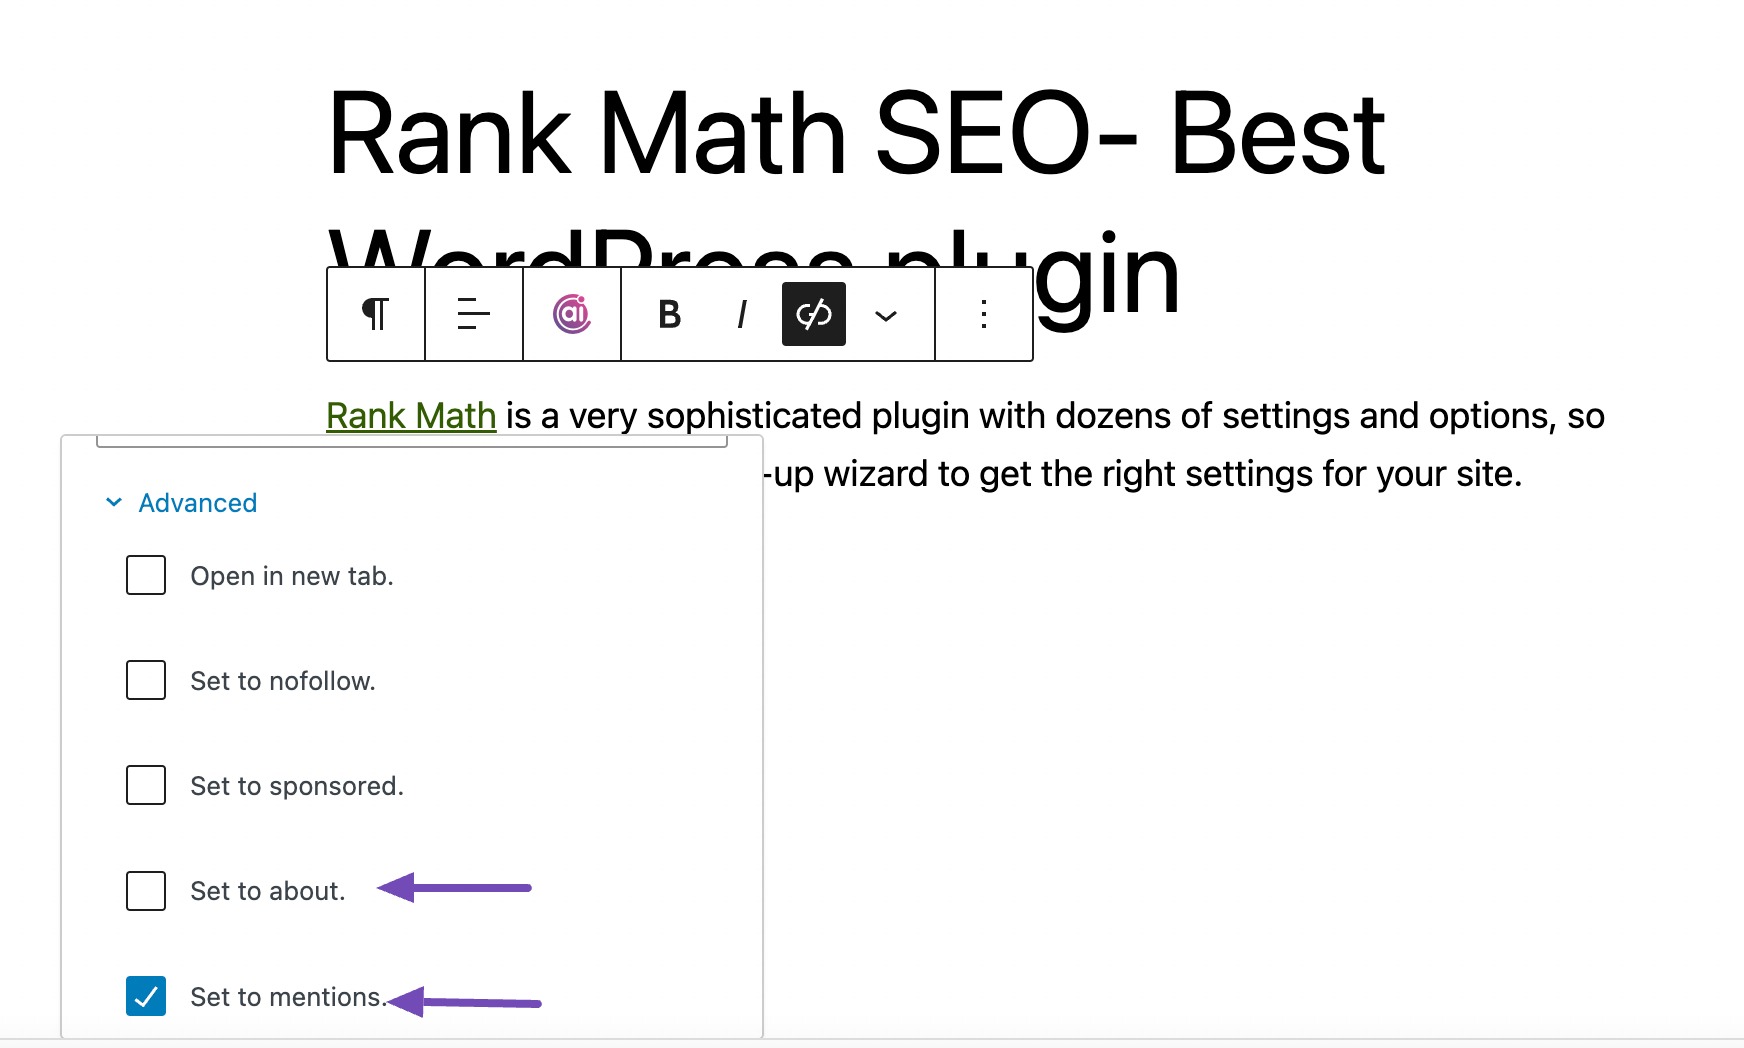
First things first—not all external links should be no-followed. We’ve added that option to make it easy to nofollow a lot of links, but not with the intention of no-following every external link. In fact, we encourage that you link out to authoritative websites—that is why the hyperlink exists. When you’re linking out to a trusted website, you should definitely not nofollow it. We’ve included a Whitelist feature in Rank Math, which helps you achieve that.
Here is how it works. You enable the feature to nofollow all external links. Then you add your list of trusted domains in the “Nofollow Exclude Domains” list. Once you save your settings, Rank Math will not nofollow any external links to any of those domains.
Another way to manage your links is not to enable the nofollow all external links option, and add the list of your untrusted domains to the blacklist, called the Nofollow Domains option in Rank Math. This will make all your external links followed, with the exception of the links to the domains listed in this section.
You can use either solution to manage your links, and if you link out more to trusted domains, then using the blacklist would save you time and vice versa.
The Blacklist and the Whitelist can be found in the General Settings inside Rank Math. You can learn all about them from the dedicated knowledge base article.
Note: This test is not applicable to WooCommerce Products and Easy Digital Downloads in the PRO version of Rank Math.
Content AI: When Content AI recommends not to add external links, it is obvious this test would not be relevant. Hence in such cases, Rank Math leaves this test hidden.
10.7 Linking to Internal Resources

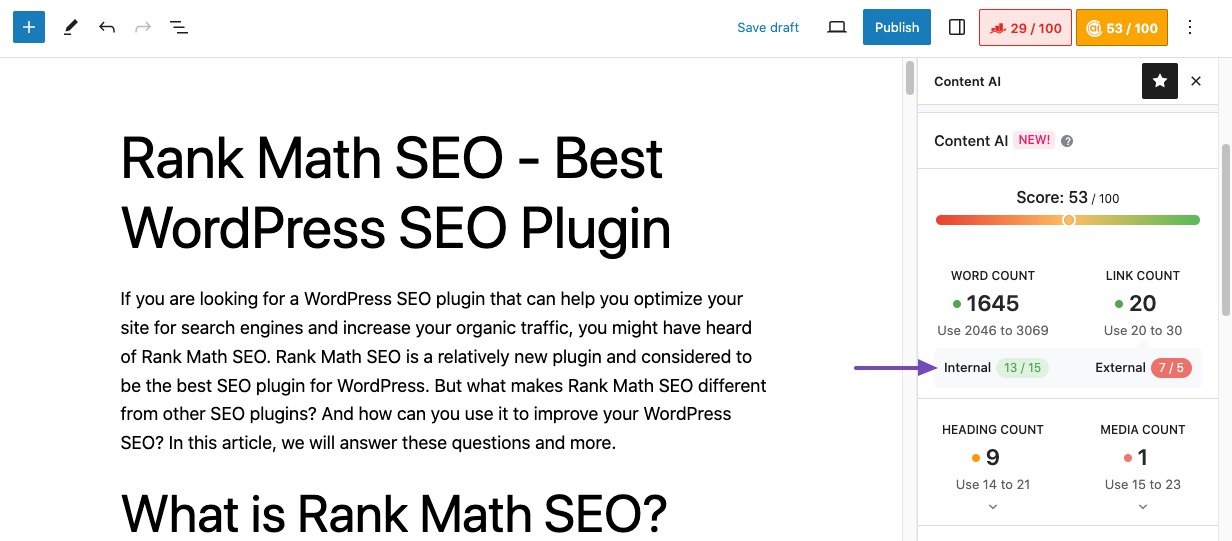
Internal links are a powerful way to improve the SEO of your post and also give your users a better experience on your website. Rank Math checks your post in real-time and notifies you if your post does not have any internal links. The following types of links qualify for this test:
- Links to other posts on your website
- Links to other subdomains on your main domain
- Links to the main domain from a sub-domain
To pass this test, make sure to include a few relevant internal links from your post to other posts on your website.
Note: This test is not applicable to WooCommerce Products and Easy Digital Downloads in the PRO version of Rank Math.
Content AI: This test is synced with the Internal link count suggestions from Content AI. Hence, if Content AI recommends not to add internal links, Rank Math would hide this test.
10.8 Focus Keyword Uniqueness (Primary Focus Keyword Only)

This is a simple test which checks if you’ve already used your focus keyword in any of your other posts. The reason for this test should be quite obvious. If you use the same focus keyword on more than one post, that means you’re trying to rank more than one post for the same keywords. The SERPs are rarely easy enough to break into with 2 posts, and it is unlikely that both your posts will reach the top 10 spots.
Another problem with optimizing 2 posts for the same keywords is content uniqueness. If you’re writing about the same topic, it would be tough to make the content pieces unique. Even if you’re able to achieve that, wouldn’t it be better just to have all the content in a single post?
By creating 2 posts about the same topic, you’re also opening up the possibility of creating duplicate content. Although search engines won’t penalize you for duplicate content, duplicate content can end up confusing them as to which of the posts they should rank.
Let us take an example. Suppose that you created a post on your website sometime back targeting a specific keyword. Over time, the topic evolved, and you felt the need to cover the same content in more detail, so you write a new post on the same topic. Now think from a search engine’s perspective. According to them, an older piece of content which has (hopefully) some good links is a good resource as compared to a brand new resource. Because of this, search engines will end up ranking your old content, and your new content will be cannibalized. For these reasons, we recommend that you create only a single post for a focus keyword.
For new websites, it is unlikely that you will fail this test as Rank Math notifies you. But, if you have an older website where a single topic has been covered multiple times, there are a few solutions that you can use to circumvent the situation. You can either merge the posts together or delete one of the posts. If you decide to delete the post, make sure to redirect the old post to the new one.
Before you decide which steps you’ll take to solve the problem, you have to find the post with the same focus keyword first. Don’t worry; you don’t have to go through all your posts and check each of them manually—Rank Math will help you out.
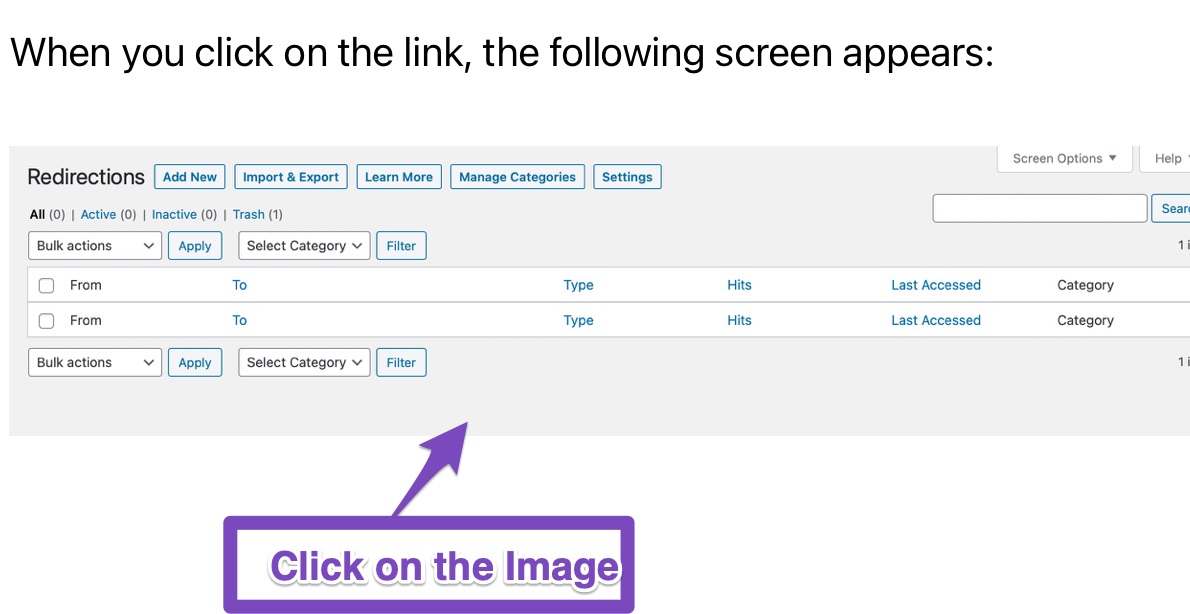
If you fail this test, Rank Math will not only notify you of the problem, but it will also add a link that you’ll be able to click to see all the posts that use the same focus keyword. Once you see all the posts, the rest of the steps are easy to implement. Here is how the error looks like:

When you click the link, this is how Rank Math presents all the posts to you.
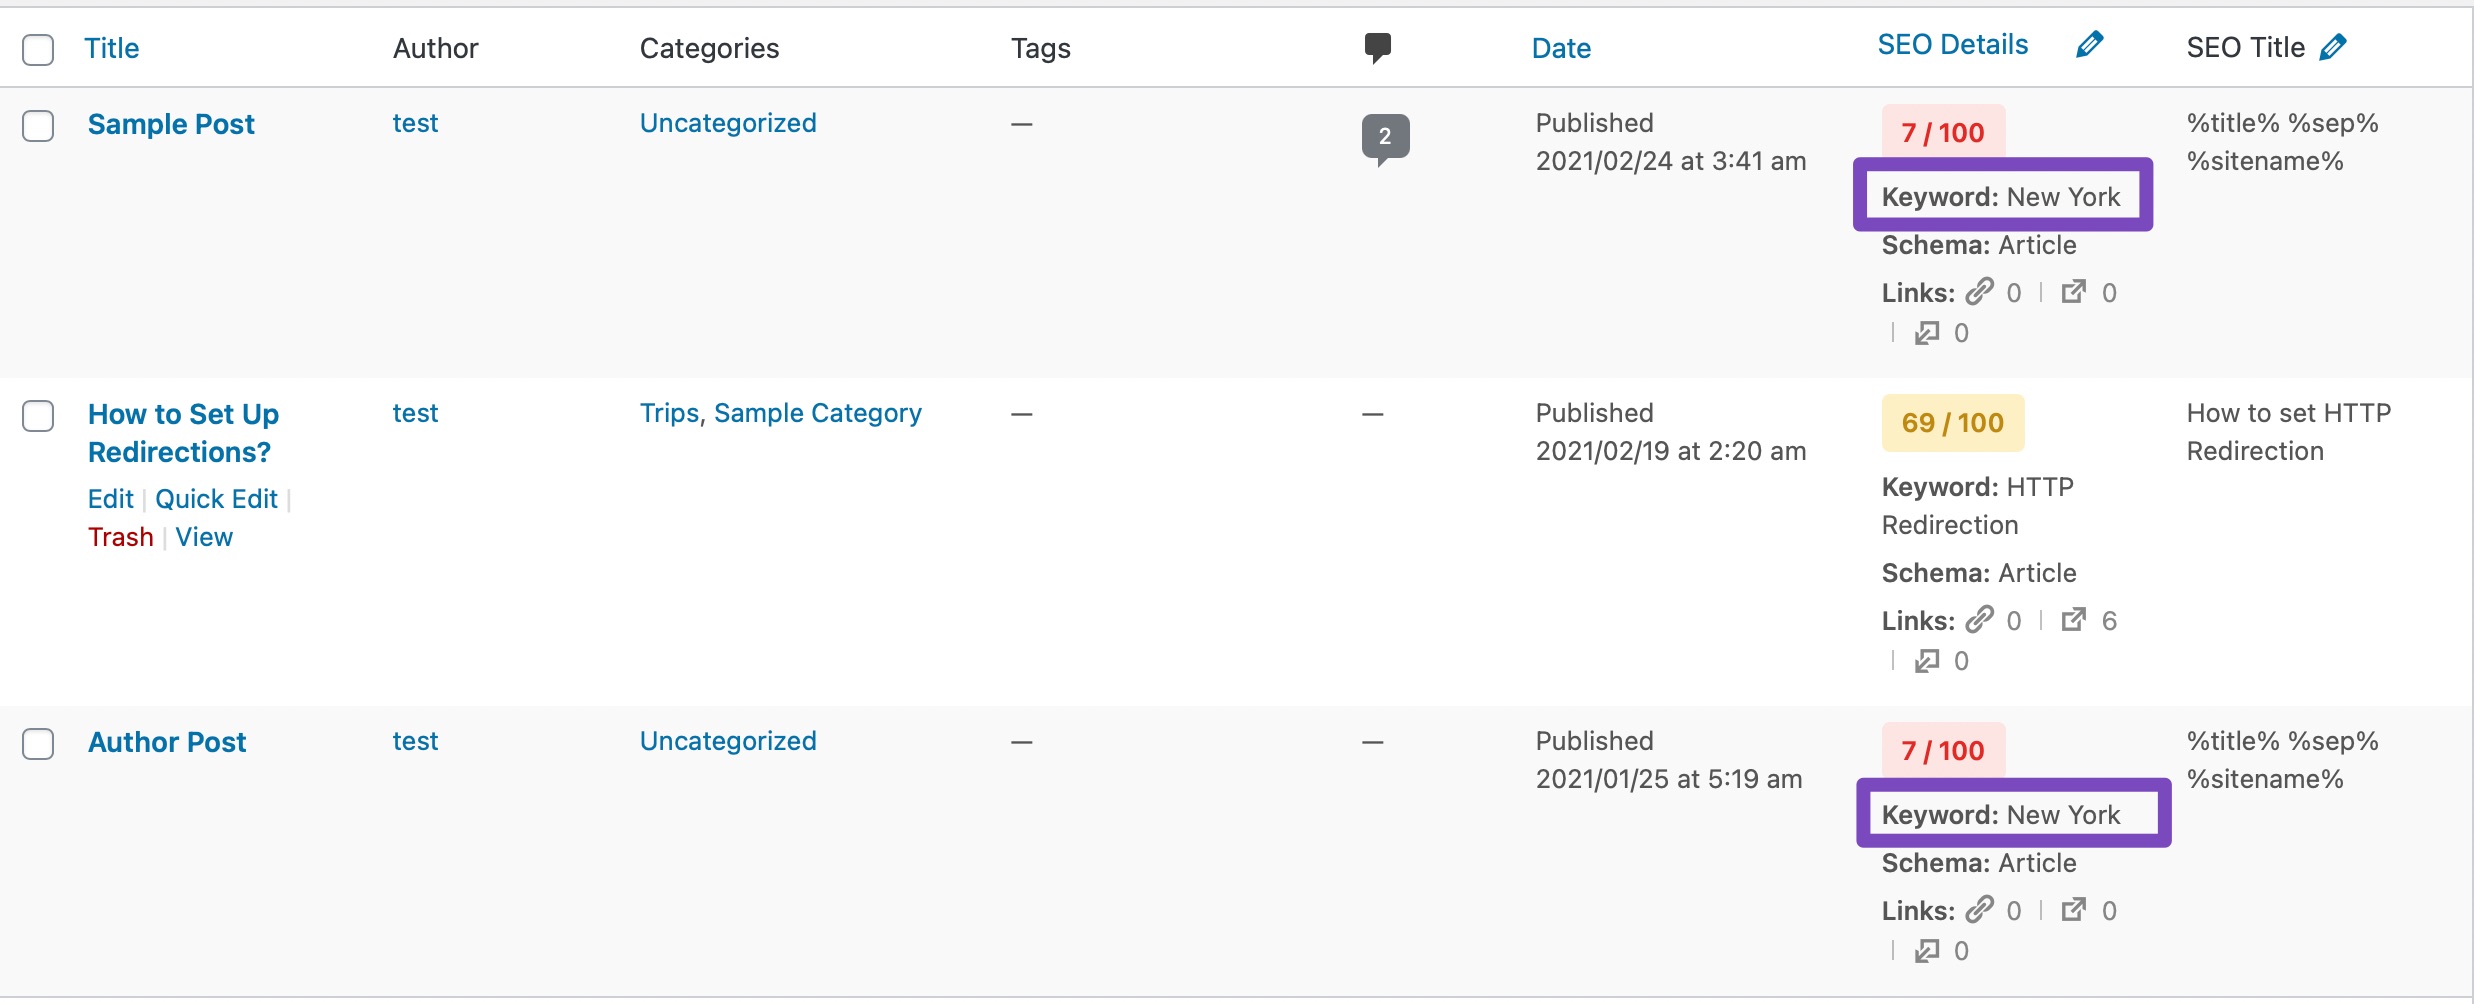
You can also use the SEO score assigned by Rank Math as a guide for what to do. As you can see in the image above, the second post isn’t optimized well for the focus keyword, but the first one is. You can use this information in conjunction with your other stats (traffic, links, conversions, etc.) to make a decision about how to manage these posts.
10.9 Use Content AI for Optimizing Post

In this test, Rank Math will check if you’re using Content AI to optimize your post for the focus keyword.
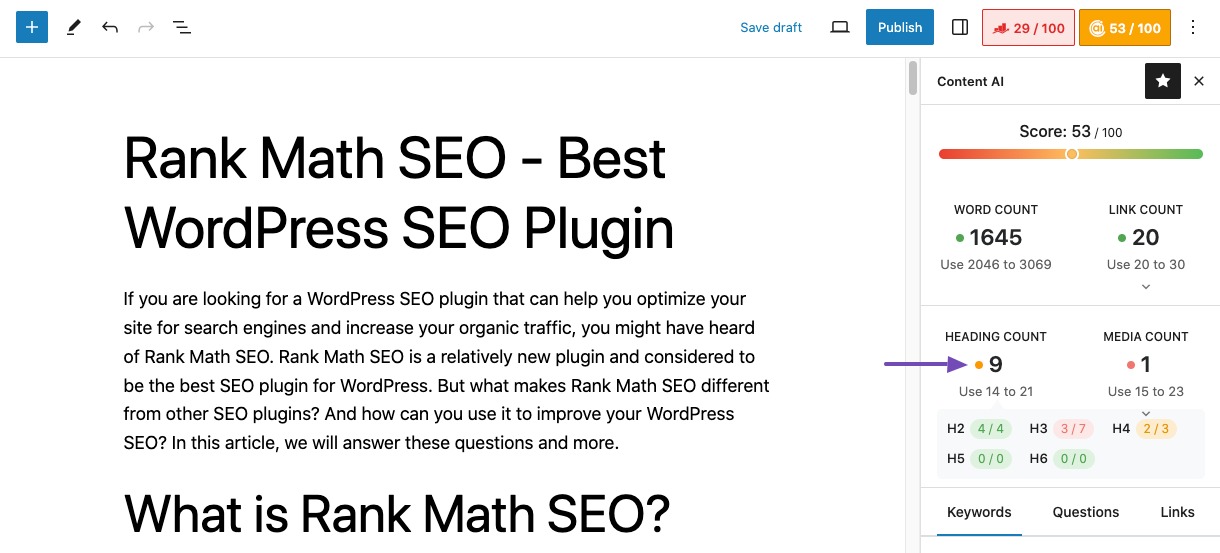
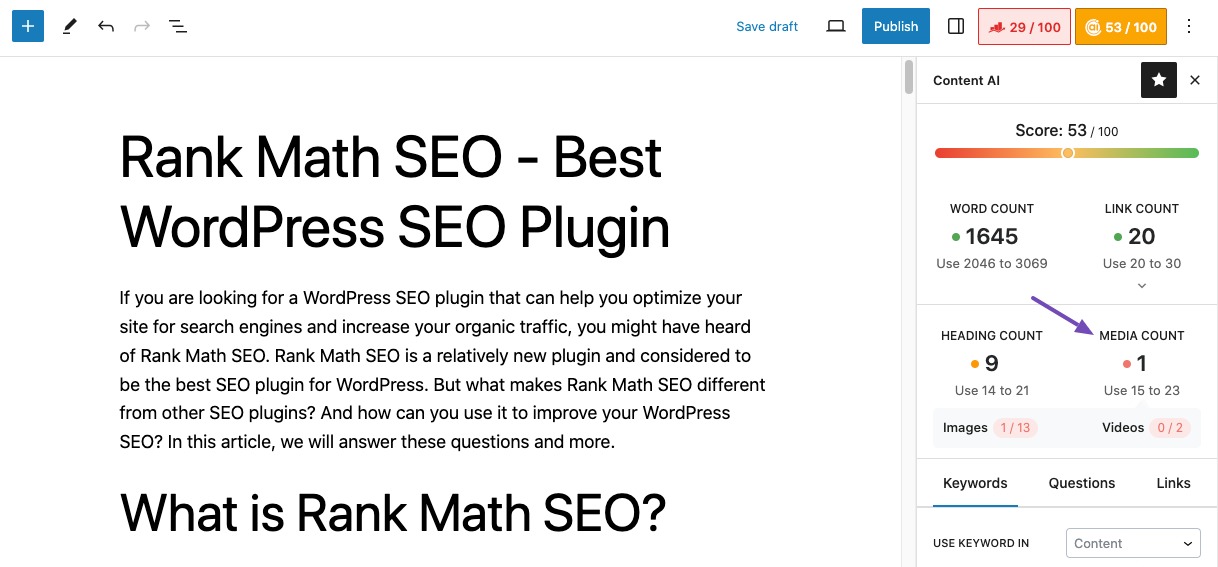
Rank Math’s Content AI is built to help users with optimizing the post for a specific focus keyword. You can research for the focus keyword with our Content AI. Our AI would use our proprietary algorithms to research existing articles ranking for this focus keyword to deliver your intelligent suggestions for optimal word count, media count, heading count, and link count.
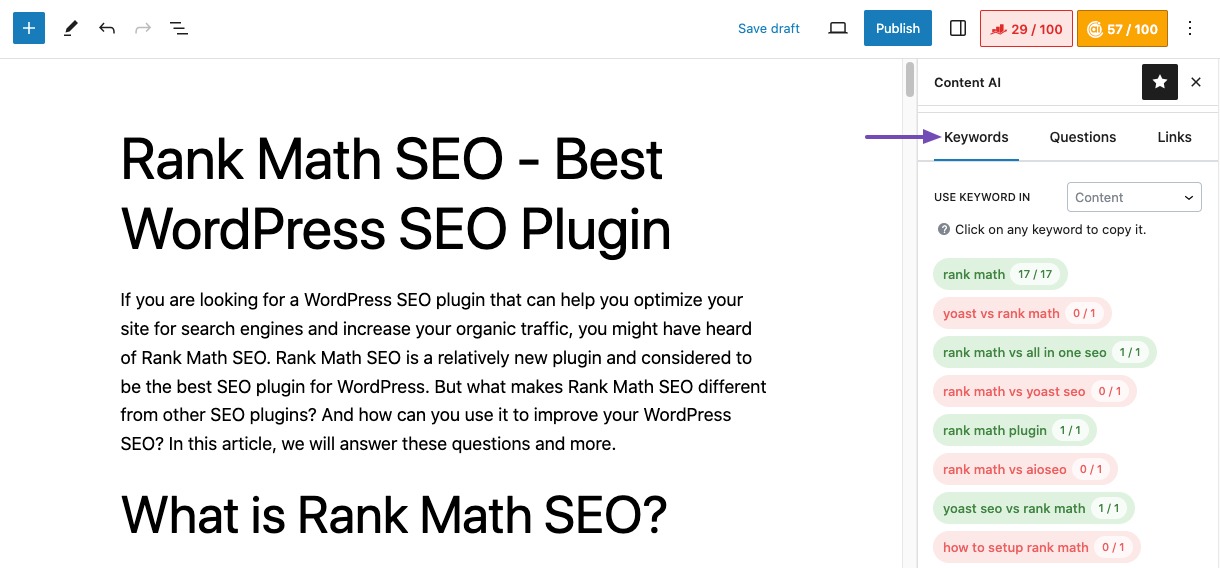
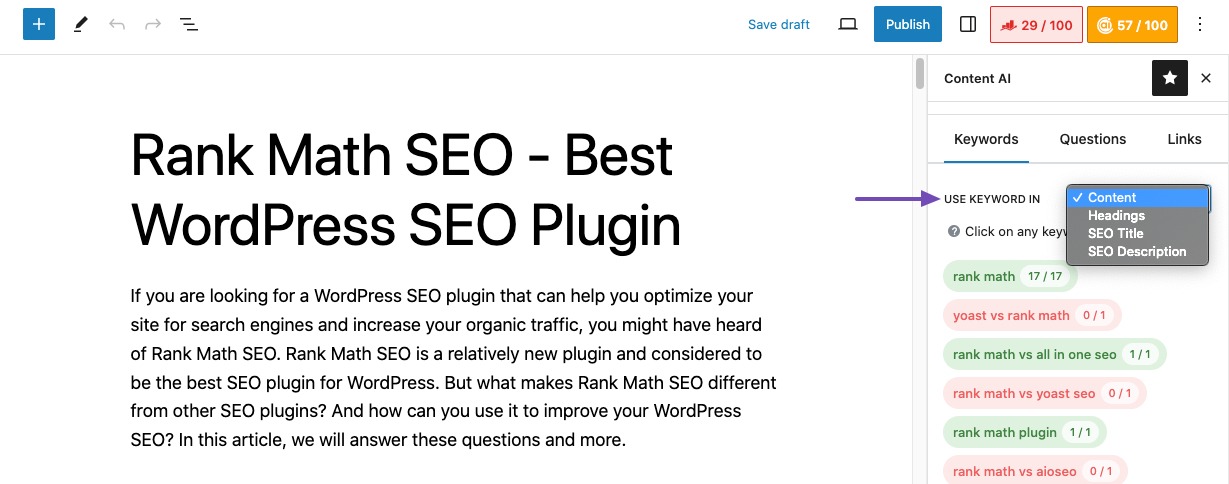
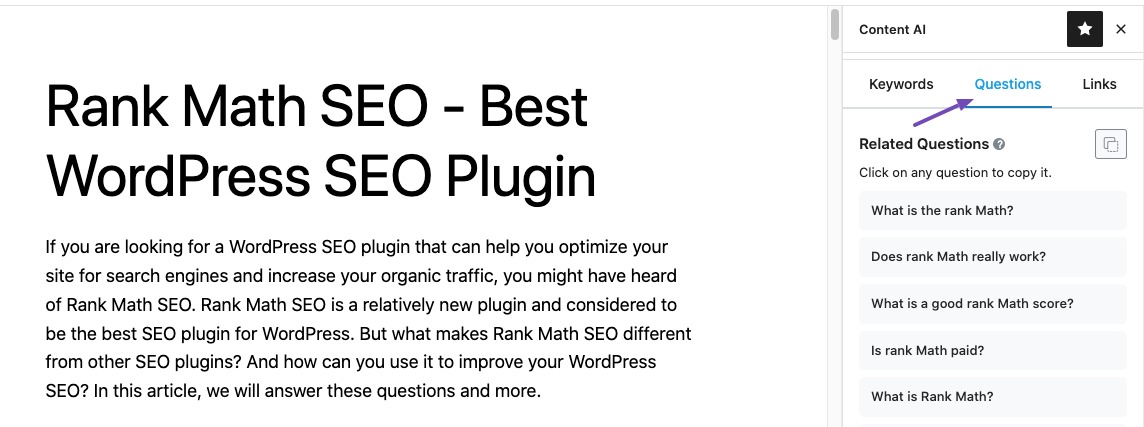
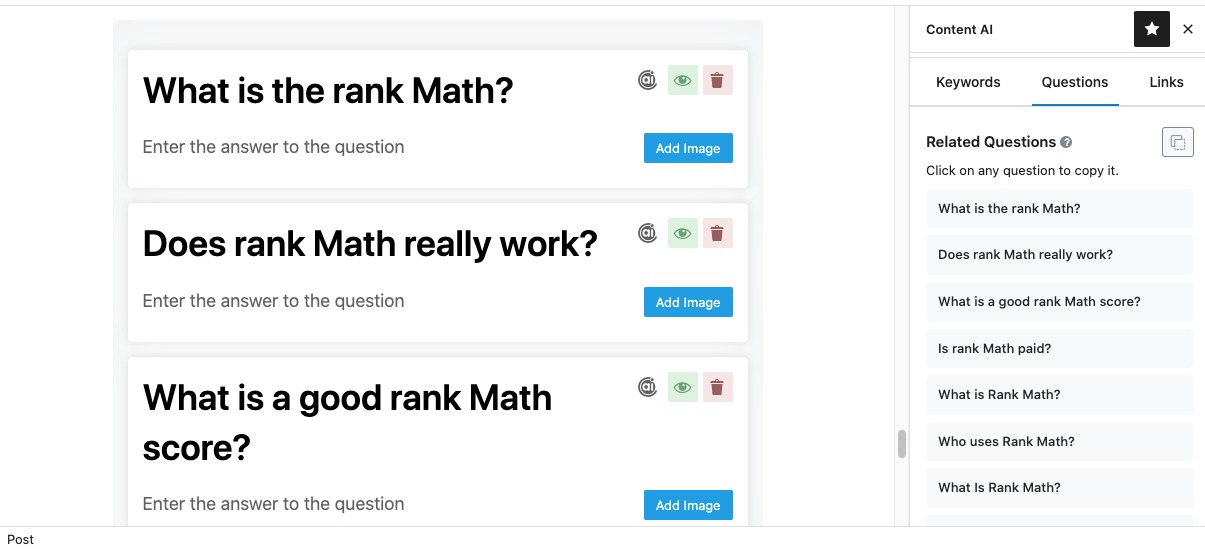
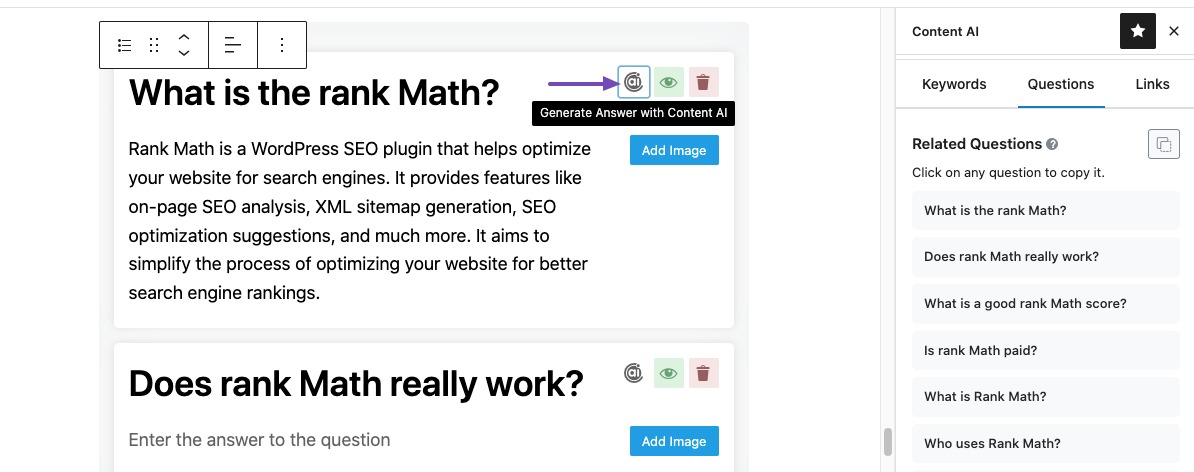
Our AI would also identify keywords you could use in your content, Headings, SEO Title, and Description. Content AI also suggests the FAQ questions that you include to answer the questions that users typically have in their minds while browsing these topics.
10.10 Allow Customers to Leave Reviews PRO
Reviews from your customers increase the credibility of your products, so Rank Math checks if you’ve enabled reviews in your WooCommerce and Easy Digital Downloads store.
While the default WooCommerce review & Easy Digital Downloads review features are limited, users can consider using WP Review PRO to improve the review form and encourage customers to leave reviews.
Note: This test is applicable only for WooCommerce Products and Easy Digital Downloads in the PRO version of Rank Math.
11 Passing All the Tests in the Additional SEO Section
Once you follow all the steps we’ve outlined above and optimized your post, you should easily pass all the tests in the Additional SEO section. You should see all green ticks in the section, like this:
Also, once you’ve passed all the Basic and Additional Tests, your SEO score for the primary focus keyword should be very high already, and you should start seeing the Green color for your score.
Let us get to the next section.
12 Title Readability
If you spend most of your resources on writing your content and very little resources on writing your titles, and then you should seriously reconsider your strategy.
It is a common saying in the advertising world that once you write your headline, you’ve spent 50 cents of your dollar. What that means is of their total copywriting budget, half is spent just on the title.
Why would they do that? Because, 100% of your audience might read their title, but less than 50% will actually read the content. And, this fact applies to well-written titles. A bad title might not even get 50% of readers.
The importance of good titles on your posts cannot be overstated. Not only is the title the hook that brings the readers in, but it also affects search rankings in ways you might not have considered.
Even though Google has never confirmed it, it is a well-known fact that Google uses click-through rates as a search ranking factor. Although that factor alone will not guarantee you excellent results, when you’re struggling to move up a couple of positions in the top 10 results, a higher click-through rate can be the edge that takes you above your competition.
When you write compelling titles that users cannot help but click, not only do you beat your competition (even though rank below them), but you also show Google that your result is more relevant to the query. If you continue to exceed the benchmark click-through rate for the query, Google will soon promote your result above others, and it will continue to stay there if it keeps attracting the majority of clicks.
Now that you understand all the benefits of writing better titles, let us get into the Title Readability tests that Rank Math performs on your post.
12.1 Focus Keyword at the Beginning of the SEO Title (Only for Primary Keyword)

In the SERPs, you have to capture your user’s attention as quickly as possible. That is why it is important to phrase your title in a way that the important words (the focus keyword) appear at the beginning. Results with keywords at the beginning of the title are also favored slightly by the search engines.
In this test, Rank Math checks if you’ve placed your primary focus keyword in the first 50% of the title, and passes the test if you have. The reason why Rank Math checks the first 50% of the title and not the absolute beginning of the title is that sometimes it is not practical to place your focus keyword at the beginning of your post without it appearing unnatural. To account for those scenarios, Rank Math has a more relaxed limit on where it checks for your focus keywords.
If you fail this test, then all you have to do is re-write the title in a way that you incorporate the primary focus keyword in the beginning. Here is a practical example of a non-optimized title.

And here is how you should optimize your title to move the focus keyword at the beginning.
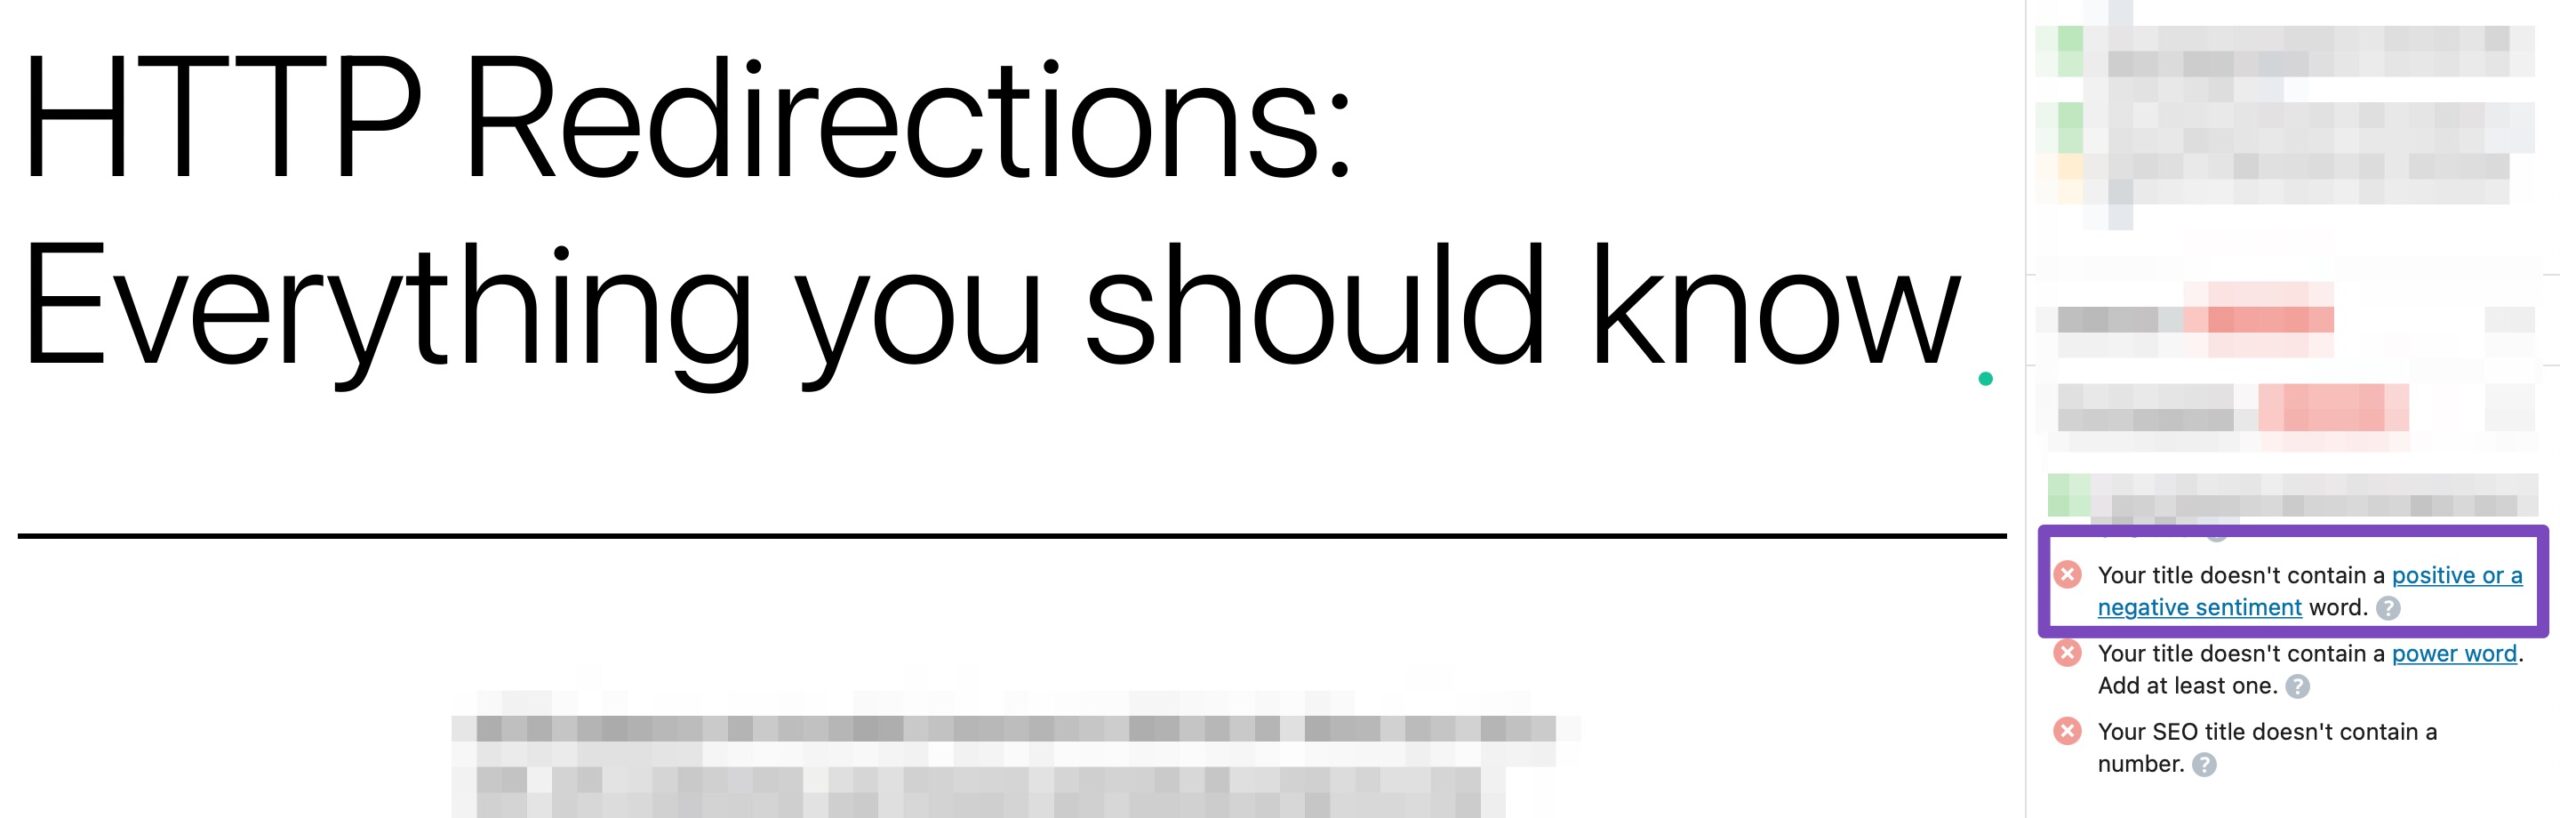
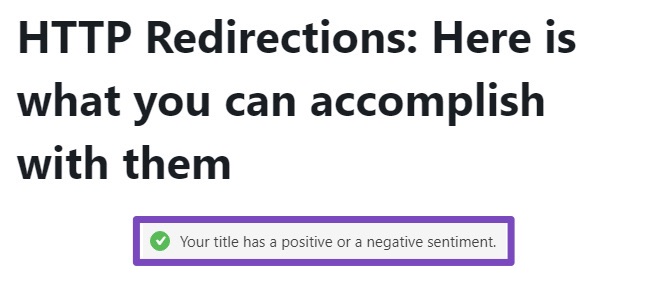
12.2 Sentiment in a Title
A proven way to get more people to click on your website in the SERPs is to have a title that evokes strong emotions. Notice that we didn’t say kind of emotions, just strong emotions. That is, it doesn’t matter what kind of emotions are evoked as long as the emotions are strong enough.
A simple rule of copywriting is to evoke emotions. If we were talking about a pizza, we would tell you how soft the bread is, how wonderful it smells, how the toppings look and taste, and how delicious the cheese tastes in the mouth. See what we did there?
You should aim to do the same with the title. But, the title isn’t a place where you have a lot of text. Therefore, it’s ideal to have a title that evokes emotions.
If you’ve browsed Facebook, you might have come across several posts that have titles similar to – “7 life-hacks that will blow your mind, 4th one is the best!!!”. They are trying to evoke your curiosity–another strong emotion.
An important thing to remember when using this tactic is that you have to manage expectations. Making exaggerations might get users to click, but if your content does not deliver, then your users will be quick to exit your website and never return. The practice of writing exaggerated titles is called “clickbait”, as in, you’re literally baiting your users to click your results.
We would advise you to stay away from click-baiting for the long-term health of your website. Not only do clickbaity titles perform worse on social media when compared to other regular titles, but they also are considered a negative ranking factor. Not directly, but when someone lands on your website and quickly bounces back and goes to another result, that phenomenon is called pogo-sticking, and that is a well-known negative ranking factor in the eyes of search engines.
To pass this test, make sure that your title evokes a strong emotion from within the user. Sometimes, it is easier said than done, but many times, just replacing a few words from your title should do the trick. Here is an example.
This is the title we created in the last test, which fails this test.
And here is how we rephrased the title to make it more emotion-evoking.
Sentiment Analysis is a complex subject, but its basis lies in understanding how certain words affect the emotion of a sentence. Here is a reference list of positive words and negative words that you can use in your titles to evoke a positive or negative response.
Note: This test is not applicable for WooCommerce Products and Easy Digital Downloads in the PRO version of Rank Math.
12.3 Use of Power Word in Title
What if you had the magical powers of making anyone click your links in the SERPs? A power so good that it would almost be considered illegal?
Don’t worry. We don’t practice black magic. We were just demonstrating the amazing use of Power Words. These are words that, when used in titles, compel users to click them, whether they like it or not.
Think about it this way. What if in the initial paragraph, we said, “Make anyone click your links in the SERPs” instead of “Having the magical power of making anyone click your links”. The words mean the same thing, but the impact they have on the message is vastly different. That’s power words for you.
In this test, Rank Math checks if you’re using a power word in the title. The test is performed using an internal list of power words, which is regularly updated. If a power word is found, you pass the test; else, you fail the test.
To learn more about power words, we recommend that you read this amazing guide about power words.
12.4 Number in Title
A proven way to get more clicks from the SERPs is to use numbers in the title. This technique has been popular for some time, but its effect has not faded as clickbait’s has. It is hard to explain why this works, but it is easy just to acknowledge that it works and use it to your advantage. Think about it, what sounds more clickable – “How to clean your garage?” or “7 easy ways to clean your garage?”. It’s obviously the second one.
In this test, Rank Math checks if you’re using numbers in your title. If you’re not, Rank Math will warn you that you should. So, to pass this test, all you have to do is include a number in the title of the post, and you’ll pass the test.

PS: Buzzsumo analyzed millions of headlines and found some interesting data about what kind of headlines performed better. We found the section on using numbers in the title, especially insightful.
Note: This test is not applicable to WooCommerce Products and Easy Digital Downloads in the PRO version of Rank Math.
13 Passing All Title Readability Tests
Once you pass all Title Readability tests, the screen should be something like this.
14 Content Readability
Up till now, you’ve used Rank Math to optimize your content and your title. So, you’ve optimized your content for the search engines and attracted your users with eye-catching titles.
Now that the user is on your website reading your post, what else can you do to improve their experience?
The answer is the presentation of the content. Think of it like this. Just because you’ve liked the trailer of a movie, that’s no guarantee that you’ll like the movie, right?
By improving the presentation of the post, you’re helping users reach your post and stay there. We’ve highlighted that on purpose–user experience is extremely important for the long-term health of your website.
First, a user who is happy to read your content can become a long-time reader and a subscriber. That is supremely beneficial for you.
Second, time spent on site is one of the ways Google and other search engines measure user engagement. And it shouldn’t be a surprise that websites with better engagement get higher rankings and more traffic.
The next few tests help you organize and present your content in ways that delight your readers. It’s the last part of the optimization process, but it is as important as the others. Let’s look at the tests.
14.1 Use a Table of Contents to Present Your Content Better

If you’re writing a long post, it’s essential to make the navigation of the post easier. Not all users are looking for the complete information that your post provides. Some users might be looking for a very specific answer that is buried somewhere in the post.
The easiest way to help your users is by introducing a table of contents in your post. Just as a large book becomes easier to navigate with an index or table of contents, your post will also become easier to navigate with the inclusion of a table of contents.
Your effort will not go unnoticed by search engines. They will notice the engagement and reward you with better rankings. Not only that, Google may include a “Jump To” link in the SERPs when it detects a table of contents in your post. This massively improves your click-through rate. Just remember that Google does it on its discretion, like rich snippets, and simply including a table of contents is no guarantee that you will get the “Jump To” links. Still, not including a table of contents guarantees that you won’t “Jump to” links, but including them just might get you the links.
Here is an example of “Jump To” links.
In this test, Rank Math checks for the presence of a table of contents creation plugin on your website. On the assumption that you will use a TOC if you have the plugin installed, Rank Math will pass the test if it finds any of the following plugins installed on your website.
- WP Shortcode Pro
- WP Shortcode
- TOC Pack – Table of Contents for Elementor
- Ultimate Blocks
- LuckyWP Table of Contents
- Elementor Pro
- Table of Contents Plus
If you are using any other plugin for adding a Table of Contents, please contact your plugin/provider and ask them to add this filter to their plugin/theme so Rank Math can detect that you are using a Table of Contents section in your posts. Once they add the filter, we will be happy to add them to the compatibility list here.
If you are manually adding a hard-coded Table of Contents section, you can use this filter to disable that particular test.
Note: This test is not applicable for WooCommerce Products and Easy Digital Downloads in the PRO version of Rank Math.
14.2 Use of Short Paragraphs

In the quest for better user experience, we’ve recommended you add a table of contents, images, and even simplify your language. The only thing that remains is how you organize your content. That’s what this test is about.
As we mentioned in another test above, putting up a wall of text is the fastest way to lose your readers’ interest. A great way to keep the user engaged is to use shorter paragraphs. Go through this very article, and you’ll notice that we keep our paragraphs limited to a few lines each.
In this test, Rank Math analyzes your content and notifies you if any of your paragraphs have more than 120 words in it. If it finds one or more paragraphs with more than 120 words, this test will fail.
To pass this test, read through your content and make the paragraphs shorter, keeping each paragraph under 120 words.
14.3 Use of Media in your posts

The reason why more people watch movies rather than read books is simple. Videos are easy to consume, and they have a bigger impact. Several studies point to the following facts about retention. Humans retain:
- 10 percent of what they READ
- 20 percent of what they HEAR
- 30 percent of what they SEE
- 50 percent of what they SEE and HEAR
- 70 percent of what they SAY and WRITE
- 90 percent of what they DO
That is why it is critical to add some media to your post to capture your reader’s attention. You’ve probably heard the common saying, “A picture is worth a thousand words.” So, tell us, what would you rather do, see a picture, or read a thousand words?
In this test, Rank Math checks for the presence of images or videos in your post and warns you if it does not find any. To pass this test, all you have to do is include images or videos in your post. You should know that even adding a single image will help you pass the test, but you will not score 100% marks. To get a 100% score on this test, you have to add at least 4 images or videos to your post.
Please note that Rank Math checks for images or videos, so including any of those will pass the test.
Content AI: Rank Math syncs this test with the Media count recommendations from Content AI. Hence, if Content AI suggests not to add images and videos, Rank Math would hide this test.
Once you pass all Content Readability tests, the screen should be something like this.
15 Scoring a Full 100 for SEO Optimization
Once you’ve passed all your tests in all the sections, check out your final SEO score.
You might be surprised to see that you’ve passed all the tests, but still don’t score a 100/100 on Rank Math’s scale. The reason for that is that you might have passed all the tests, but you did not score 100% on all the tests. We’ve mentioned many times that you don’t have to score 100% on a test to pass it, so on the surface, it might seem that you have done all the work, but some optimizations still remain.
For example, we just mentioned in the section above that you need to add at least 4 images or videos to your post to score a 100% on the Media test. But, adding just 1 image will pass the test too.
When we demonstrated the example, we added a single image to our post to pass the test. As we added a few more images to the post, our score moved upwards.
To score a perfect 100, go through each test’s description, and see which tests have additional conditions that require some more effort. Then go back to your post and optimize your post for those tests to score 100 on 100.
Also, pay attention to the secondary keywords. In our post, they still appear yellow, which means the post has not been optimized well for them. To see the failed tests, click on any of the secondary keywords.
As you see, there are some basic and additional optimizations that we have not done for our secondary keyword. Let us quickly fix those. Once we optimized for all the recommendations for all the posts, our overall score quickly jumped to 96. Pretty amazing, right?

Sometimes, you will not add any secondary keywords to your posts, and to account for that, Rank Math does not score you negatively if you don’t add secondary keywords, and even the individual scores for your secondary keywords do not affect your overall score. But, the better you optimize your post for secondary keywords, the more the chances that your post will get some traffic for those keywords. So, do not ignore the optimization process for your secondary keywords.
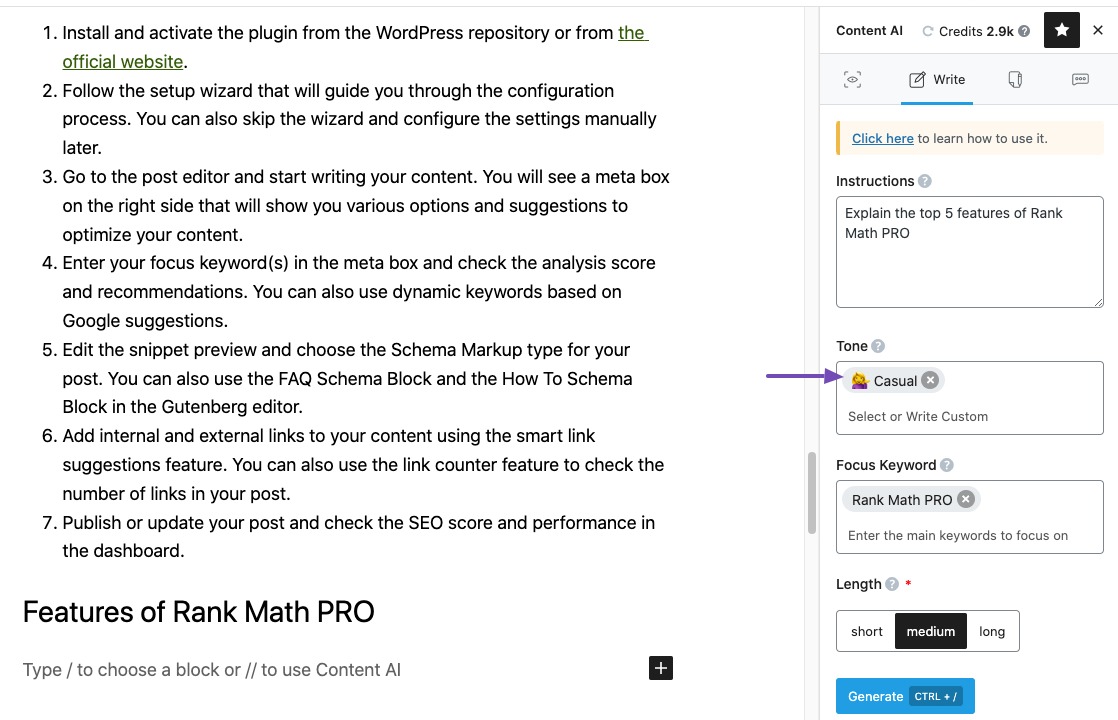
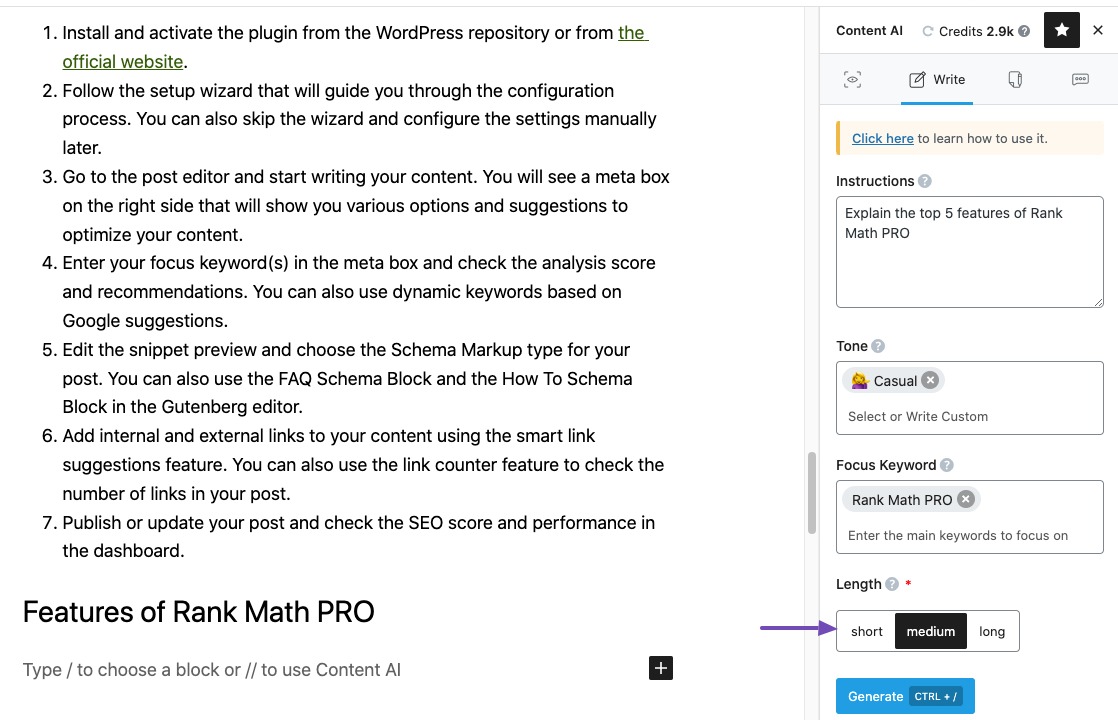
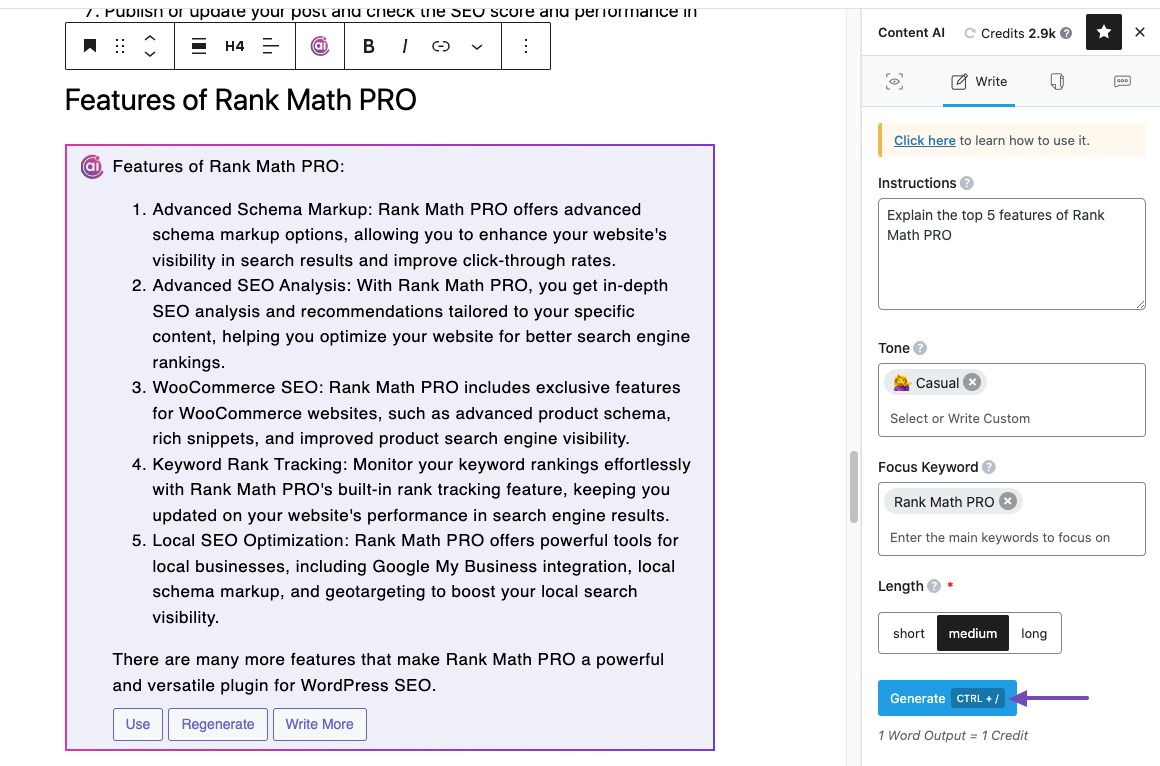
How to Use Rank Math’s Content AI for SEO
Artificial Intelligence (AI) is already a part of our everyday life, starting with the simplest search in Google to powering complex computations — AI has already made its way. AI-powered technologies are well-known for performing our day-to-day tasks effortlessly, and Rank Math has taken advantage of AI to help you optimize your website for search engines.
1 How Rank Math’s Content AI Works
First things first, before we start to take advantage of AI suggestions, it is important that we understand how Content AI works.
Rank Math makes the Content AI available right inside the familiar Rank Math Metabox, so you can integrate the AI suggestions alongside your content creation process.
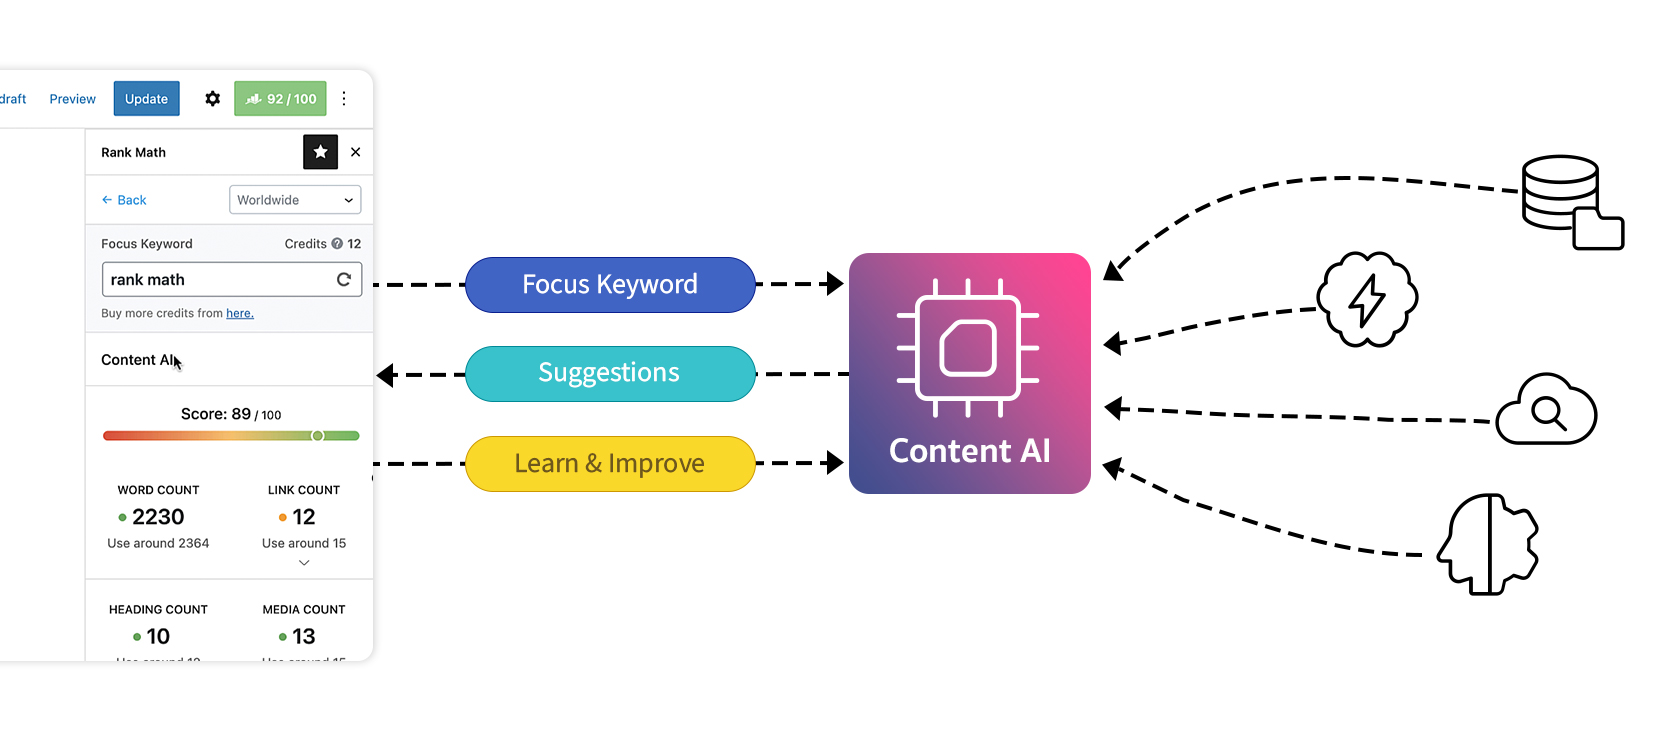
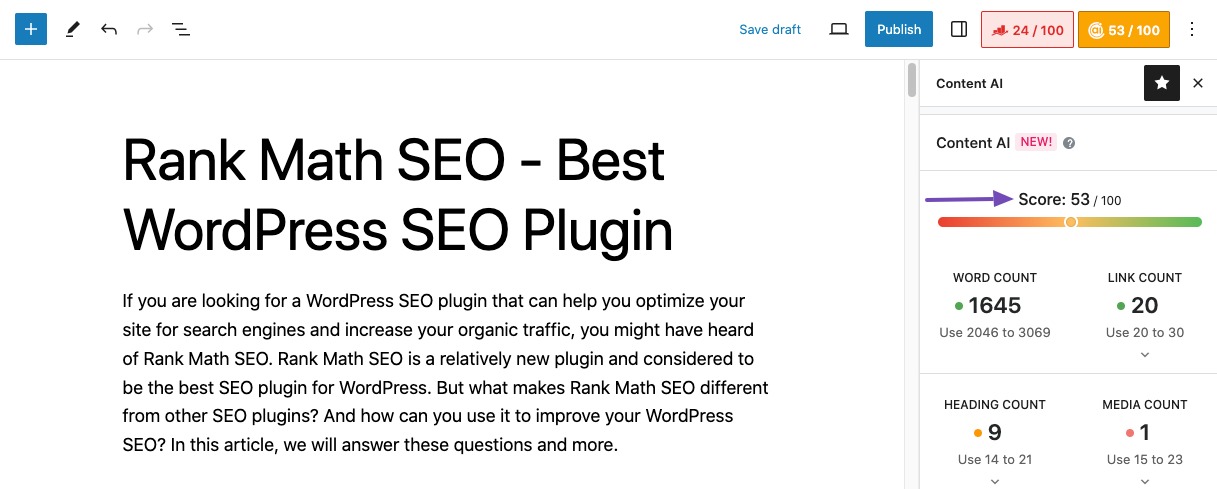
As you research for any focus keyword, Rank Math takes the input and sends the request to our AI server. Our server collects the data from various sources using proprietary algorithms and uses our own AI to offer more relevant suggestions, such as how many words, headings, links, and media you should be using in your content based on what is currently ranking for that keyword.
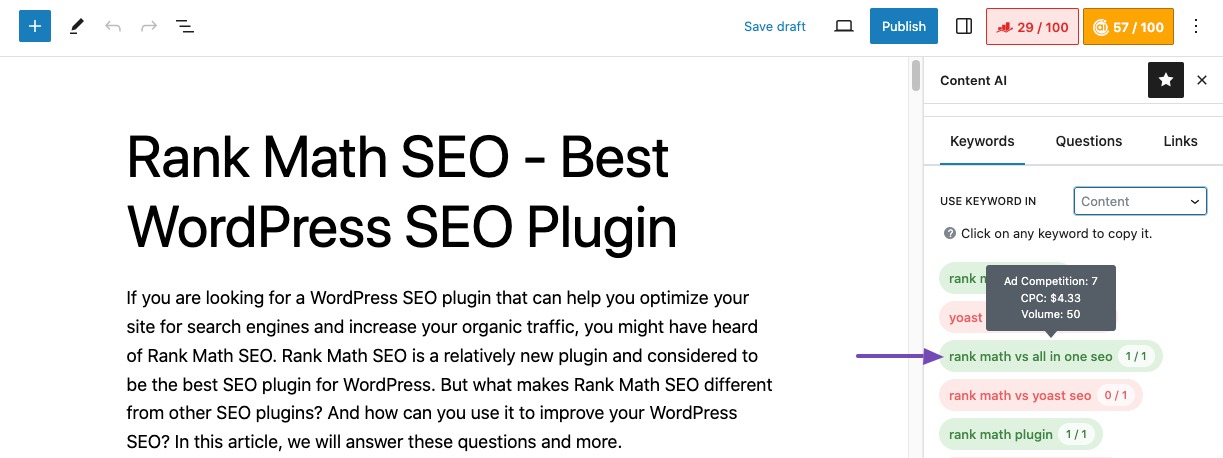
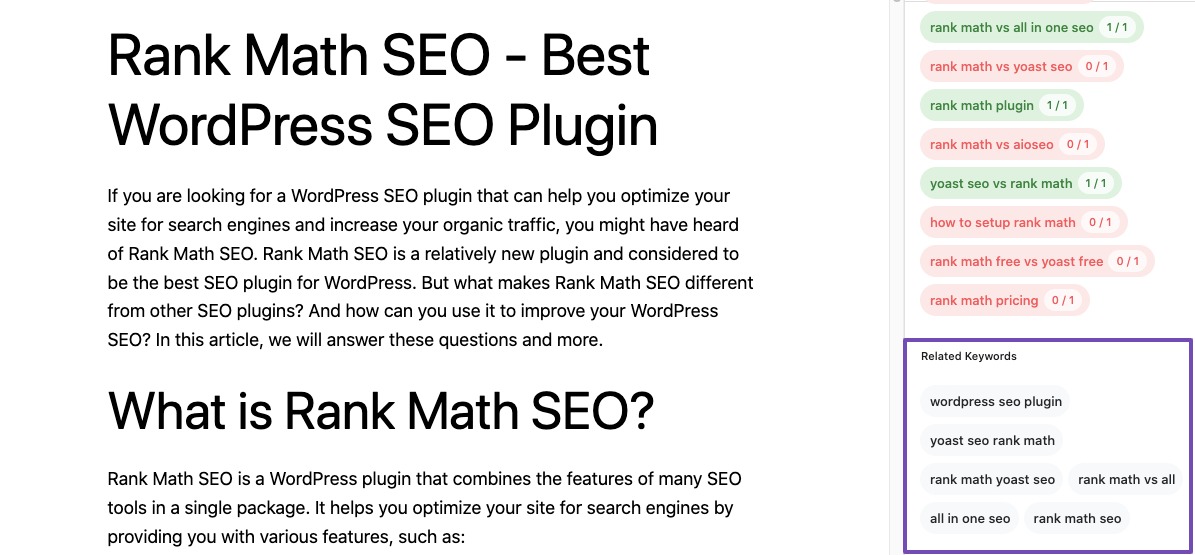
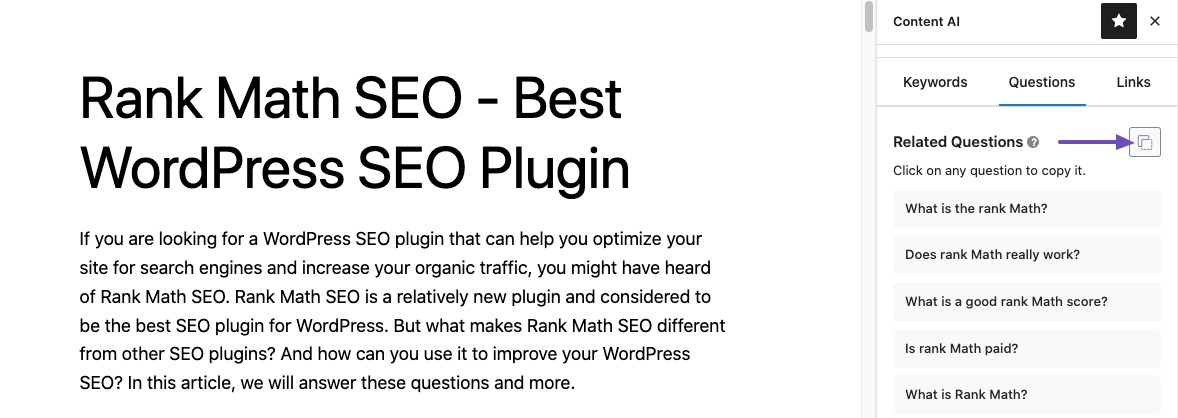
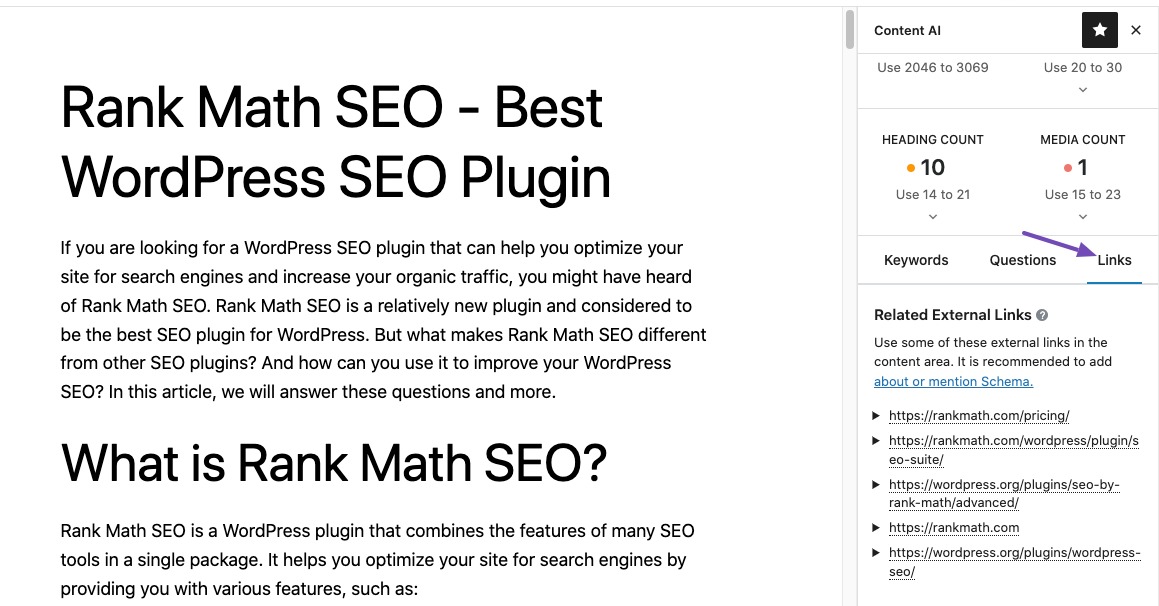
Our Content AI goes above and beyond to suggest related keywords, FAQs, and external links you can place in your content and meta tags, making your content creation process effortless.
Further, useful data like Ad Competition, Volume, and CPC for keywords are clearly marked and distinct, so you don’t need to switch tabs or use any external tool, for that matter.
Our AI supports over 80 countries and includes the potential of learning and improving itself. Hence it is evident, every time you refresh the researched data, our AI delivers new and improved data.
2 How to Enable Content AI
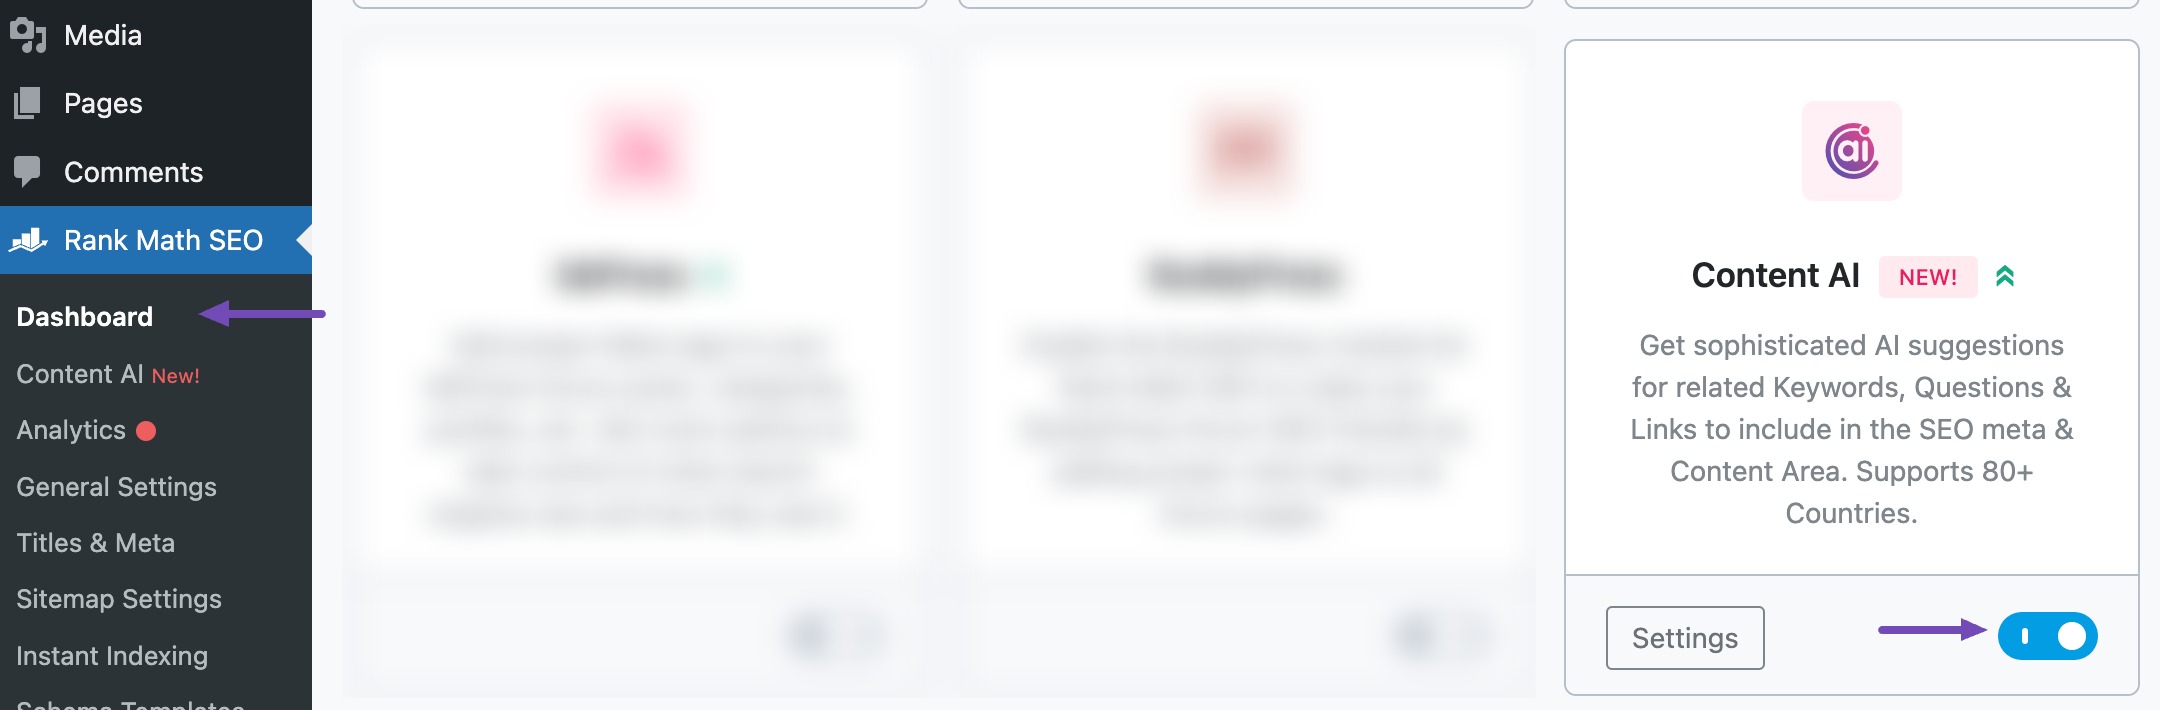
To get started with Rank Math’s Content AI, at first, you need to enable the Content AI module.
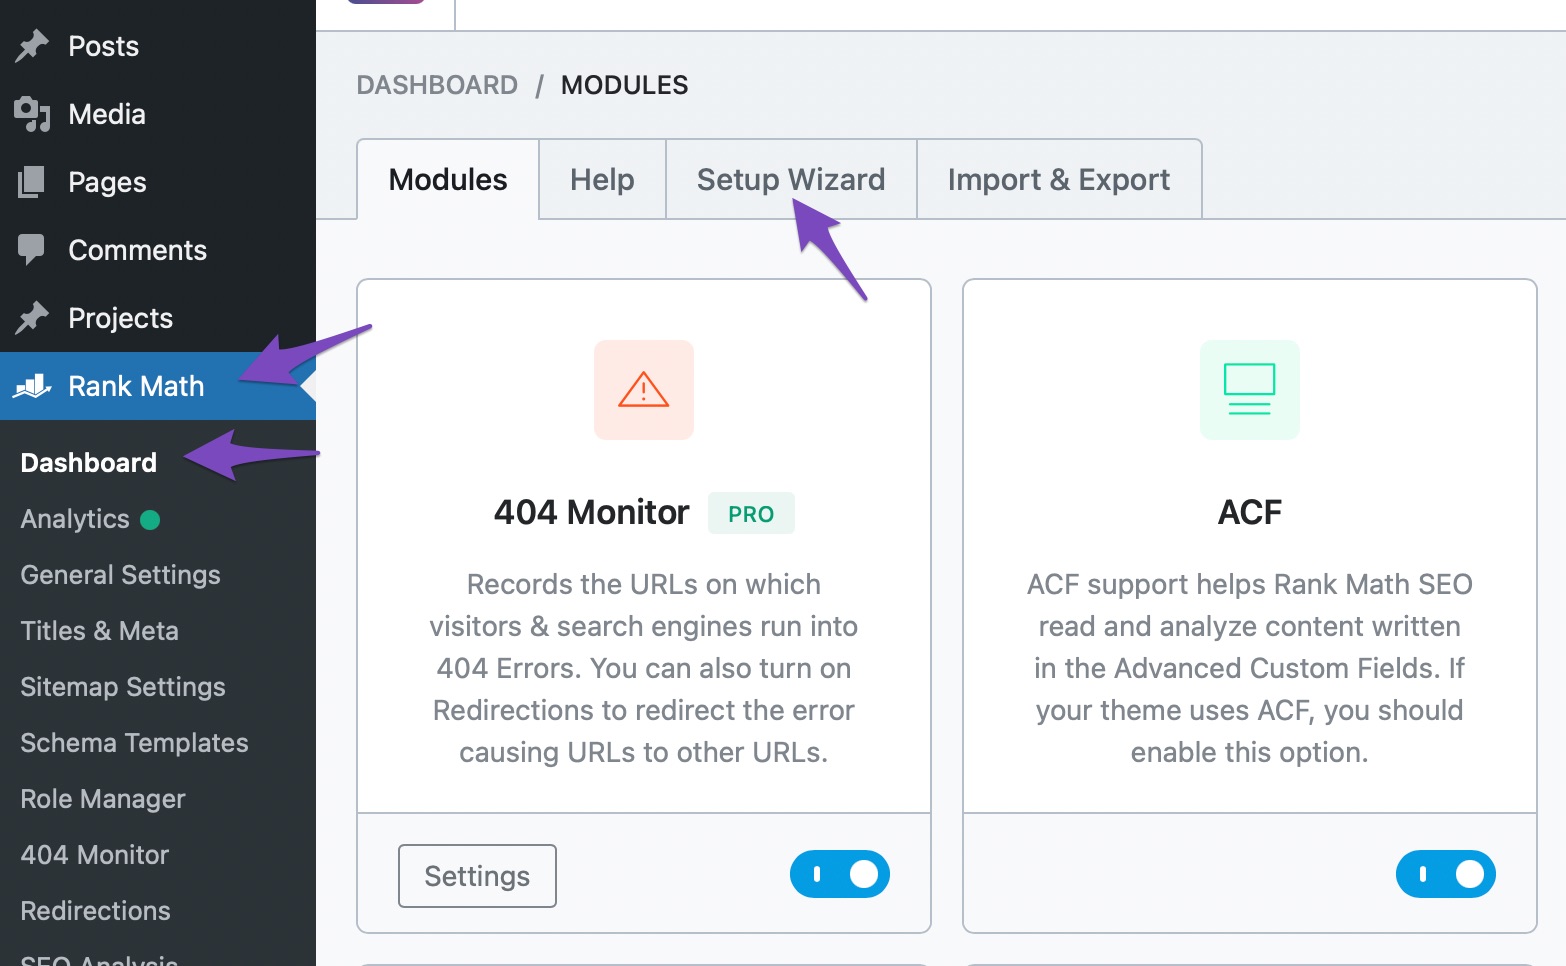
Head over to Rank Math SEO → Dashboard → Modules inside your WordPress admin area. From the list of available modules, enable the Content AI module as shown below.
3 How to Configure Content AI
Once you’ve enabled the Content AI module, you can click the Settings button or simply navigate to Rank Math SEO → General Settings → Content AI for site-wide configurations.
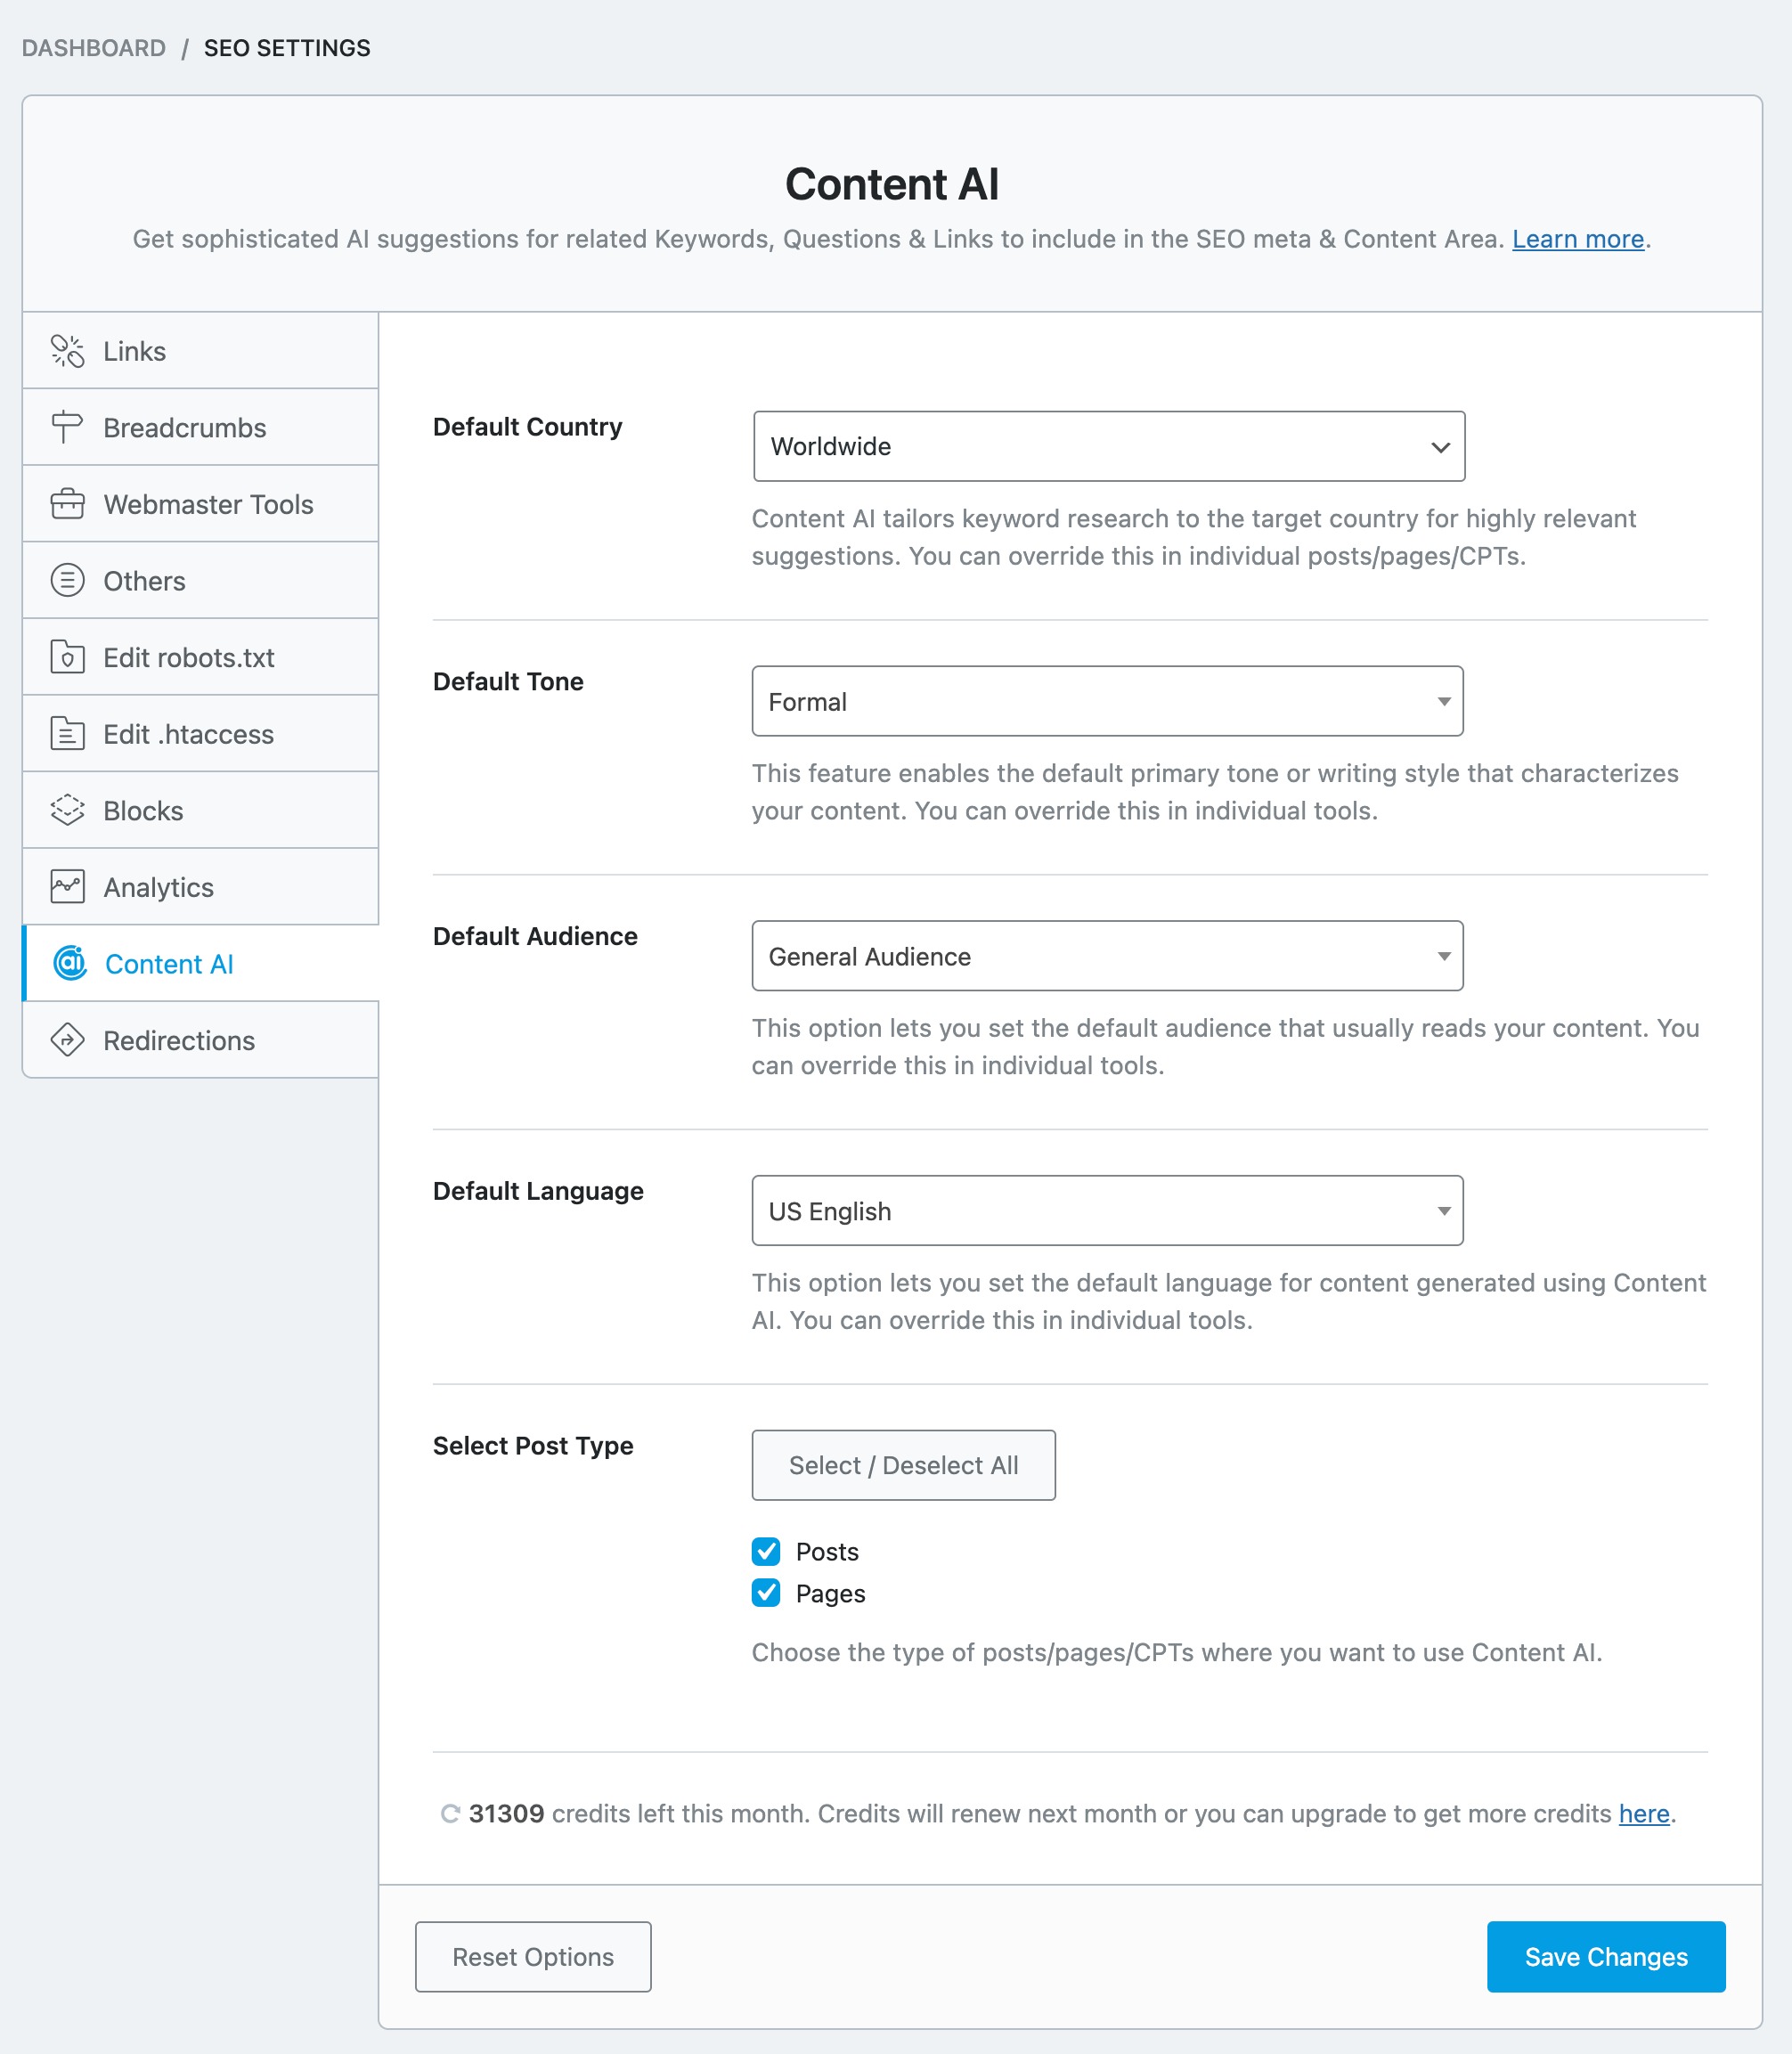
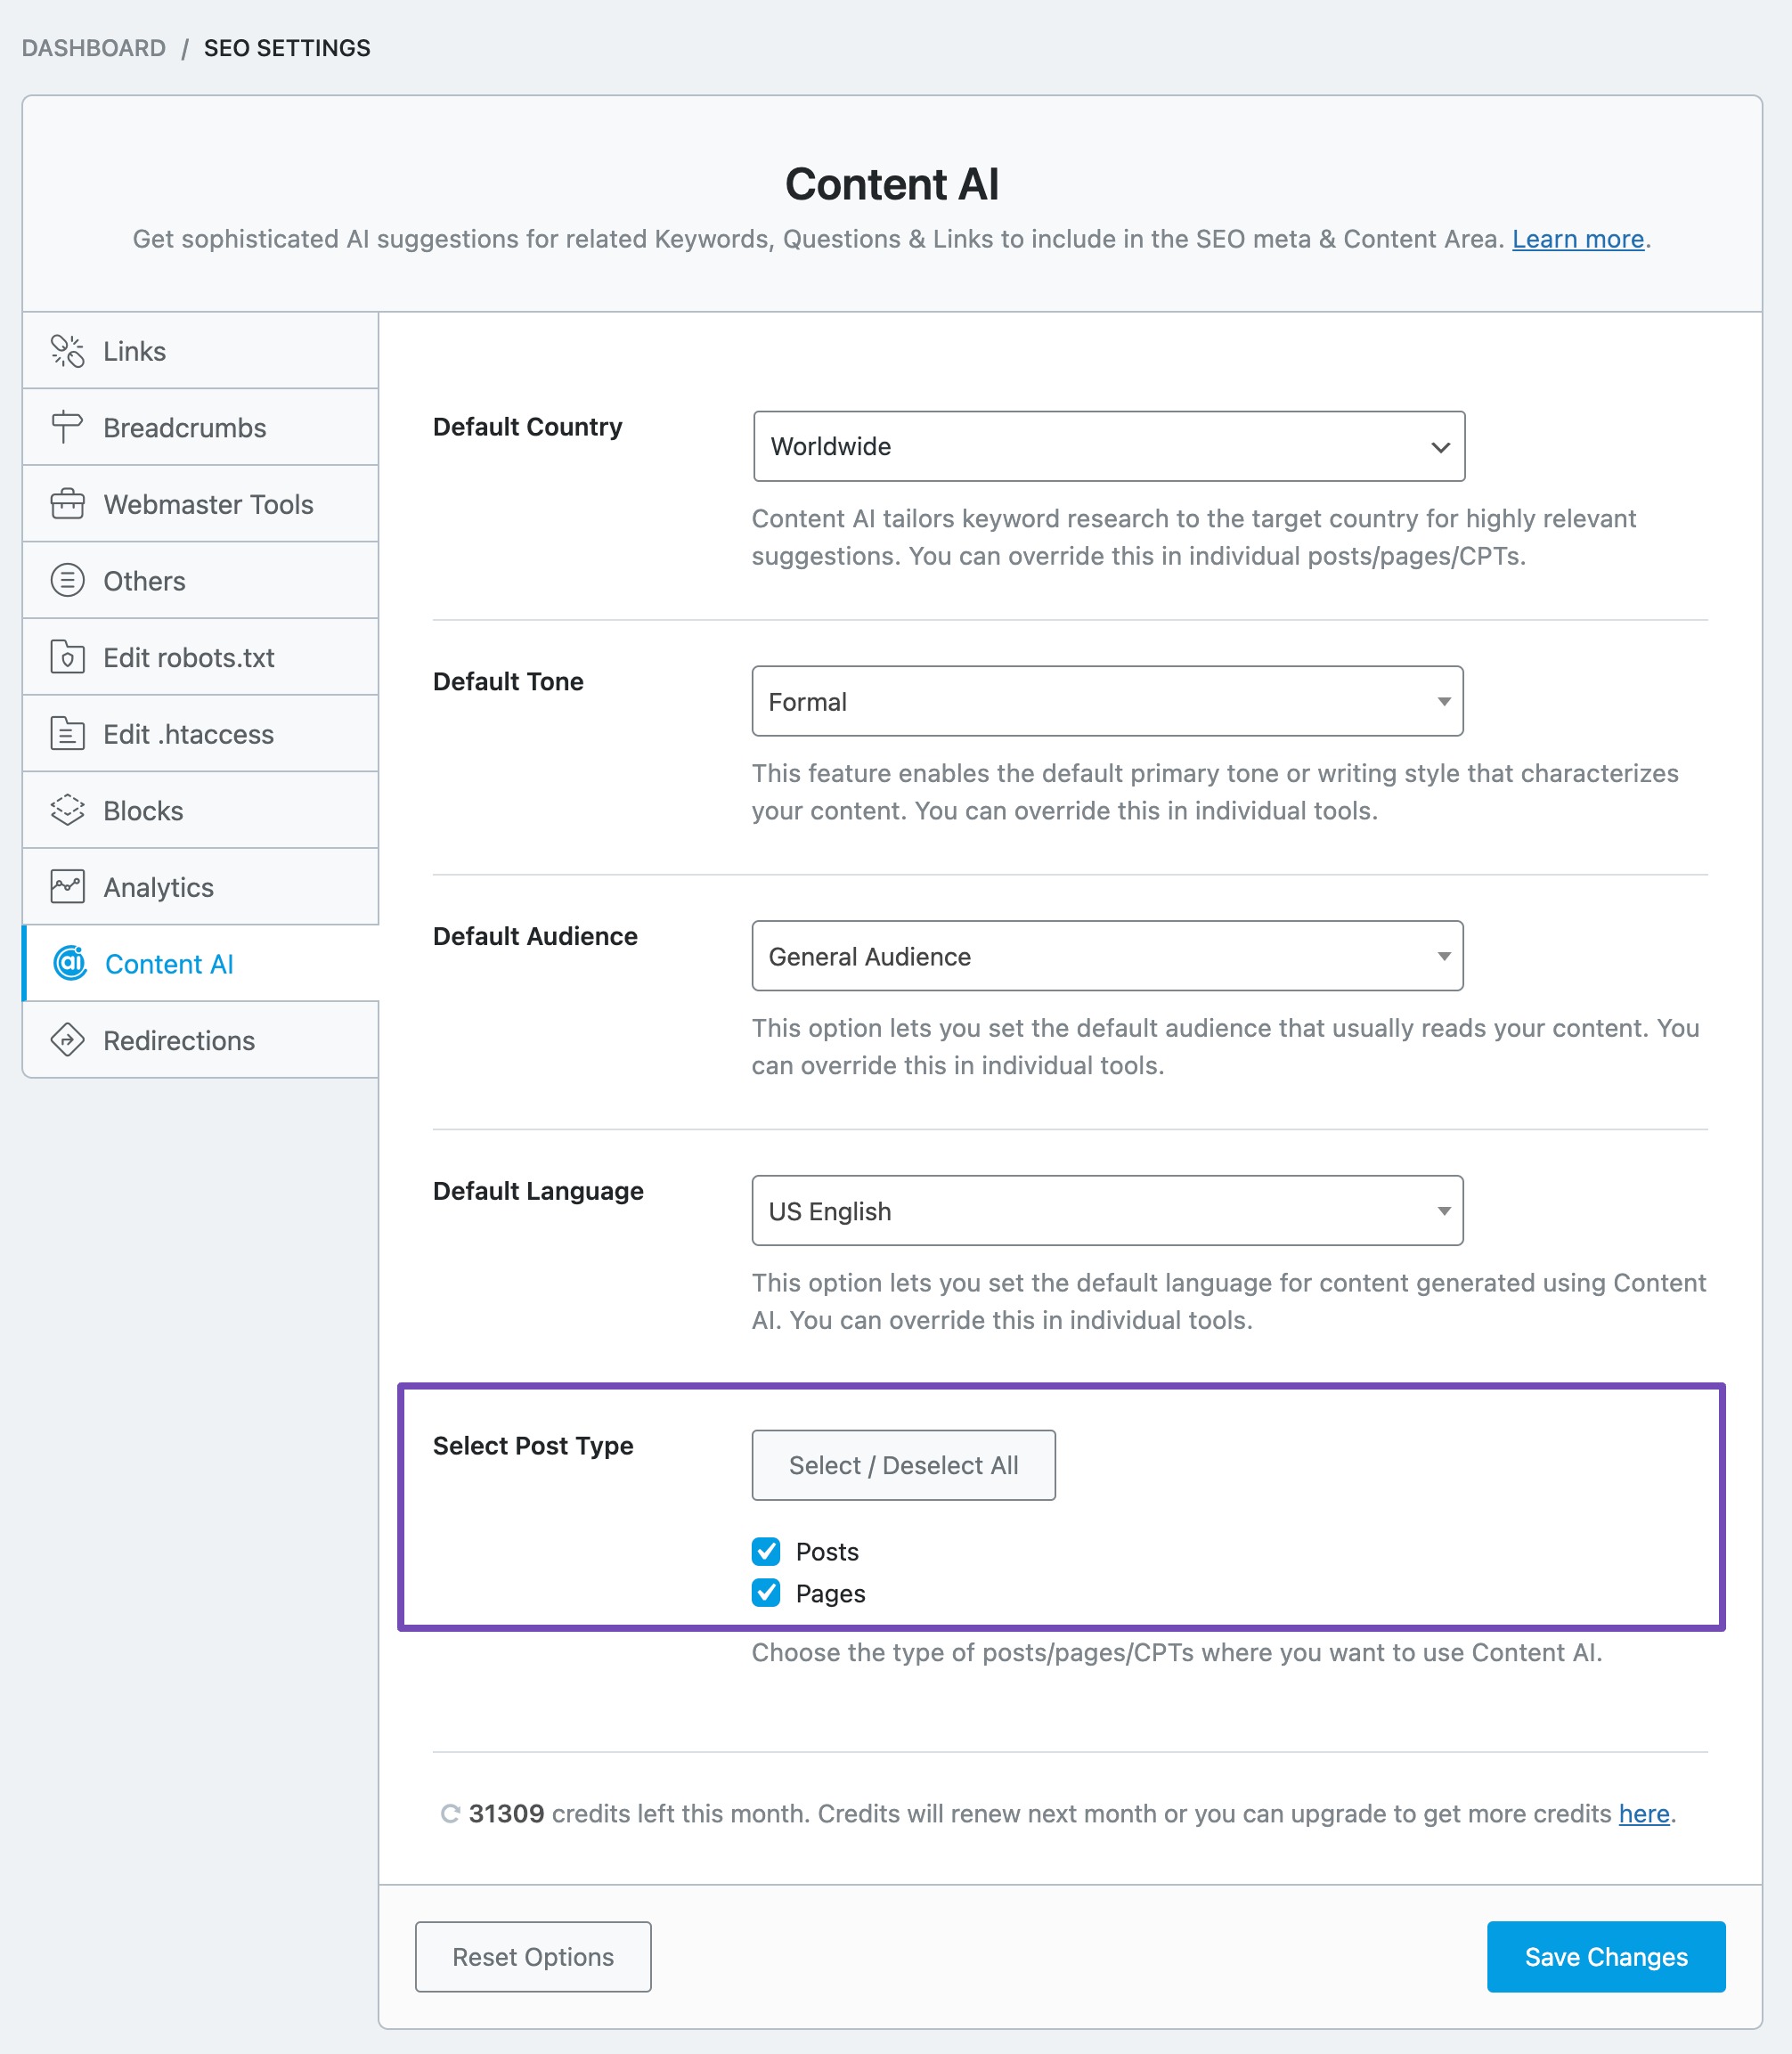
Under the Content AI settings, you’ll find options for configuring, and let’s look at them one-by-one.
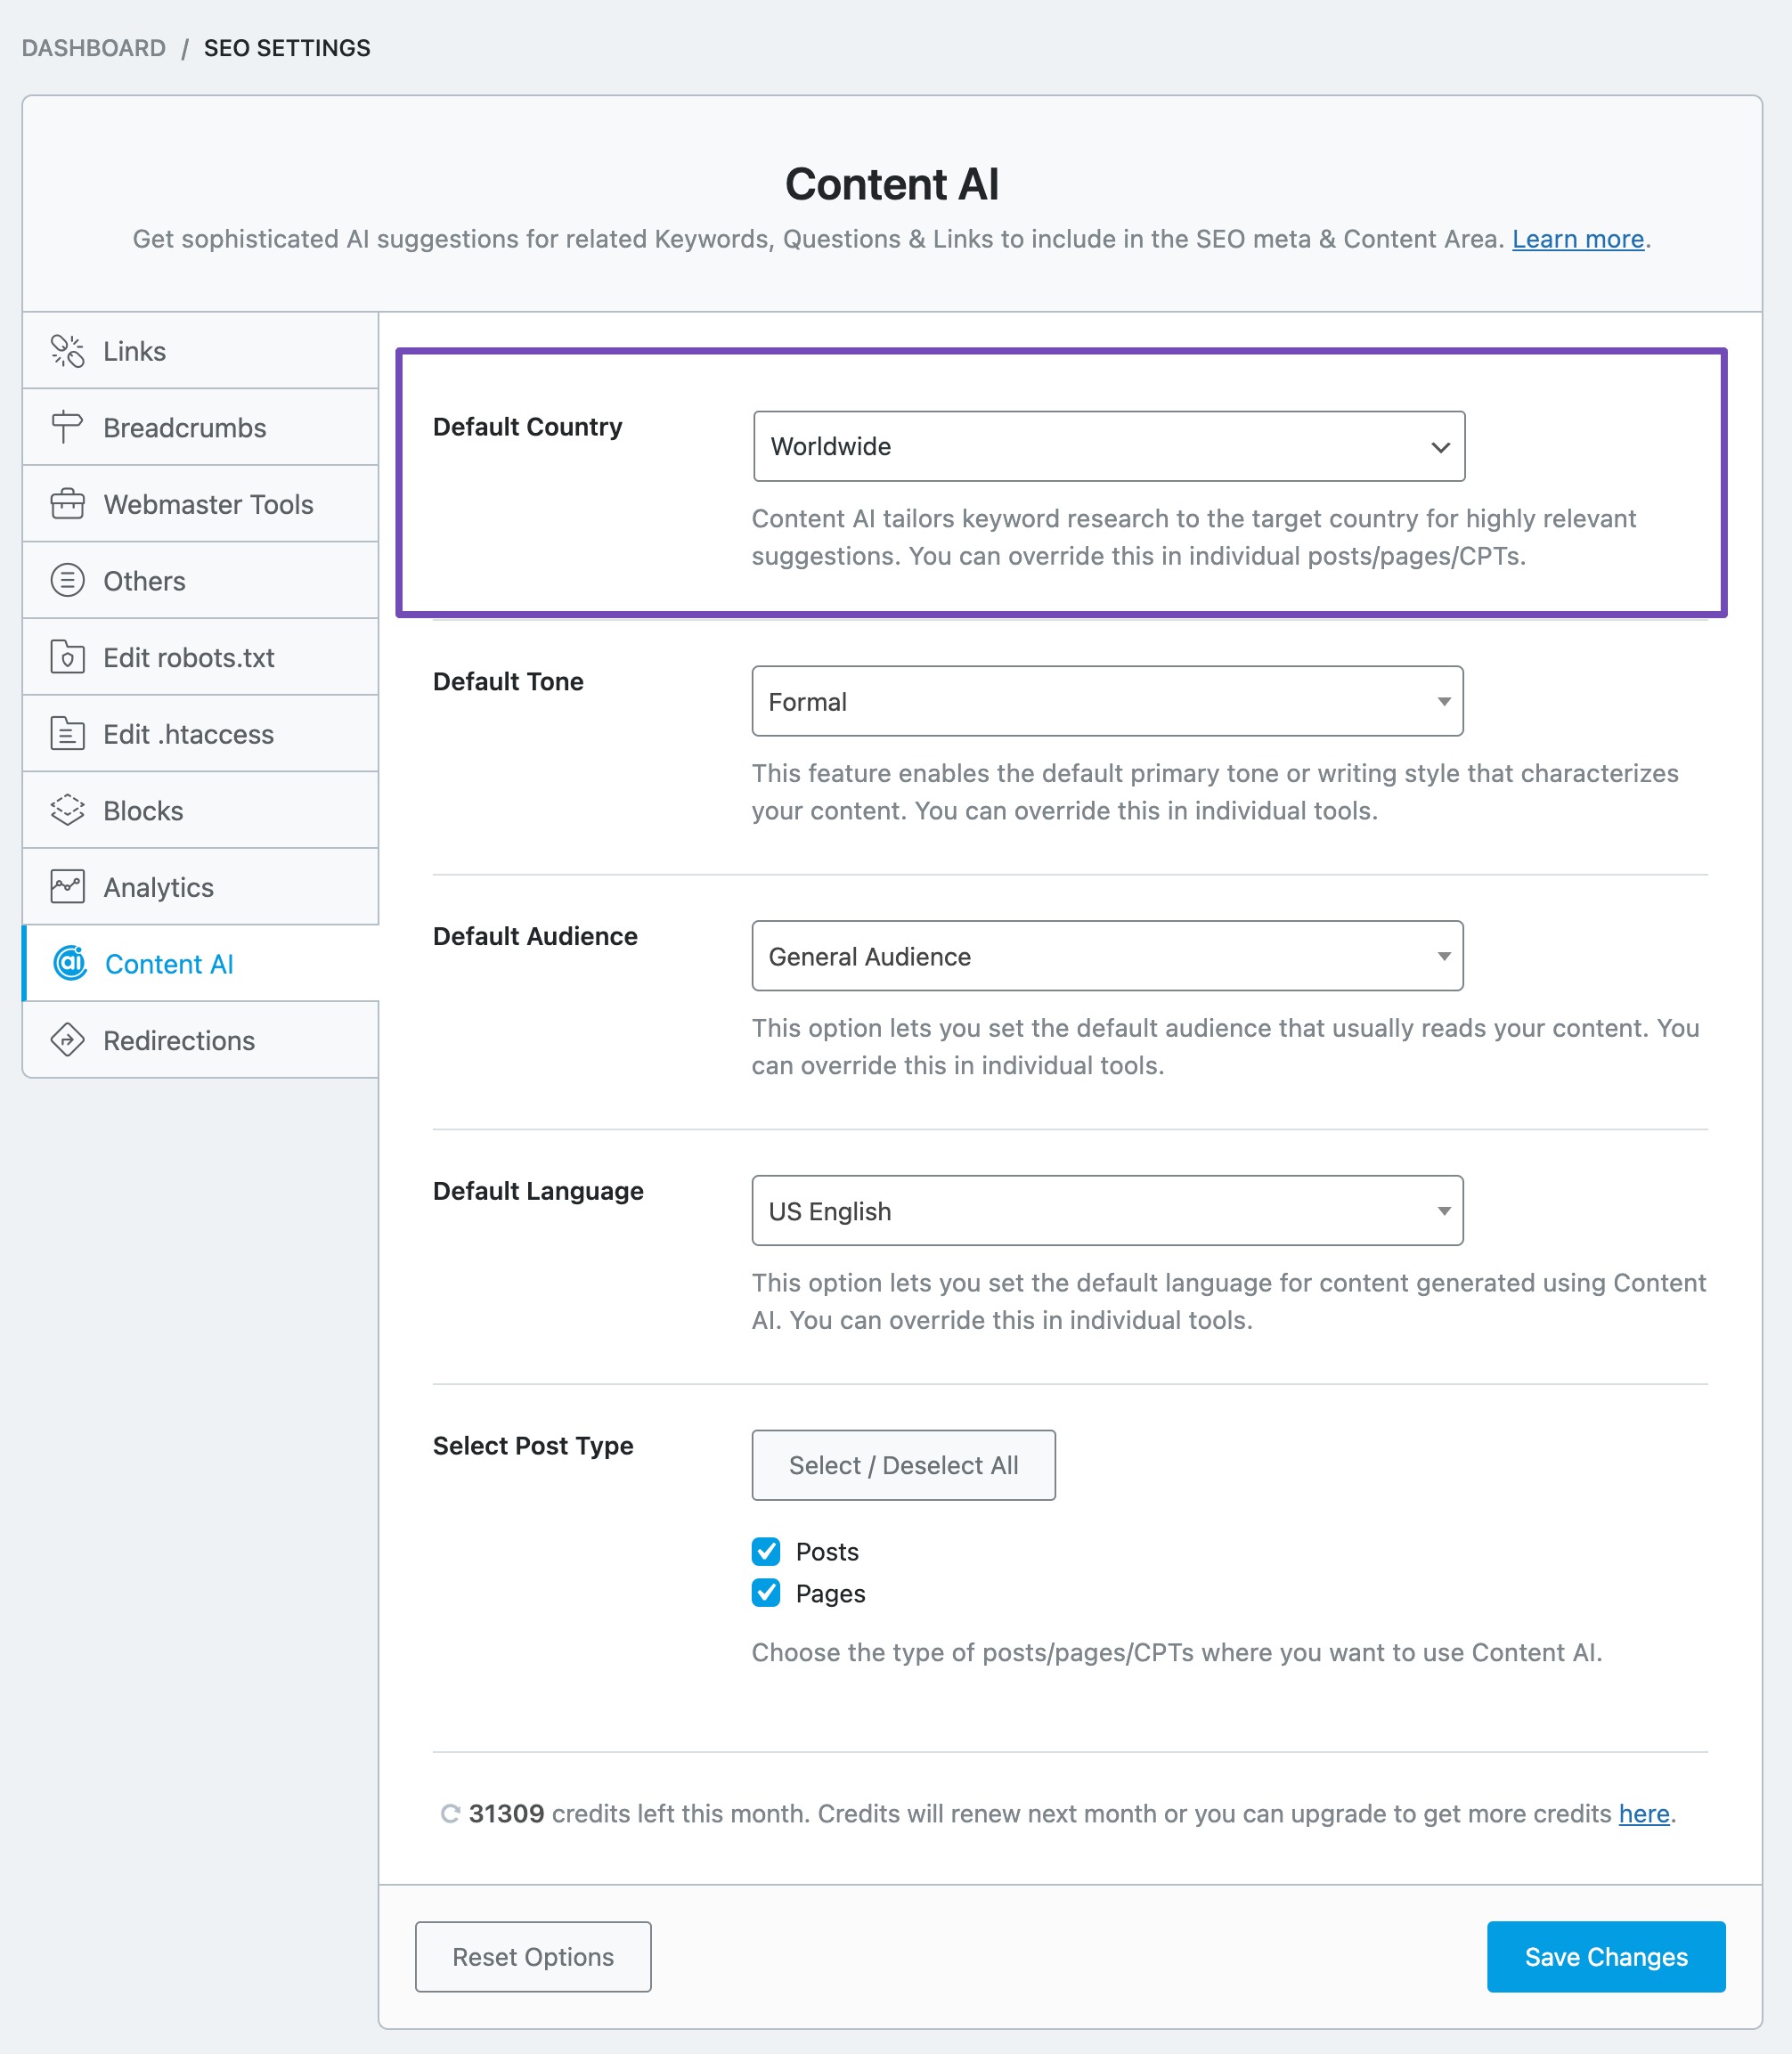
3.1 Default Country
Rank Math’s Content AI can research keywords based on the target country and offer more relevant suggestions.
The option available here allows you to set a default country, and that said, you can always change that on a per-post basis. Click the drop-down list to choose your target country, or if you’re targeting global audience, leave the field with the default Worldwide option.
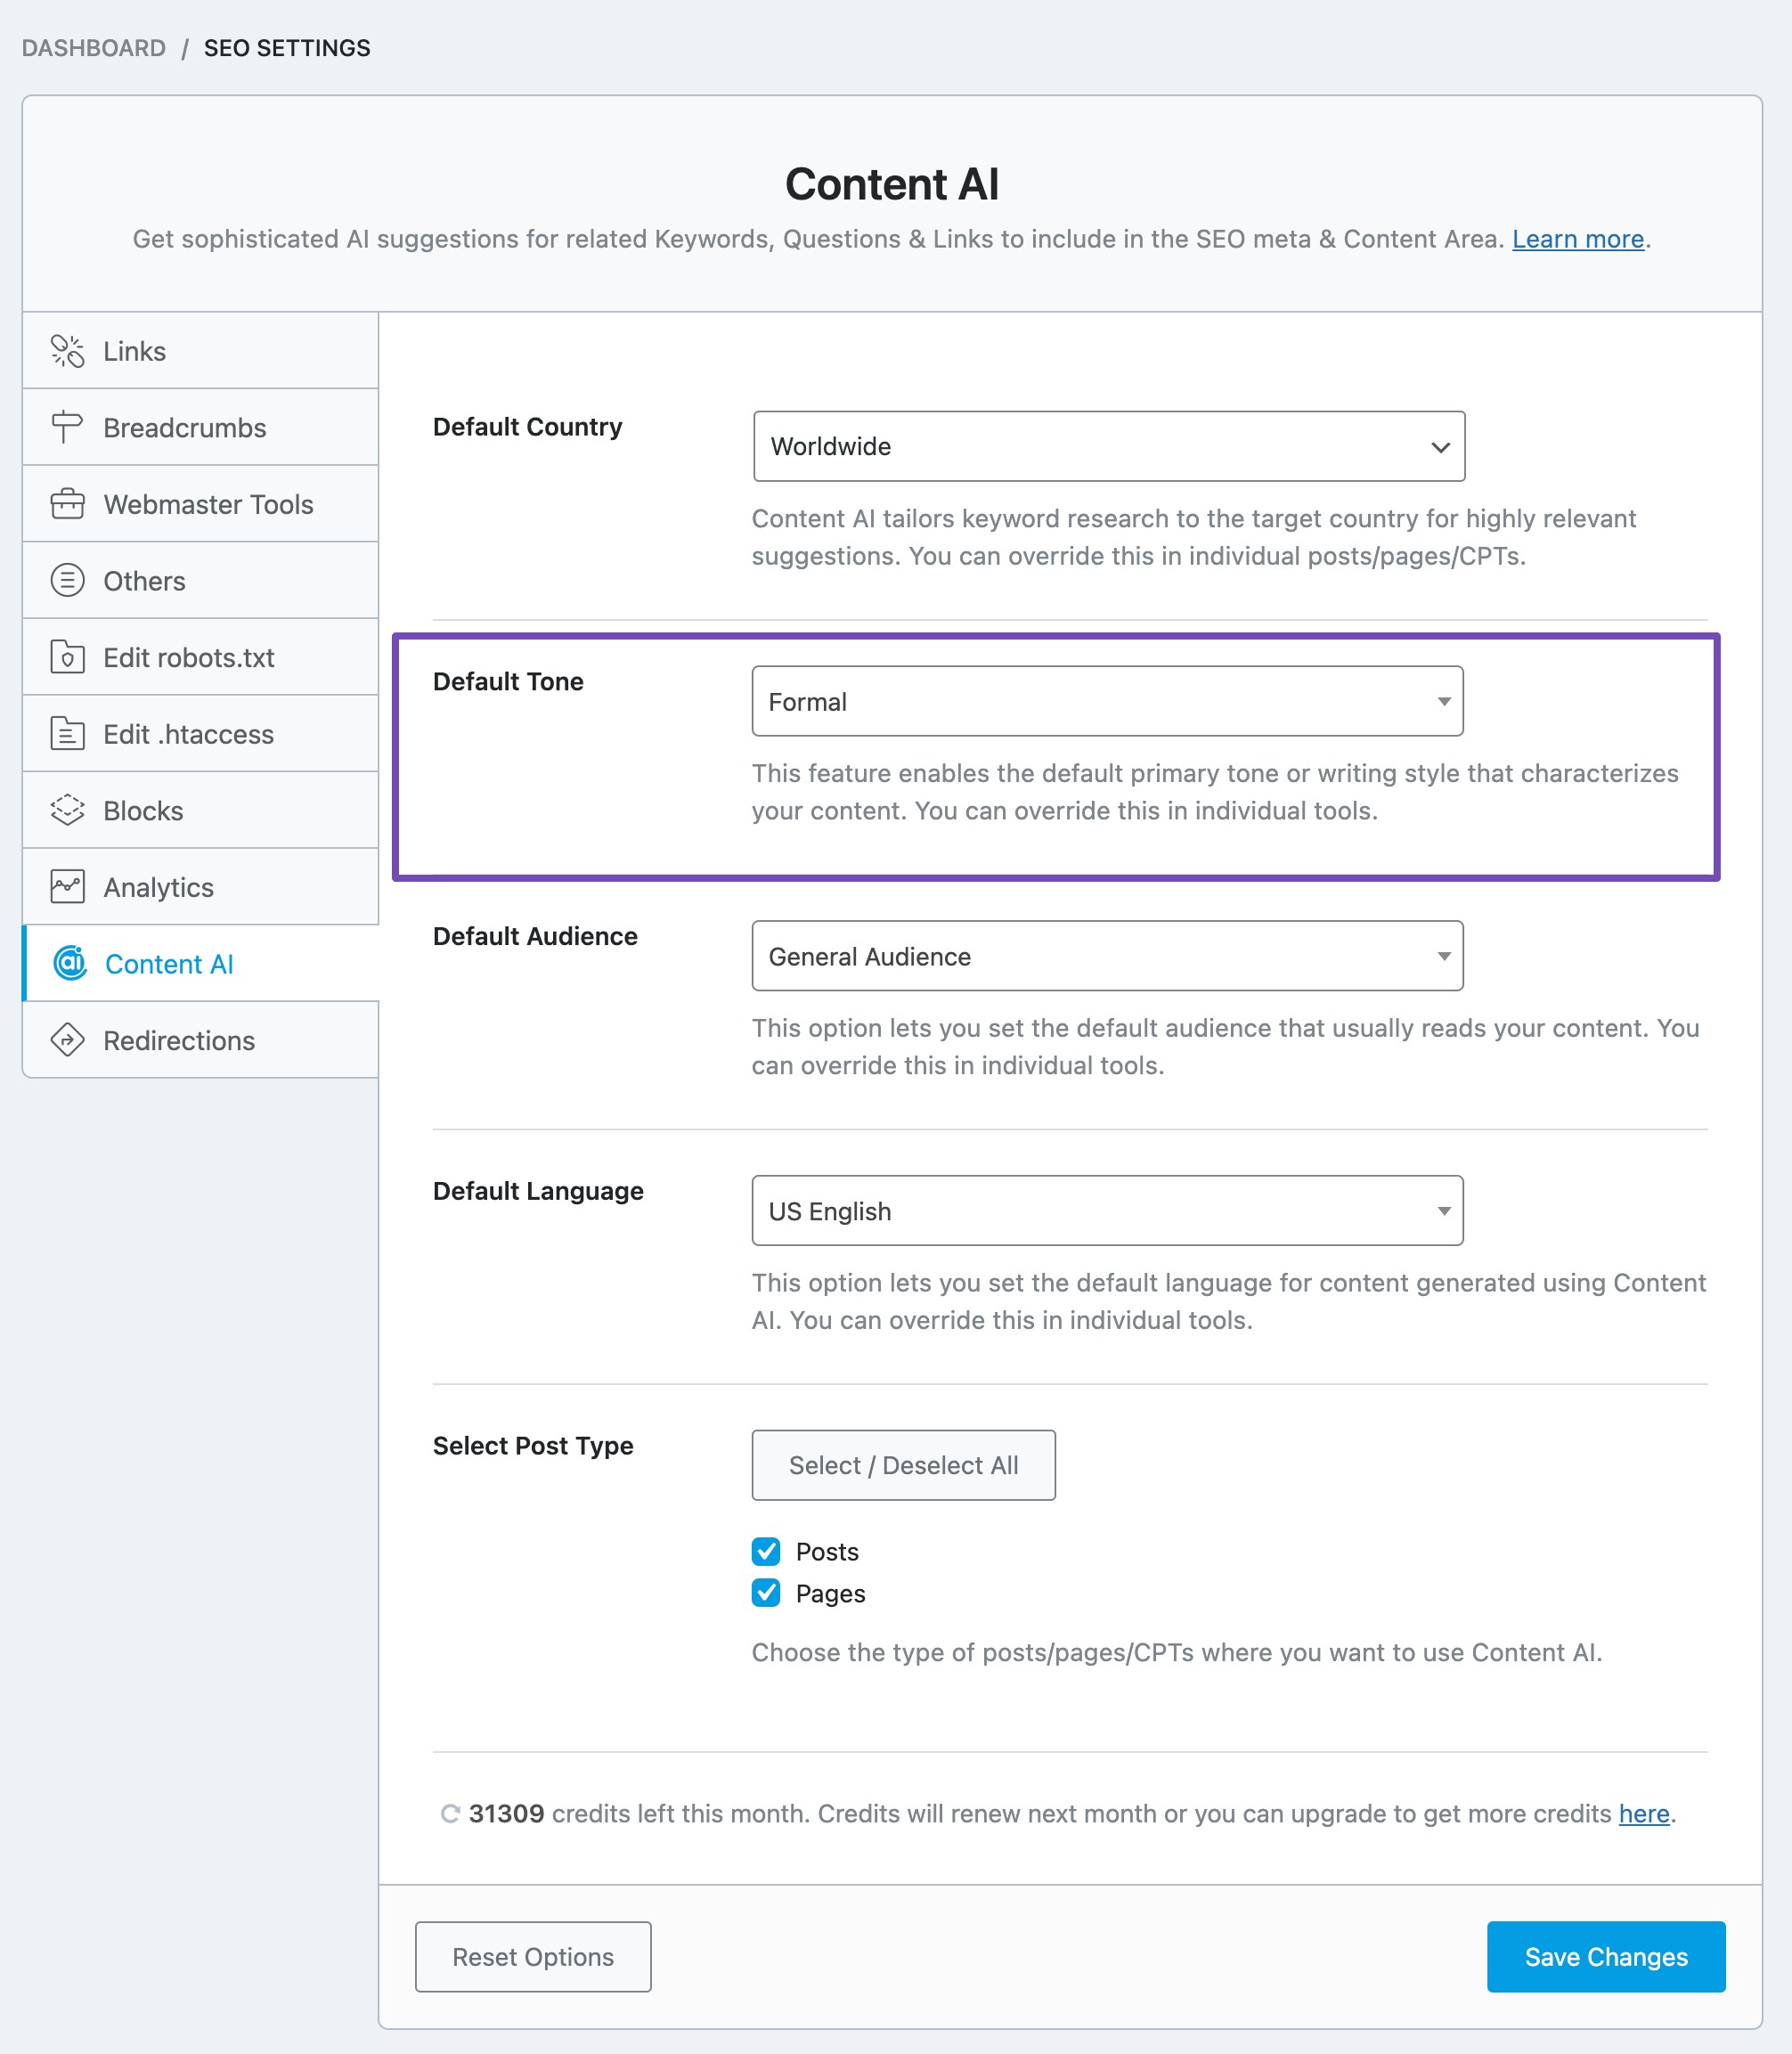
3.2 Default Tone
This option lets you set the default tone that best describes the writing tone for your posts/pages. Click the drop-down list to choose your default tone.
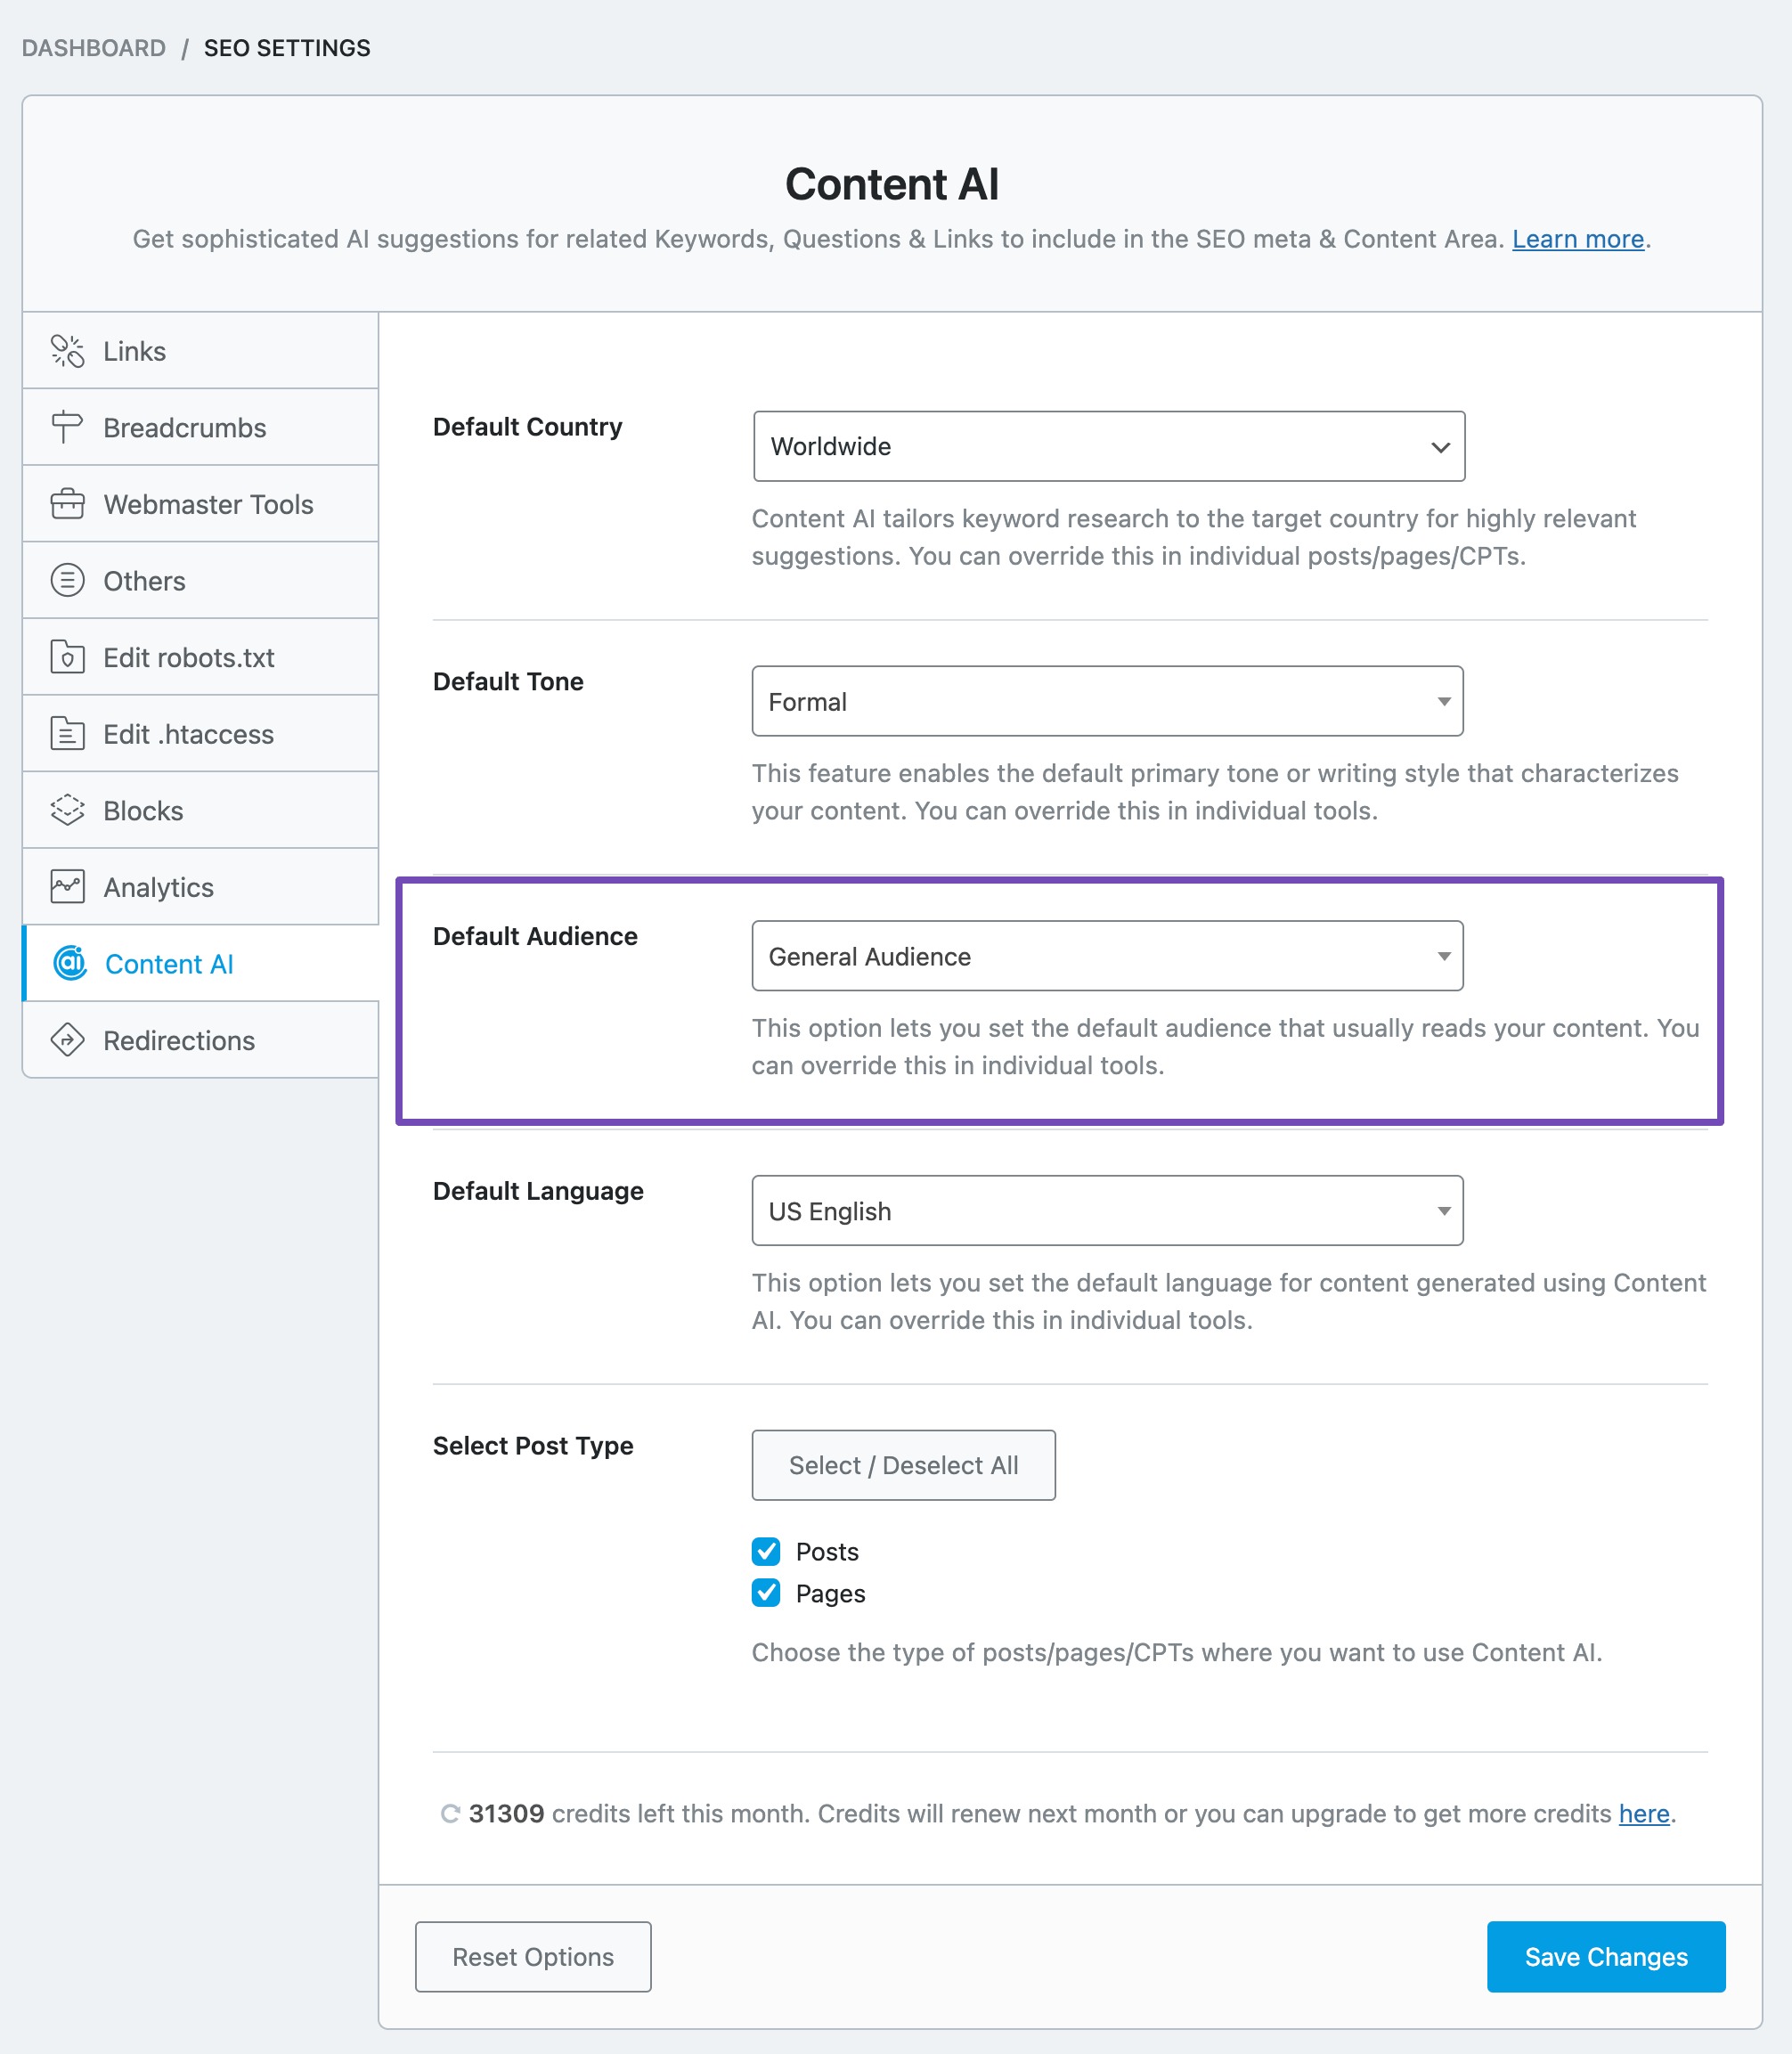
3.3 Default Audience
This option lets you set the default audience you wish to target. Click the drop-down list to choose your default audience.
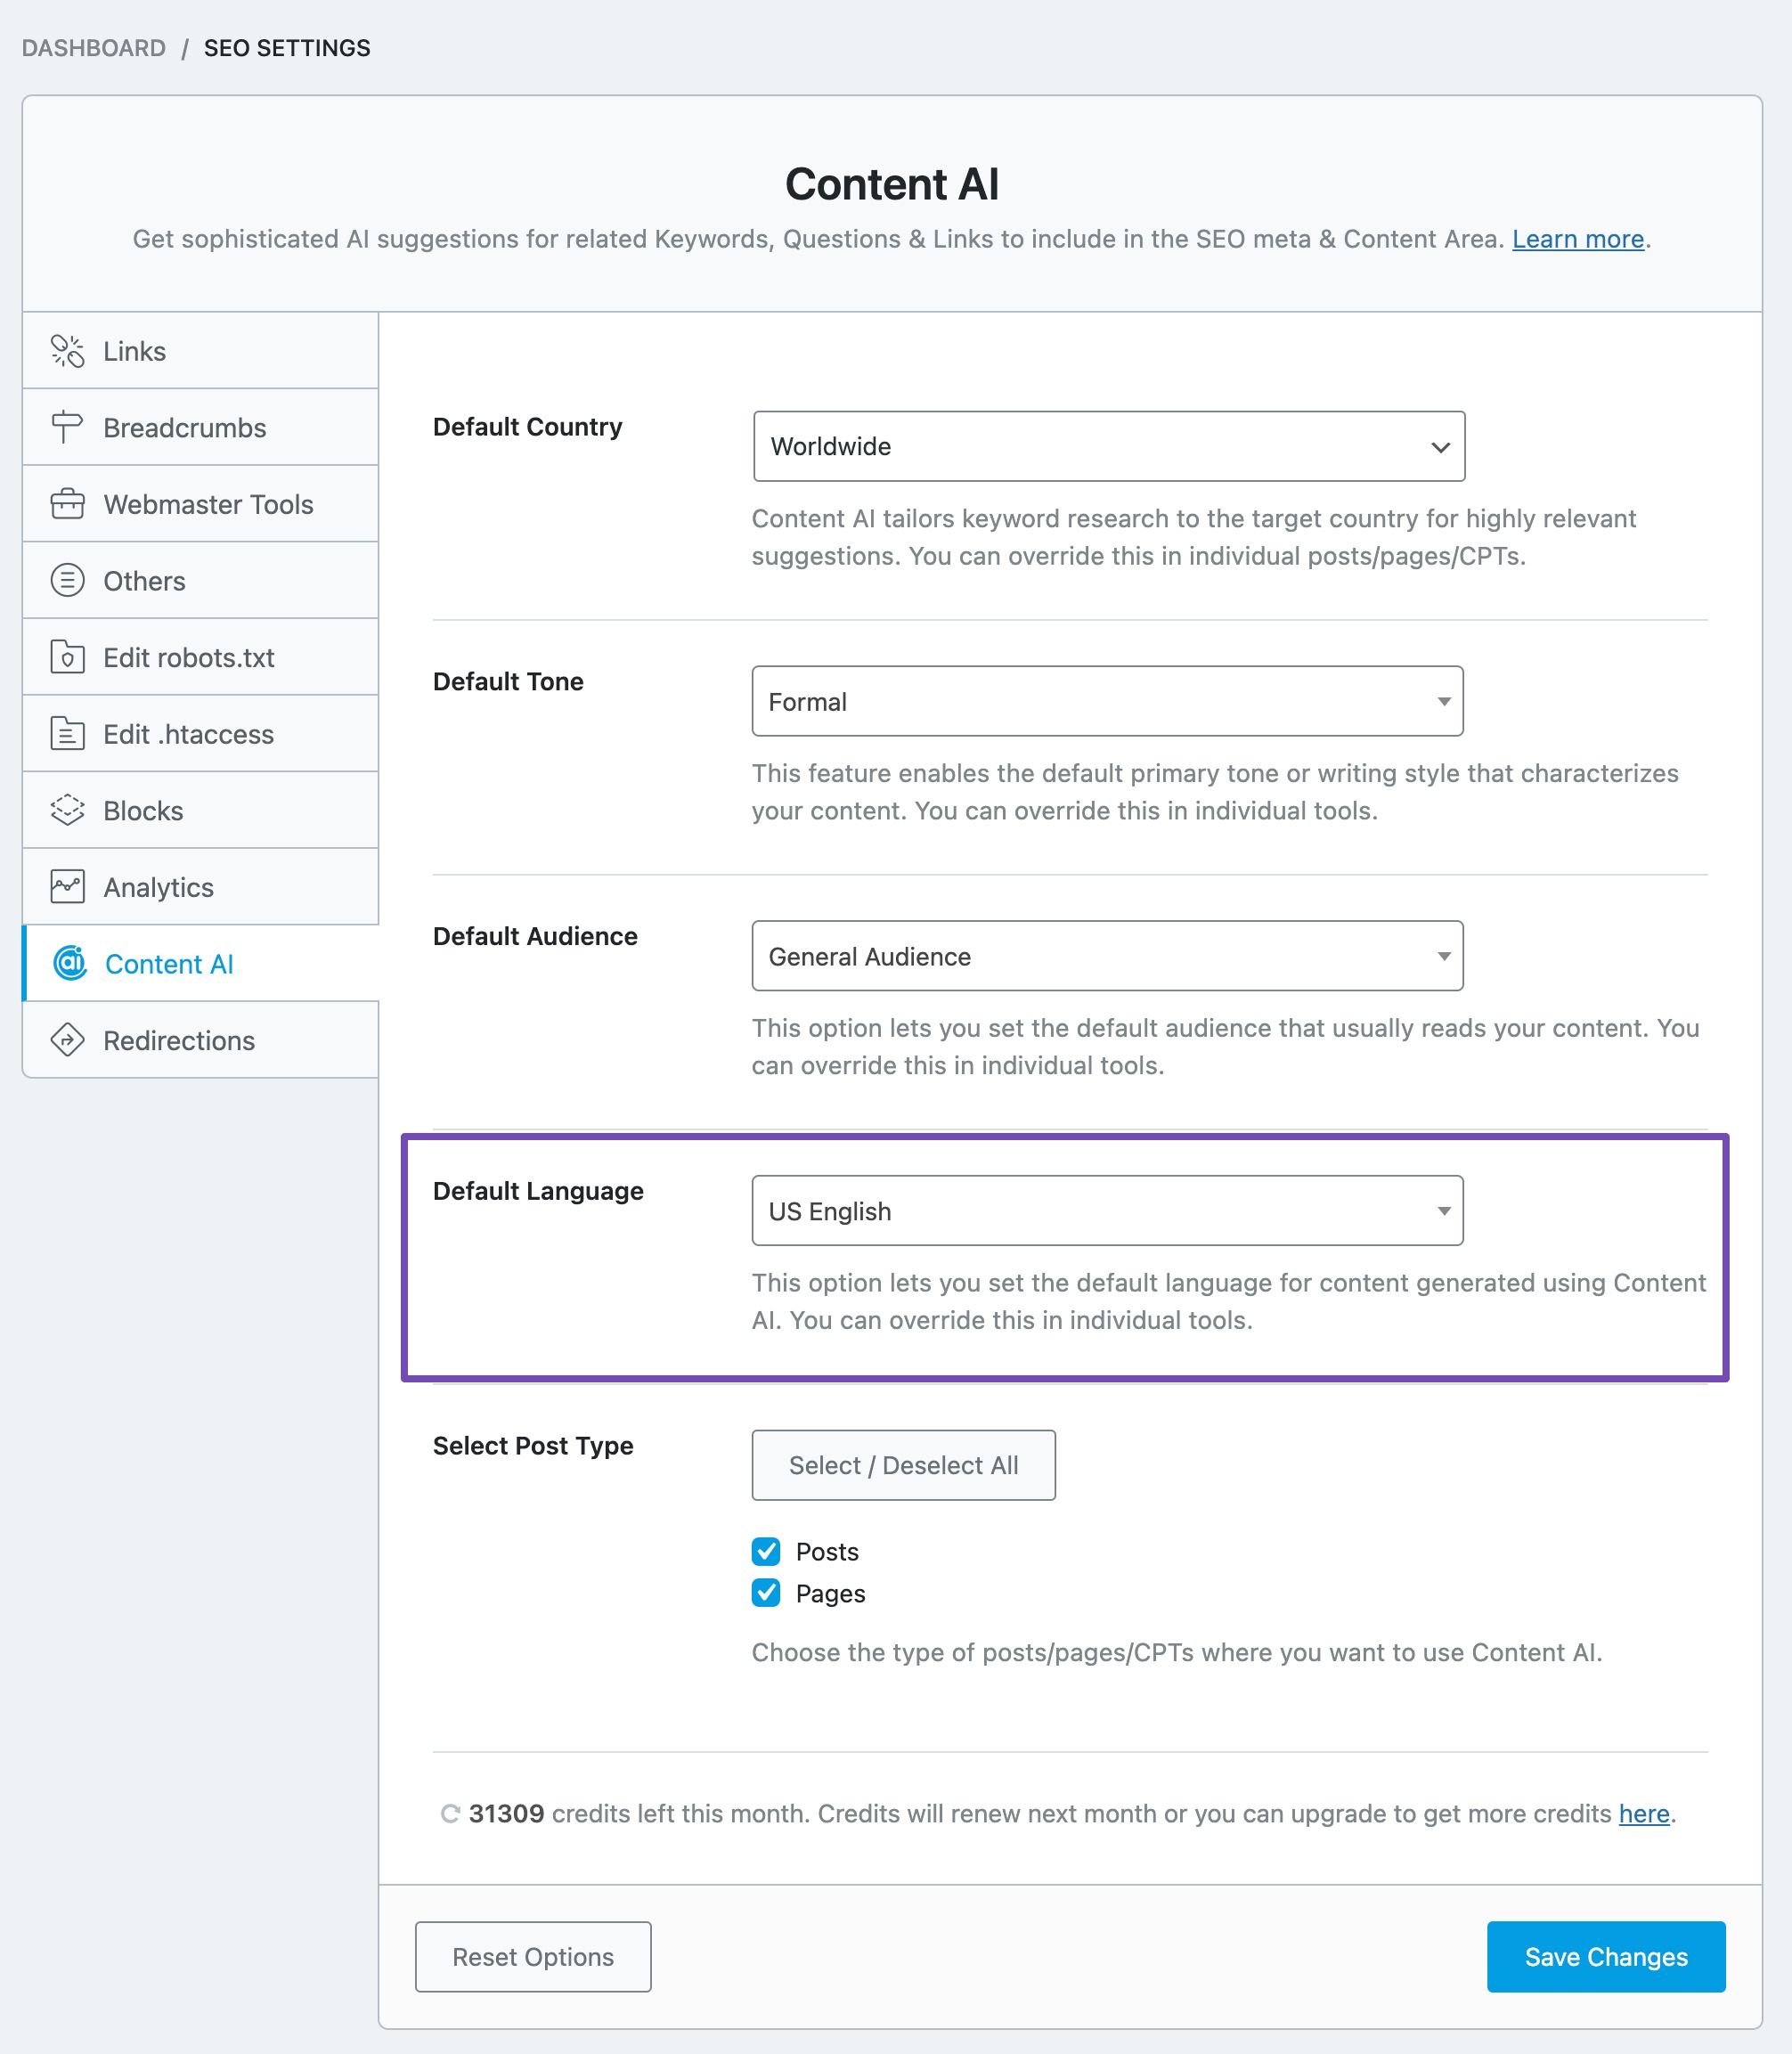
3.4 Default Language
This option lets you set the language in which you want Content AI to generate your content. Click the drop-down list to choose your default language.
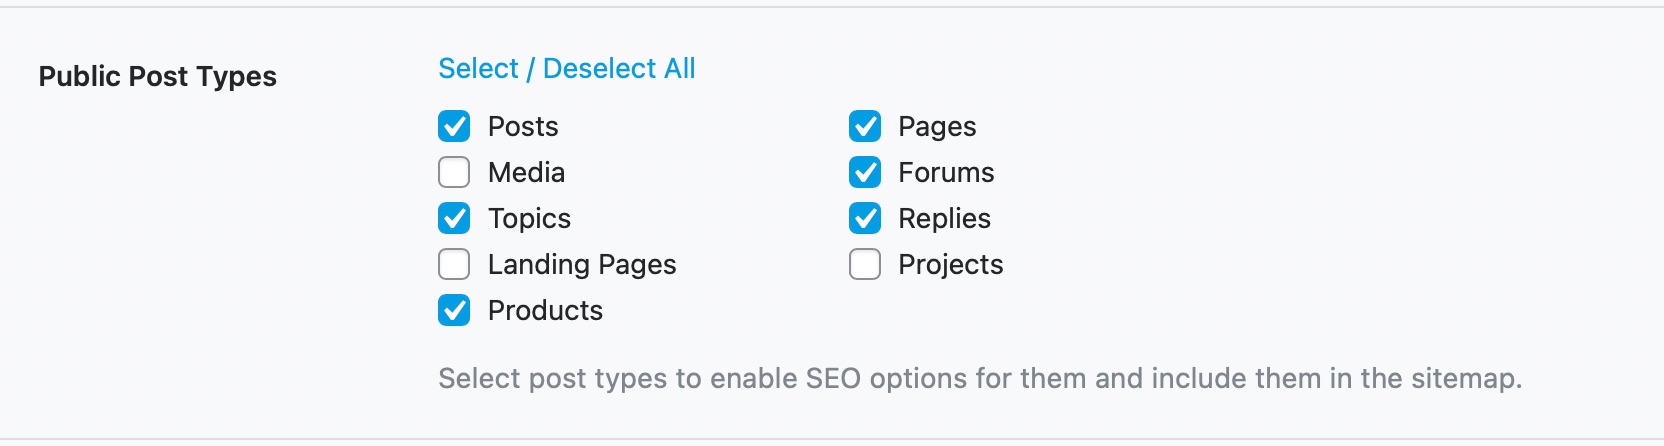
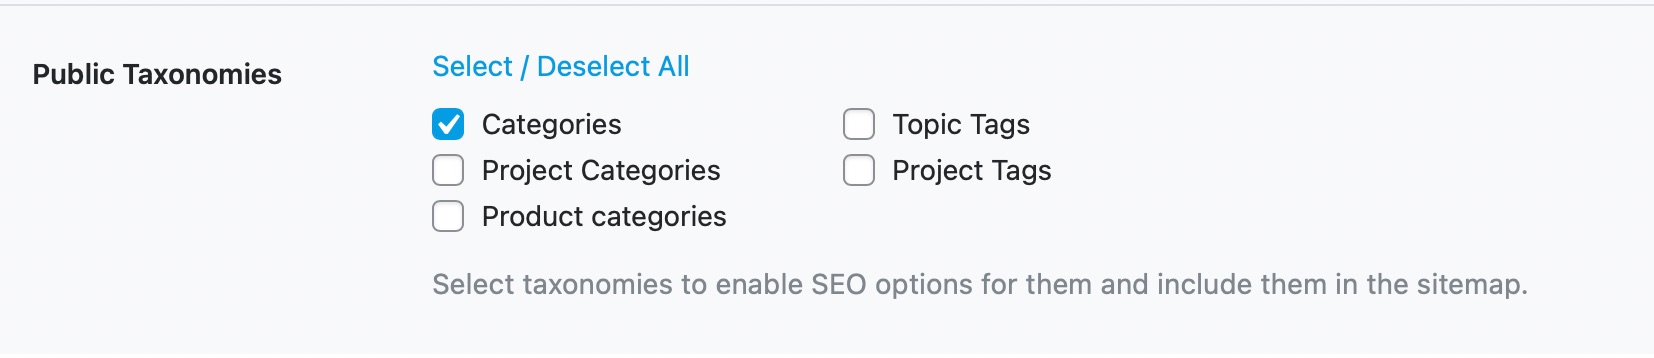
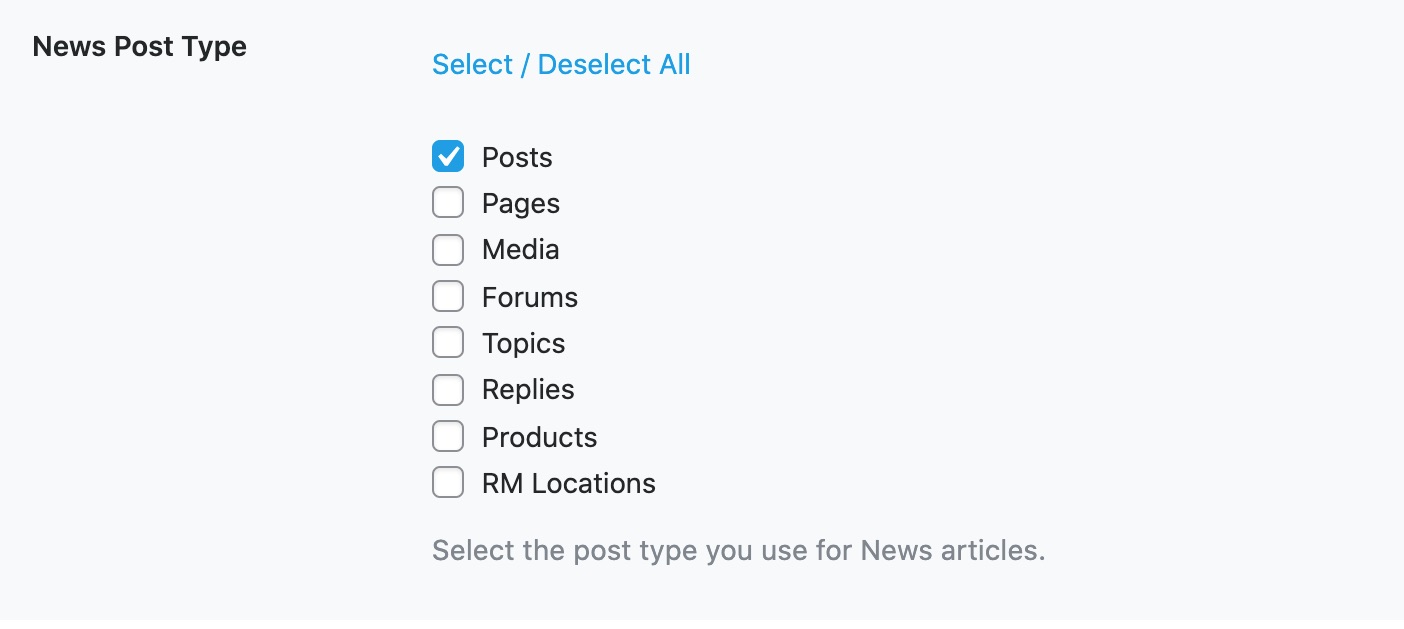
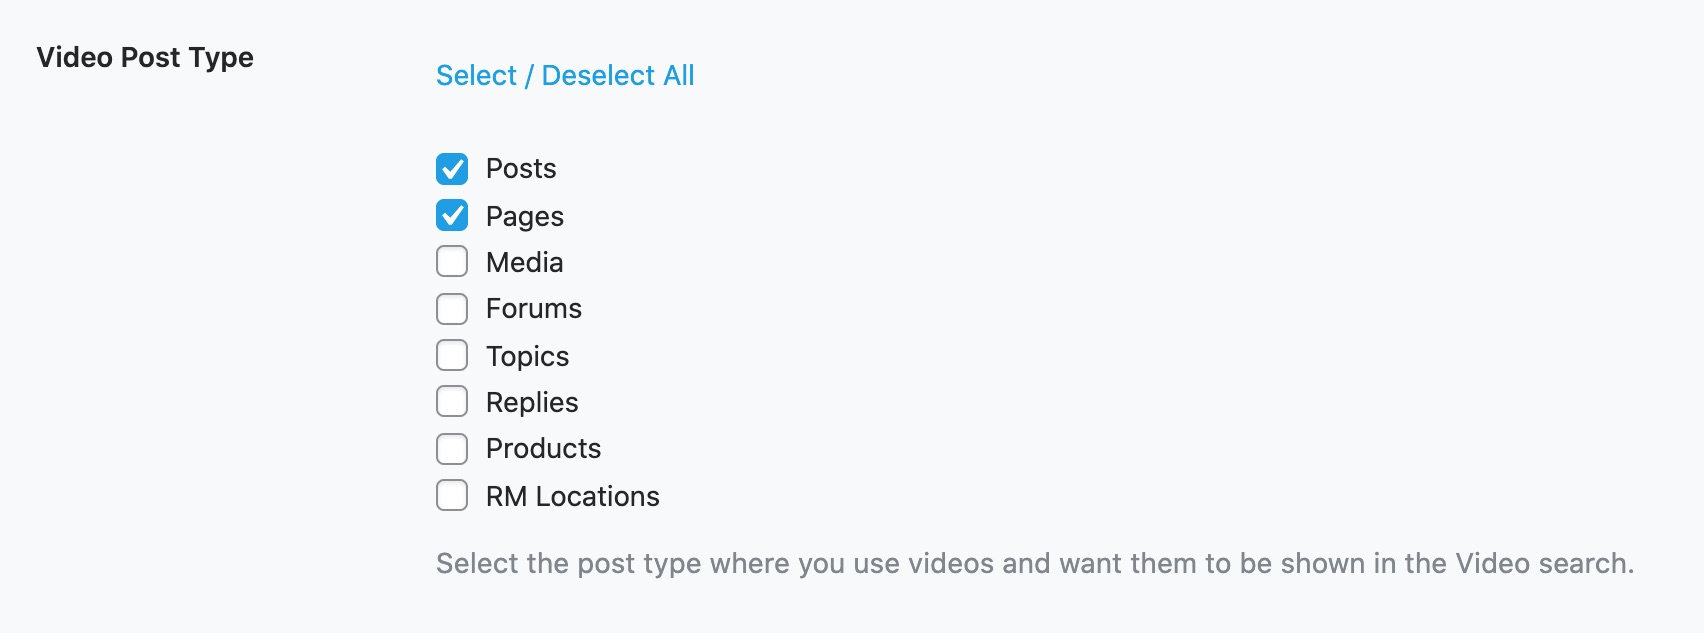
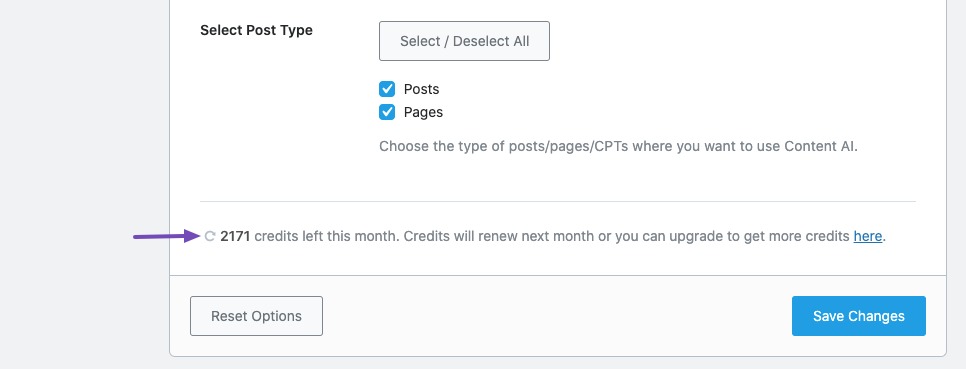
3.5 Select Post Type
The next option lets you select the post types where you want to use the Content AI.
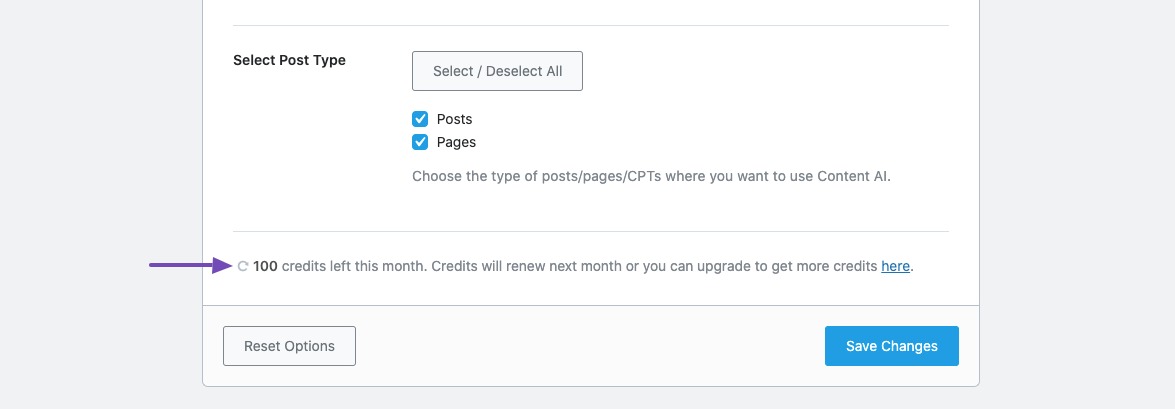
3.7 Credits Left
Rank Math uses a credits system to allow users to research keywords with Content AI.
Depending upon the membership you hold, Rank Math offers credits, and you can see the number of credits left here. You can also click the refresh button here, and Rank Math will check for the total number of credits currently left with your Rank Math account.
Every time you research a keyword, 500 credits will be deducted, and we’ll discuss more on how the credits are deducted as we start to research keywords with AI.
Business and Agency users will also get the option to allocate Content AI credits for their clients (which we’d cover next).
If you’ve made changes to the Content AI settings, then don’t forget to hit the Save Changes button, else your changes will not reflect.
4 How to Assign Content AI Credits? BUSINESS
Rank Math Business and Agency users will be able to allocate Content AI credits from their Client Management dashboard, available inside the Rank Math account area. To assign credits, follow the steps we walk you through.
4.1 Login to Rank Math Account Area
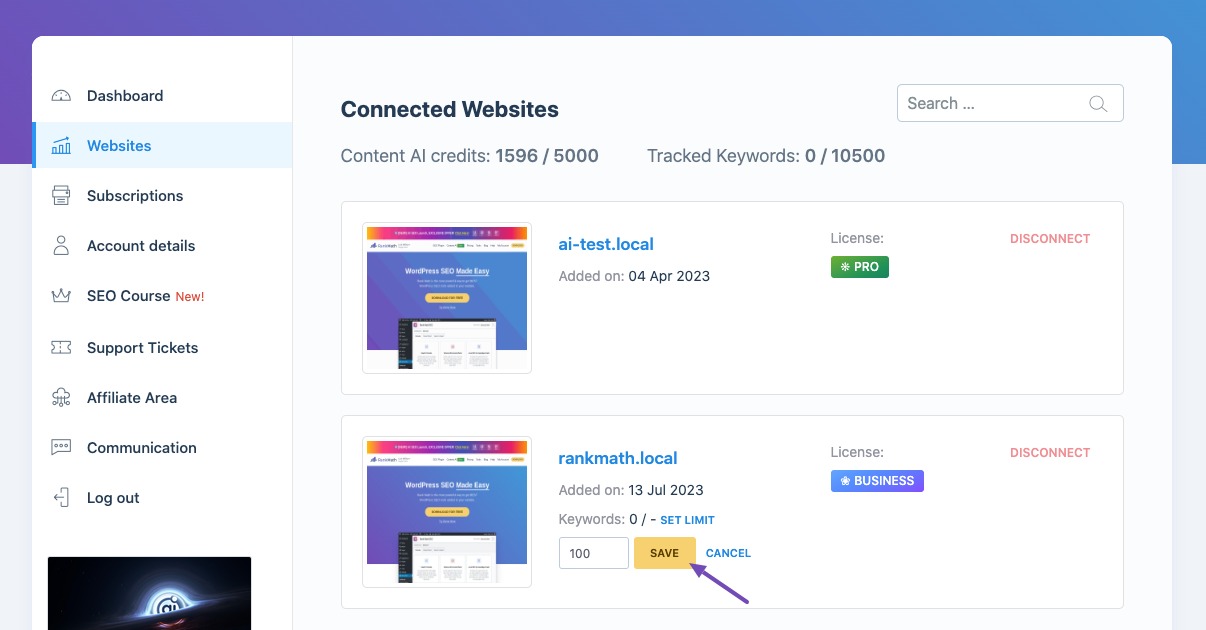
To assign credits, log in to your Rank Math account, which you’ve used to purchase the Business/Agency License. Then navigate to the Websites section from the left sidebar.
4.2 Connected Websites
Here you can find all your connected websites, their search analytics, the membership they’re activated with, and more. You can learn more about how to use our Client Management dashboard from here.
At the top, you can notice the total number of Content AI credits used and available with your account. For instance, the below image shows the account includes a total of 5000 Content AI credits, and only 1596 credits have been used so far.
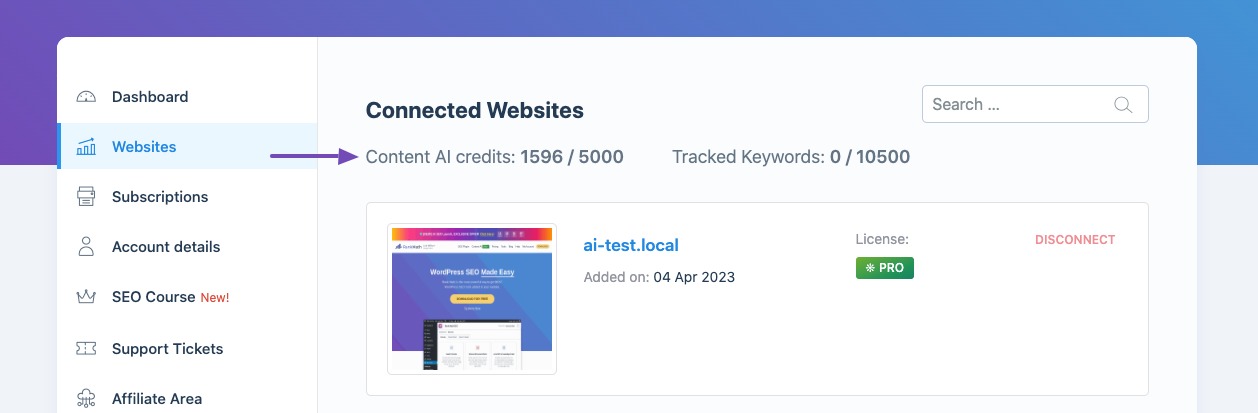
Similarly, if you see something like Content AI credits: 0/7500, this means you have 7500 credits available but you’re yet to use them.
4.3 Assign Content AI Credits
To allocate credits for a site, click the Set Limit button next to the Content AI Credits.
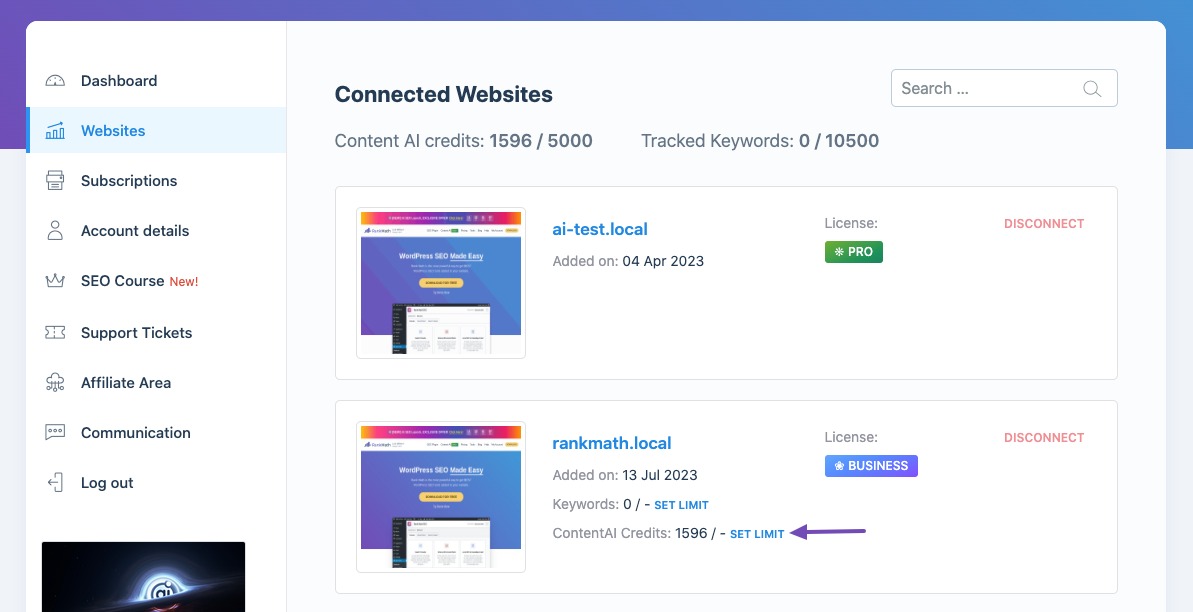
Enter the number of credits that you want to allocate, and then click the Save button.
You can also find the changes being reflected in your WordPress dashboard as well.
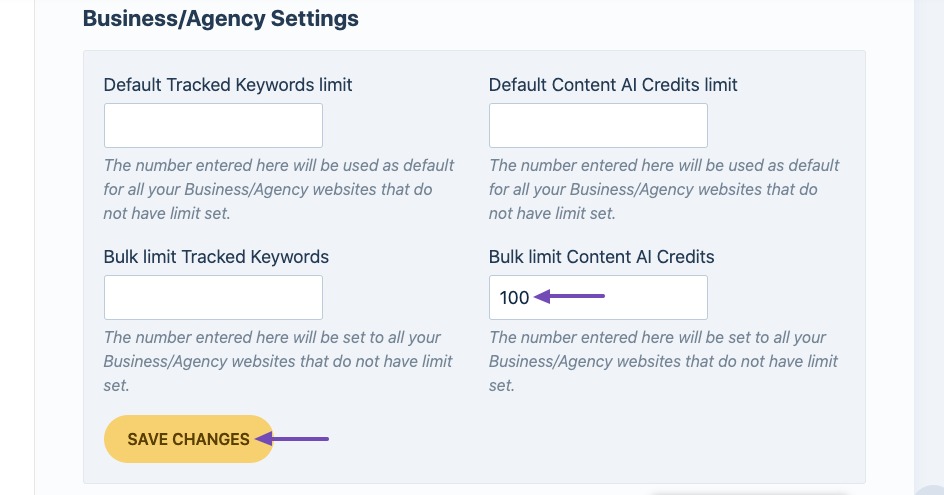
Apart from this, if you are having Rank Math Business or Agency license, you can also adjust the Content AI credits from the Business/ Agency settings available at the bottom of the Client Management dashboard.
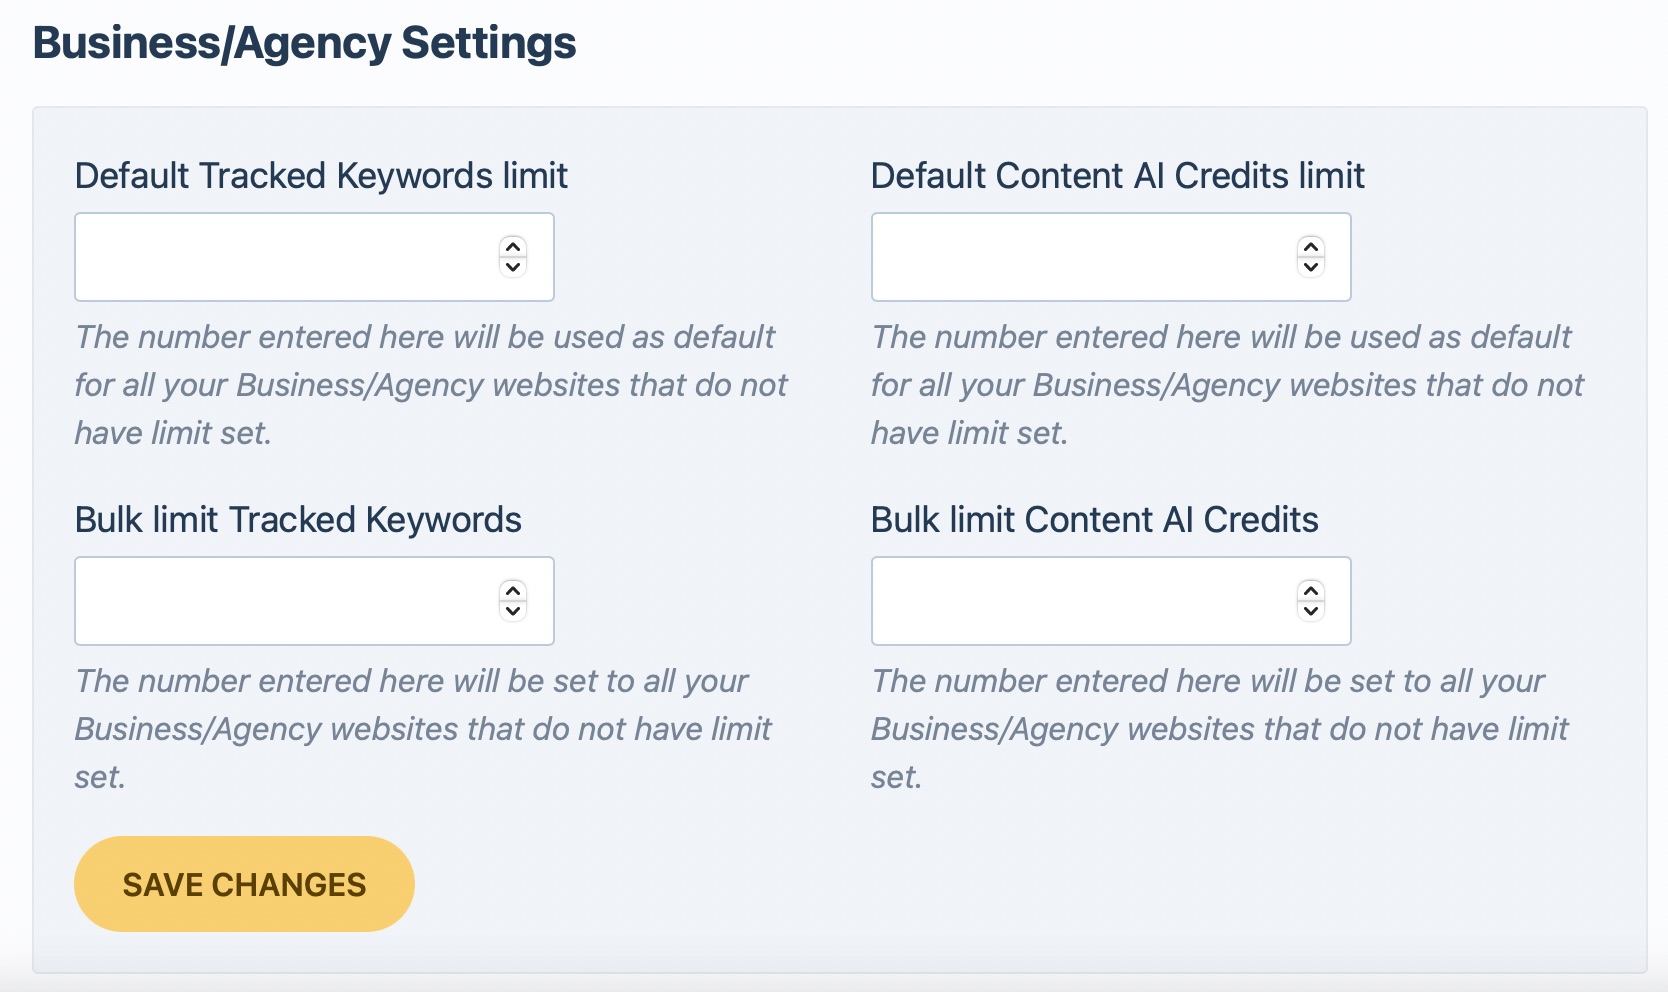
Default Content AI Credits limit
Enter the limit here to set a default Content AI credits for all new websites that you connect with your Rank Math license.
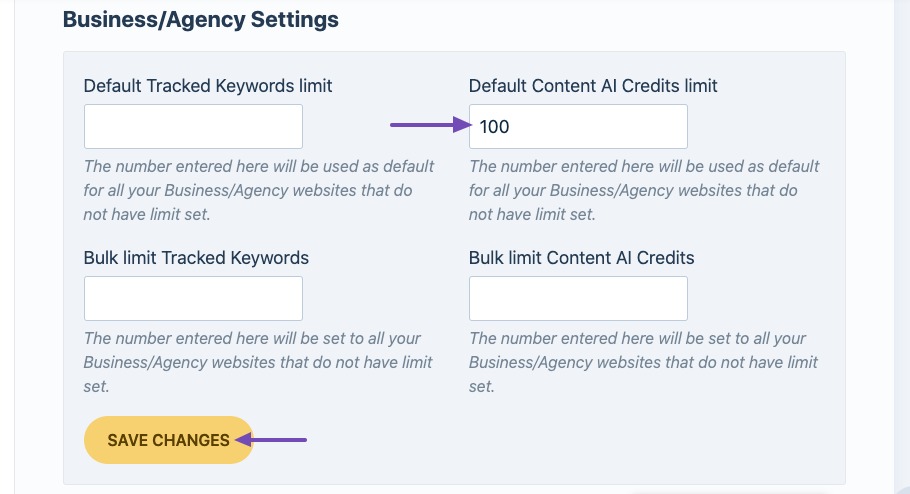
In case, you have already too many websites connected with your Rank Math license without any credits limit set, then use the next option.
Bulk Content AI Credits limit
Enter the limit here to assign Content AI credits for all websites connected with your license. Please note that this option will only change the limit for websites, where there was no limit set previously. If you have already assigned Content AI credits to any of the websites, then you have to change it manually.
5 How to Research Keywords With Content AI
Now that we’ve enabled and configured Content AI, let’s start researching keywords.
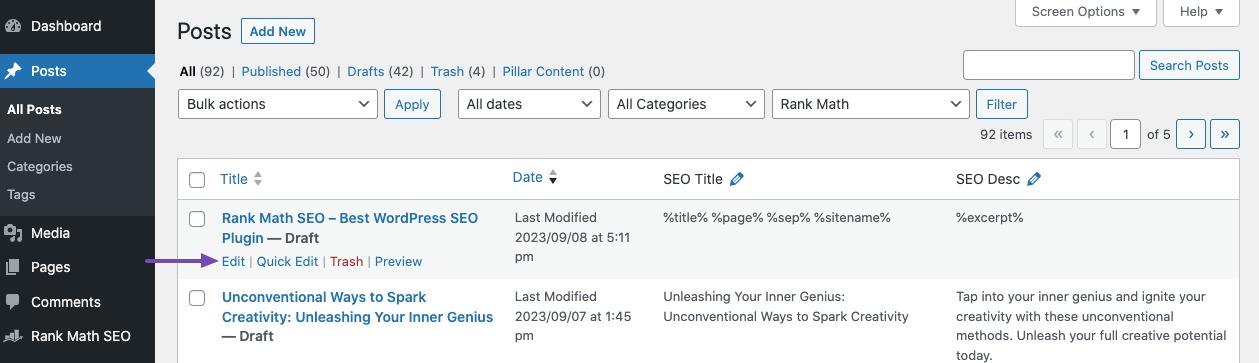
5.1 Edit Post or Page
Start by opening the post or page that you’d like to optimize with Content AI by simply clicking the Edit option.
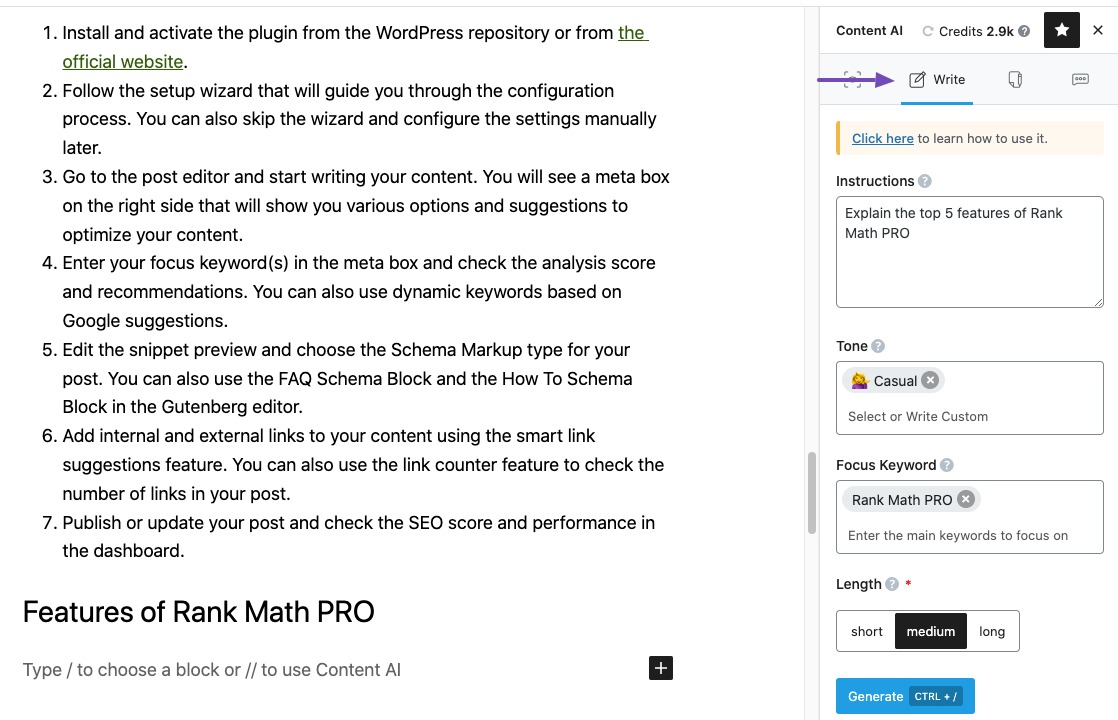
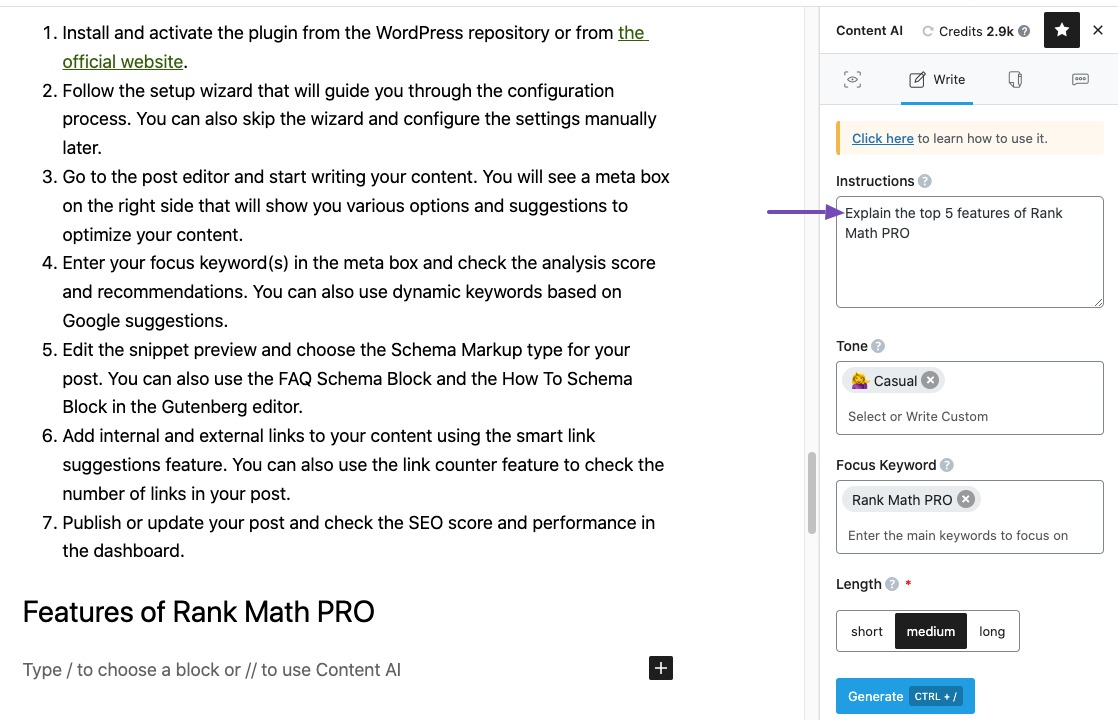
5.2 Open Content AI Panel
In the Gutenberg Editor, open the Content AI Panel by clicking the Content AI icon in the top-right corner.
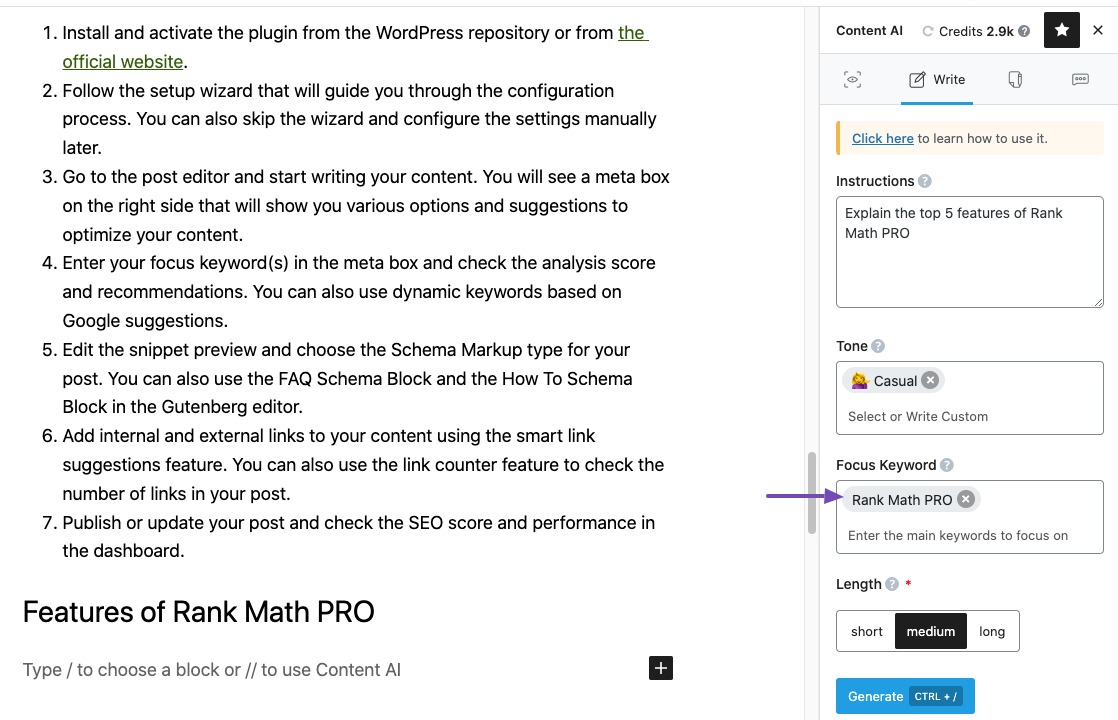
5.3 Research for Focus Keyword
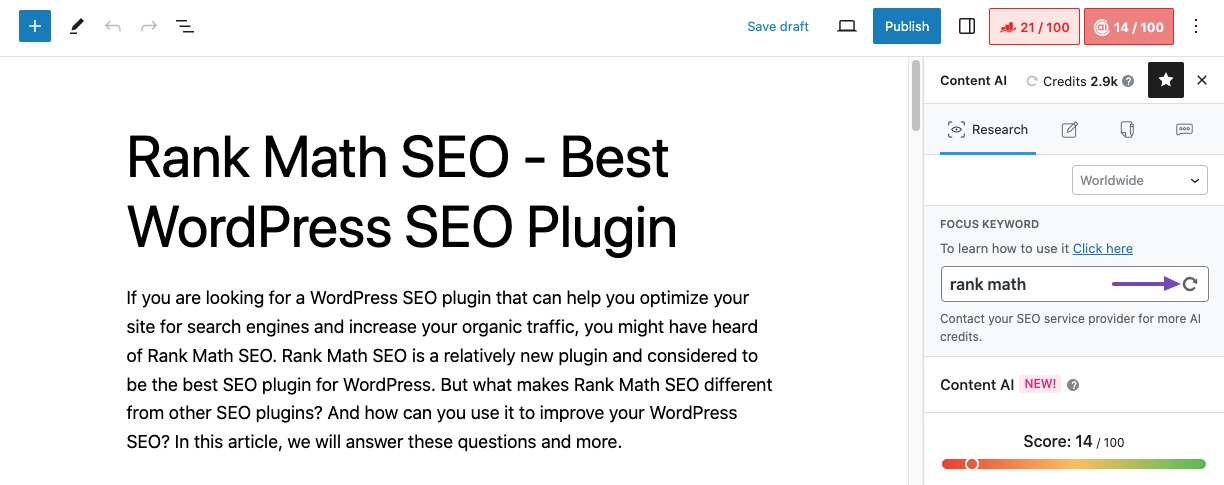
Now from the Content AI panel, in the Research tab, you can research for the focus keyword or enter the new keyword that you want to research.
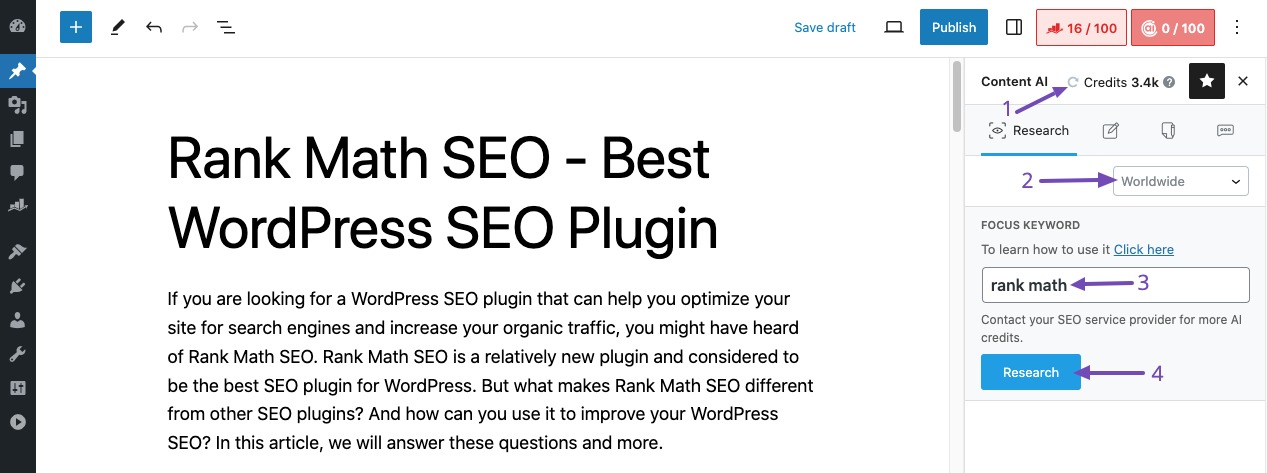
The panel includes a few options, and let’s have a look into them:
You can notice an option available to select the Country (indicated by 2) we’re targeting.
If you’re wondering why we’re configuring it again?
The Default Country option that we’ve configured earlier is a global setting. It sets a default value for all your posts to save time. As we mentioned earlier, Rank Math offers a more granular approach and lets you change the country on a post level, so you don’t have to always abide by the global setting. Click the Country option to select one from the drop-down list.
Above the country selection, you can find the total number of Credits left (indicated by 1). If the credits are incorrect/not displayed, you can always click the refresh button before to get the currently available credits.
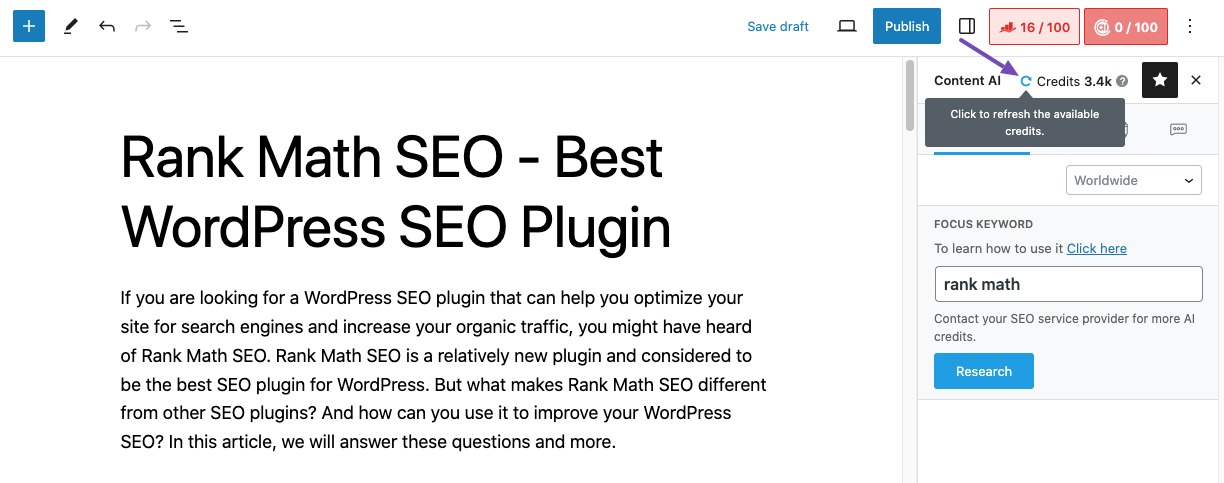
In the Focus Keyword field (indicated by 3), you can enter the keyword you want to optimize your post for and then choose the Research button.